Nodes Browser
ComfyDeploy: How ComfyUI-Seed-Nodes works in ComfyUI?
What is ComfyUI-Seed-Nodes?
ComfyUI-Seed-Nodes is a custom node library that extends the functionality of ComfyUI, offering advanced image loading and pixelation tools.
How to install it in ComfyDeploy?
Head over to the machine page
- Click on the "Create a new machine" button
- Select the
Editbuild steps - Add a new step -> Custom Node
- Search for
ComfyUI-Seed-Nodesand select it - Close the build step dialig and then click on the "Save" button to rebuild the machine
ComfyUI-Seed-Nodes
介绍
ComfyUI-Seed-Nodes 是一个为 ComfyUI 提供自定义节点的集合。这些节点扩展了 ComfyUI 的功能,提供了高级图像处理能力,如图像像素化和多图像加载。
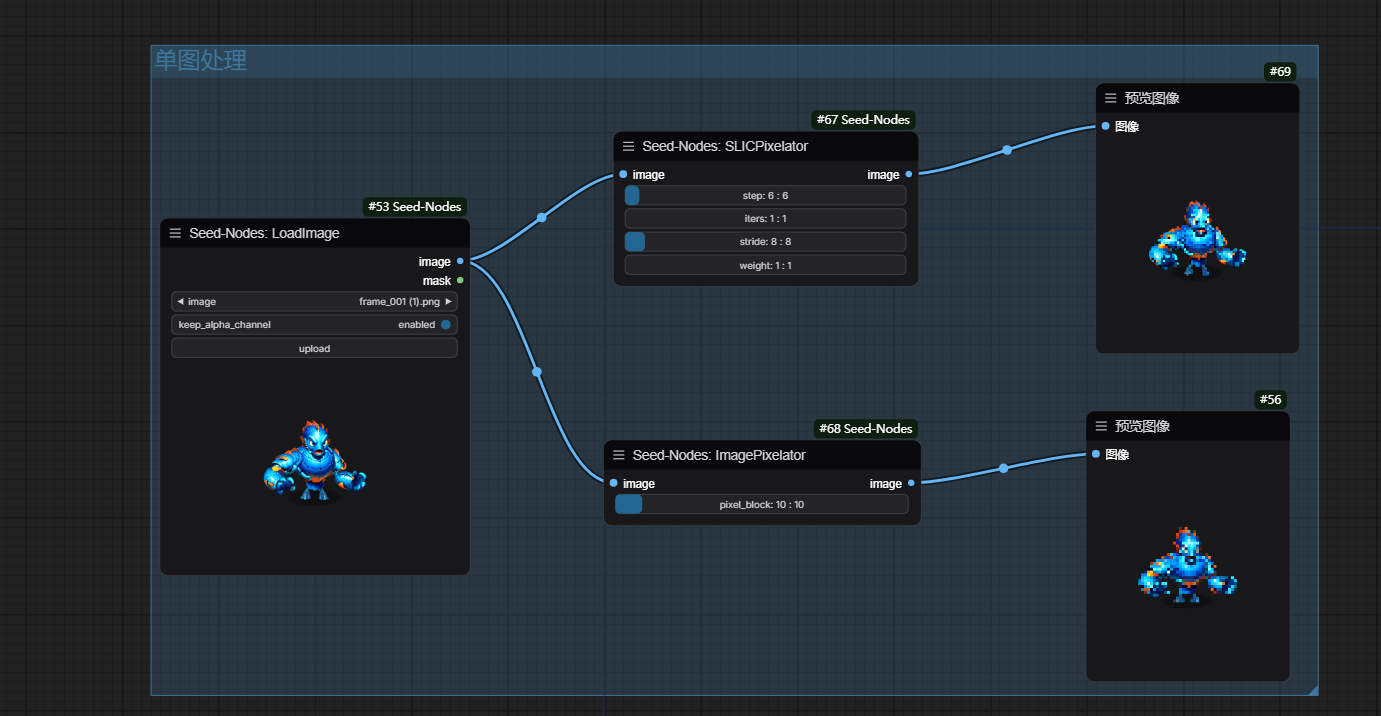
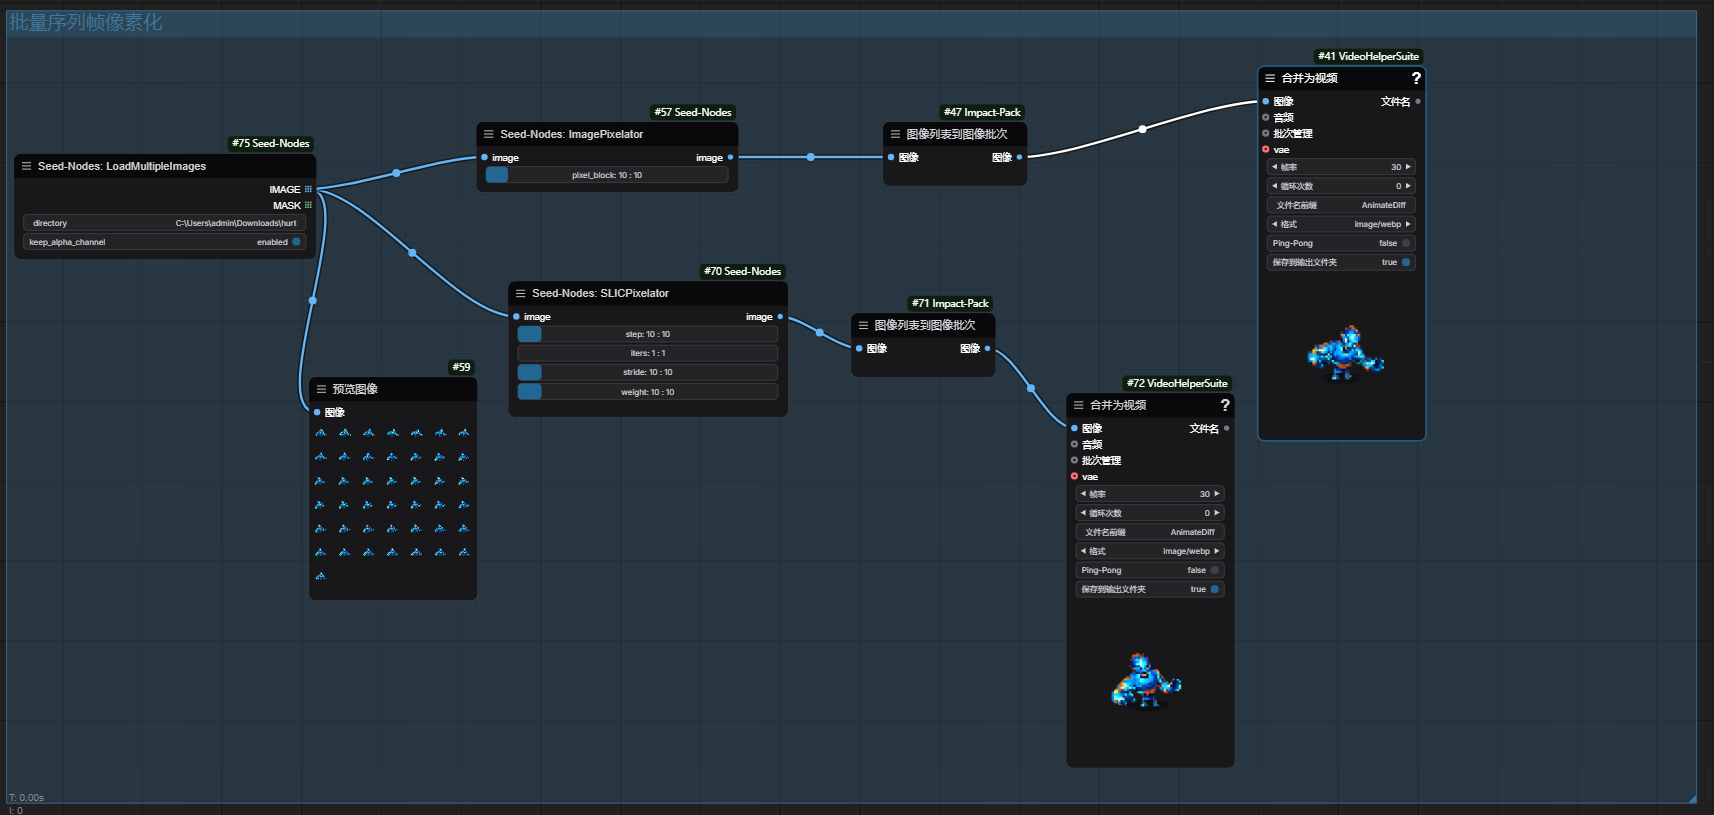
演示


功能
- LoadImage: 加载单张图像,支持可选的 alpha 通道保留。
- LoadMultipleImages: 从指定目录加载多张图像。
- ImagePixelator: 根据指定的像素块大小对图像应用像素化效果。
- SLICPixelator: 使用 SLIC(Simple Linear Iterative Clustering)算法进行高级图像像素化处理。
安装
前置条件
步骤
-
克隆仓库
git clone https://github.com/Seed/ComfyUI-Seed-Nodes.git -
导航到项目目录
cd ComfyUI-Seed-Nodes -
安装自定义节点
将
ComfyUI-Seed-Nodes文件夹复制到 ComfyUI 的custom_nodes目录中。cp -r ComfyUI-Seed-Nodes <path_to_ComfyUI>/custom_nodes/将
<path_to_ComfyUI>替换为您 ComfyUI 安装的实际路径。 -
重启 ComfyUI
重启 ComfyUI 以加载新的自定义节点。
使用
LoadImage 节点
LoadImage 节点允许您将单张图像加载到 ComfyUI 中,并可选择是否保留 alpha 通道。
输入:
image: 选择要加载的图像文件。keep_alpha_channel: 是否保留图像的 alpha 通道。
输出:
image: 加载的图像张量。mask: 对应的遮罩张量。
LoadMultipleImages 节点
LoadMultipleImages 节点允许您从指定目录批量加载图像。
输入:
directory: 指定图像所在的目录路径。keep_alpha_channel: 是否保留图像的 alpha 通道。
输出:
IMAGE: 图像张量列表。MASK: 遮罩张量列表。
ImagePixelator 节点
ImagePixelator 节点根据指定的像素块大小对图像应用像素化效果。
输入:
image: 输入图像张量。pixel_block: 像素块大小。
输出:
image: 像素化后的图像张量。
SLICPixelator 节点
SLICPixelator 节点使用 SLIC 算法进行高级图像像素化处理。
输入:
image: 输入图像张量,形状应为 (C, H, W) 或 (1, C, H, W)。step: SLIC 网格步长。iters: SLIC 迭代次数。stride: SLIC 像素化步幅。weight: SLIC 颜色距离权重。
输出:
image: 像素化后的图像张量。
示例
以下是如何在 ComfyUI 中使用这些自定义节点的简单示例:
- 添加 LoadImage 节点并选择要加载的图像。
- 将 LoadImage 节点的输出连接到 ImagePixelator 节点。
- 调整 ImagePixelator 节点的
pixel_block参数以设置像素化程度。 - 将 ImagePixelator 节点的输出连接到显示节点(如 Image Viewer)。
许可证
本项目采用 MIT 许可证 进行许可。
第三方依赖
- ComfyUI-Light-Tool: 遵循 MIT 许可证。
其他依赖项同样遵循各自的许可证。
贡献
欢迎贡献!请遵循以下步骤:
- Fork 本仓库。
- 创建您的特性分支 (
git checkout -b feature/YourFeature)。 - 提交您的更改 (
git commit -m 'Add some feature')。 - 推送到分支 (
git push origin feature/YourFeature)。 - 打开一个 Pull Request。
联系方式
如果您有任何问题或建议,请通过 GitHub Issues 与我们联系。
