Nodes Browser
ComfyDeploy: How AuraSR-ComfyUI works in ComfyUI?
What is AuraSR-ComfyUI?
ComfyUI implementation of [a/Aura-SR](https://github.com/fal-ai/aura-sr)
How to install it in ComfyDeploy?
Head over to the machine page
- Click on the "Create a new machine" button
- Select the
Editbuild steps - Add a new step -> Custom Node
- Search for
AuraSR-ComfyUIand select it - Close the build step dialig and then click on the "Save" button to rebuild the machine
AuraSR-ComfyUI
ComfyUI implementation of Aura-SR.
Also supports AuraSR v2

ATTENTION:
AuraSR v1 (model) is ultra sensitive to ANY kind of image compression and when given such image the output will probably be terrible. It is highly recommended that you feed it images straight out of SD (prior to any saving) - unlike the example above - which shows some of the common artifacts introduced on compressed images.
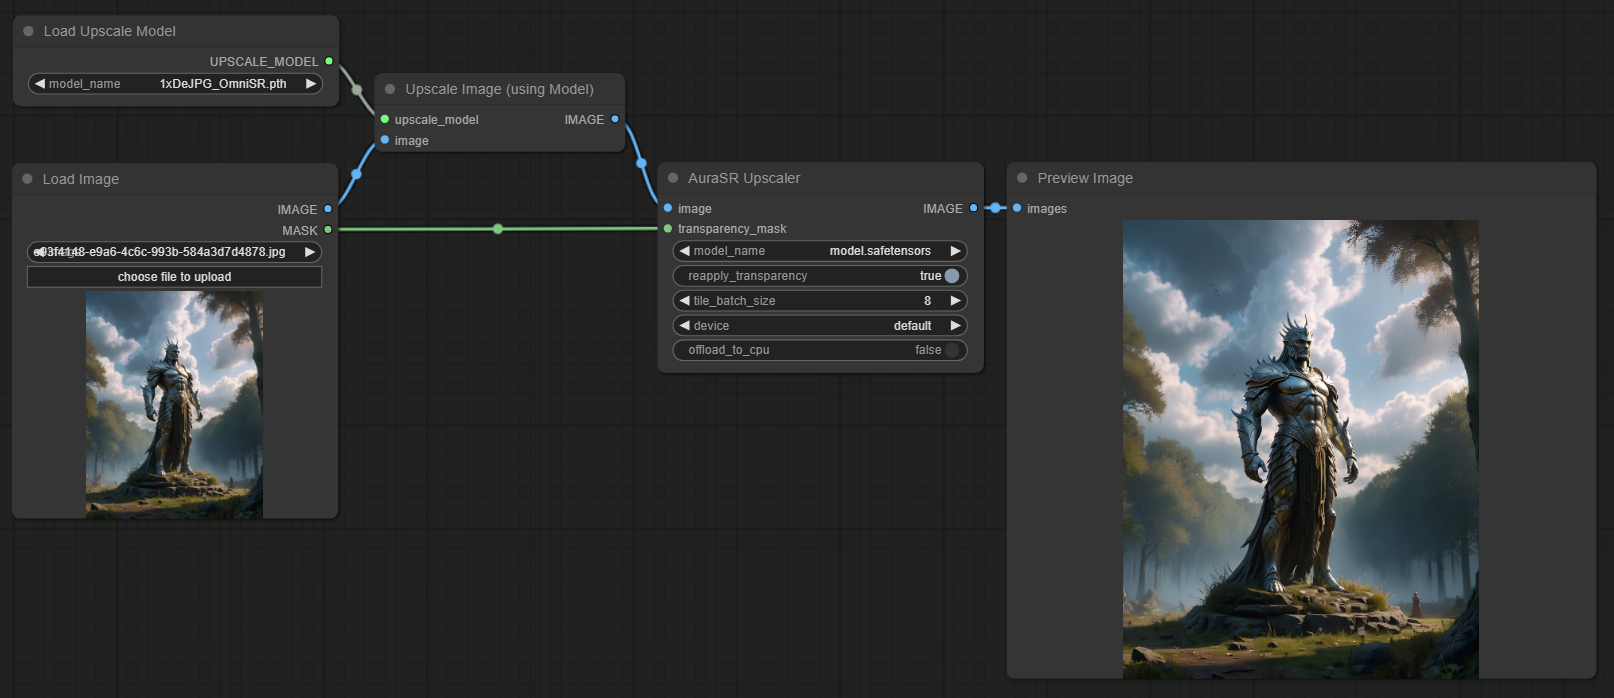
TIP: If you are loading an already saved image (especially if its a .JPEG) - you can try to use a 'compression artifact-removal' model such as DeJPG_OmniSR before passing the image to AuraSR. Check these links to judge the results yourself: imgsli and imgur.
Example workflow with DeJPG:

NOTE: AuraSR v2 seems to no longer suffer from this issue and in fact, if you use a 'compression artifact-removal' model beforehand with it - the results may lose quality! So the recommendation above is ONLY meant for the first version of the model!
Instructions:
- Create a folder named 'Aura-SR' inside '\models'.
- Alternatively, you can specify a (single) custom model location using ComfyUI's 'extra_model_paths.yaml' file with an entry exactly named as 'aura-sr'.
- Download the .safetensors AND config.json files from HuggingFace and place them in '\models\Aura-SR'
- V2 version of the model is available here: link (seems better in some cases and much worse at others - do not use DeJPG (and similar models) with it! I'll personally just stick with V1 for now).
- (Optional) Rename the model to whatever you want and rename the config file to the same name as the model (this allows for future, multiple models with their own unique configs).
- Install with ComfyUI Manager, restart then reload the browser's page.
- Add Node > AuraSR > AuraSR Upscaler
- All of the node's parameters are self explanatory apart for 'transparency_mask' and 'reapply_transparency':
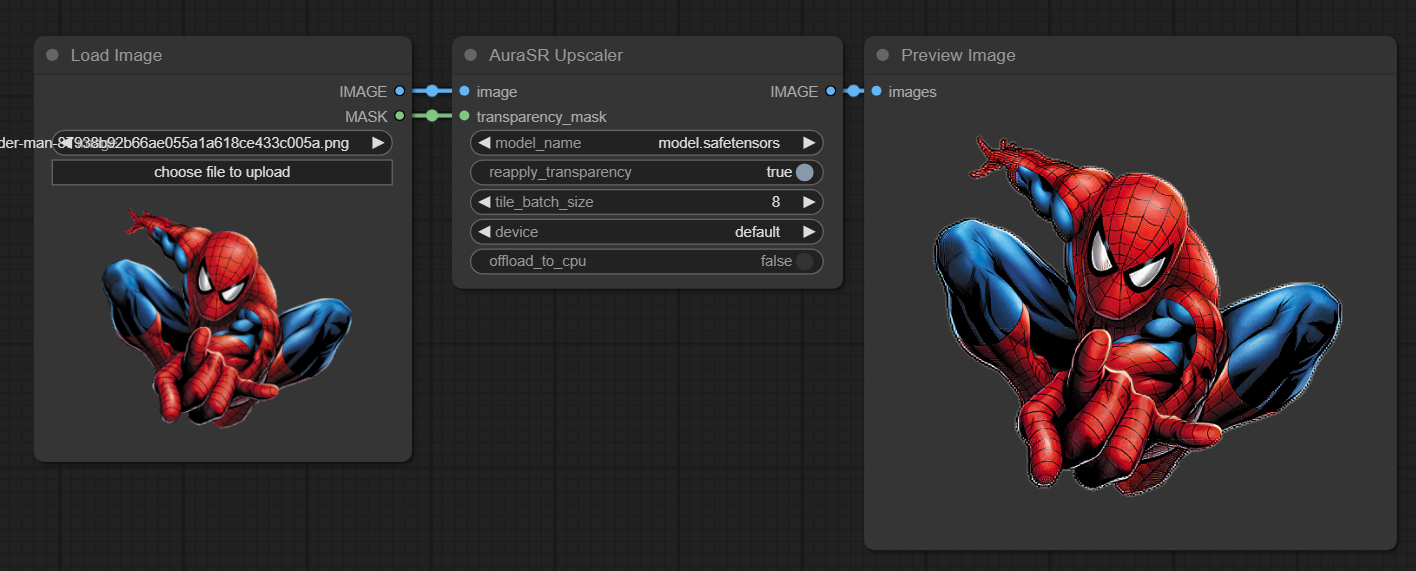
- transparency_mask: (Optional) A mask obtained from loading a RGBA image (with transparent pixels). Can be directly connected to the 'Load Image' native node.
- reapply_transparency: When given a valid mask AND/OR a single RGBA image - it will attempt to reapply the transparency of the original image to the upscaled one. Keep in mind that the 'Load Image' native node auto-converts the input image to RGB (no transparency) before sending it to another node. Therefore if you are not passing a valid 'transparency_mask' then you need a specialized node capable of loading and outputing in RGBA mode. This feature is internally disabled whenever you send a batch of images to the node.
Changelog
v3.0.0:
-
Batch Image input is now supported.
- Reapply_transparency is automatically, internally set to False when receiving batches of images.
-
Added ability to add a aura-sr entry to extra_model_paths.yaml. This allows you to set a custom location for your AuraSR models. Example ('aura-sr' is case sensitive):
somethingHere:
	aura-sr: your/path/to/aurasrFolder
v2.1.0:
- Added support for AuraSR v0.4.0 (code)
- Which introduces 2 new upscaling methods: '4x_overlapped_checkboard' and '4x_overlapped_constant'. Comparison
- These new methods take at least twice the amount of time as the original but may offer better results.