Nodes Browser
ComfyDeploy: How ComfyUI-ScenarioPrompt works in ComfyUI?
What is ComfyUI-ScenarioPrompt?
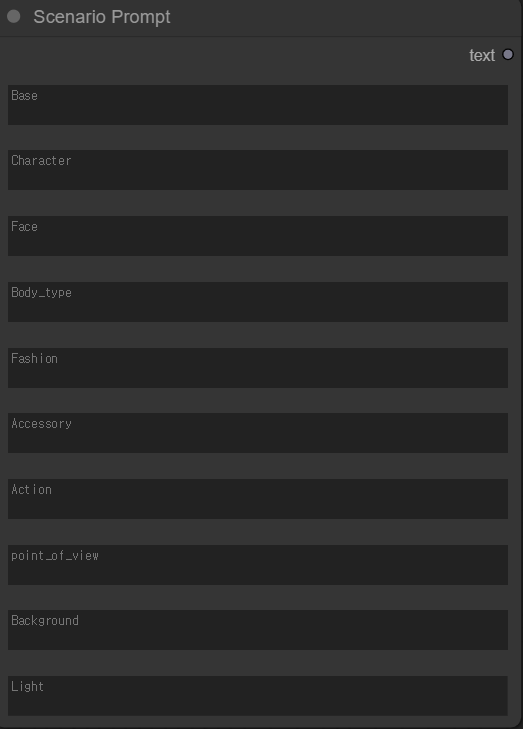
ScenarioPrompt is a custom node that helps you understand what you're prompting for each property as you build your prompts
How to install it in ComfyDeploy?
Head over to the machine page
- Click on the "Create a new machine" button
- Select the
Editbuild steps - Add a new step -> Custom Node
- Search for
ComfyUI-ScenarioPromptand select it - Close the build step dialig and then click on the "Save" button to rebuild the machine
ComfyUI-ScenarioPrompt

ScenarioPrompt is a custom node that helps you understand what you're prompting for each property as you build your prompts
Currently available in 10 properties, Base is mandatory.

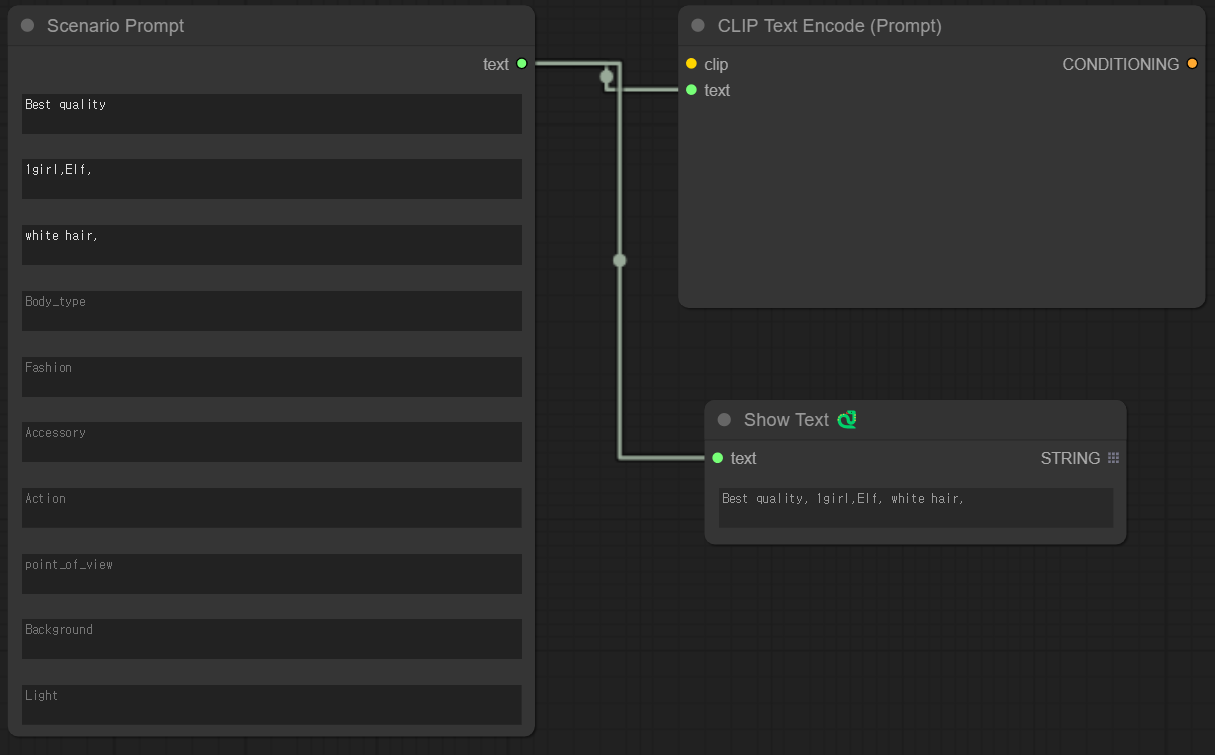
You can use it in conjunction with CLIP Text Encode (Prompt), or you can use the Show Text item in ComfyUI-Custom-Scripts to line up the prompts entered.
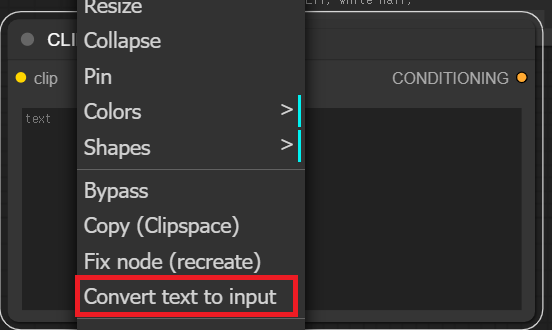
⚠️ To connect ScenarioPrompt to a prompt, you must check the Convert text to input box for CLIP Text Encode (Prompt).

Installation
cd path/to/comfyui/custom_nodes/
git clone https://github.com/Ludobico/ComfyUI-ScenarioPrompt.git
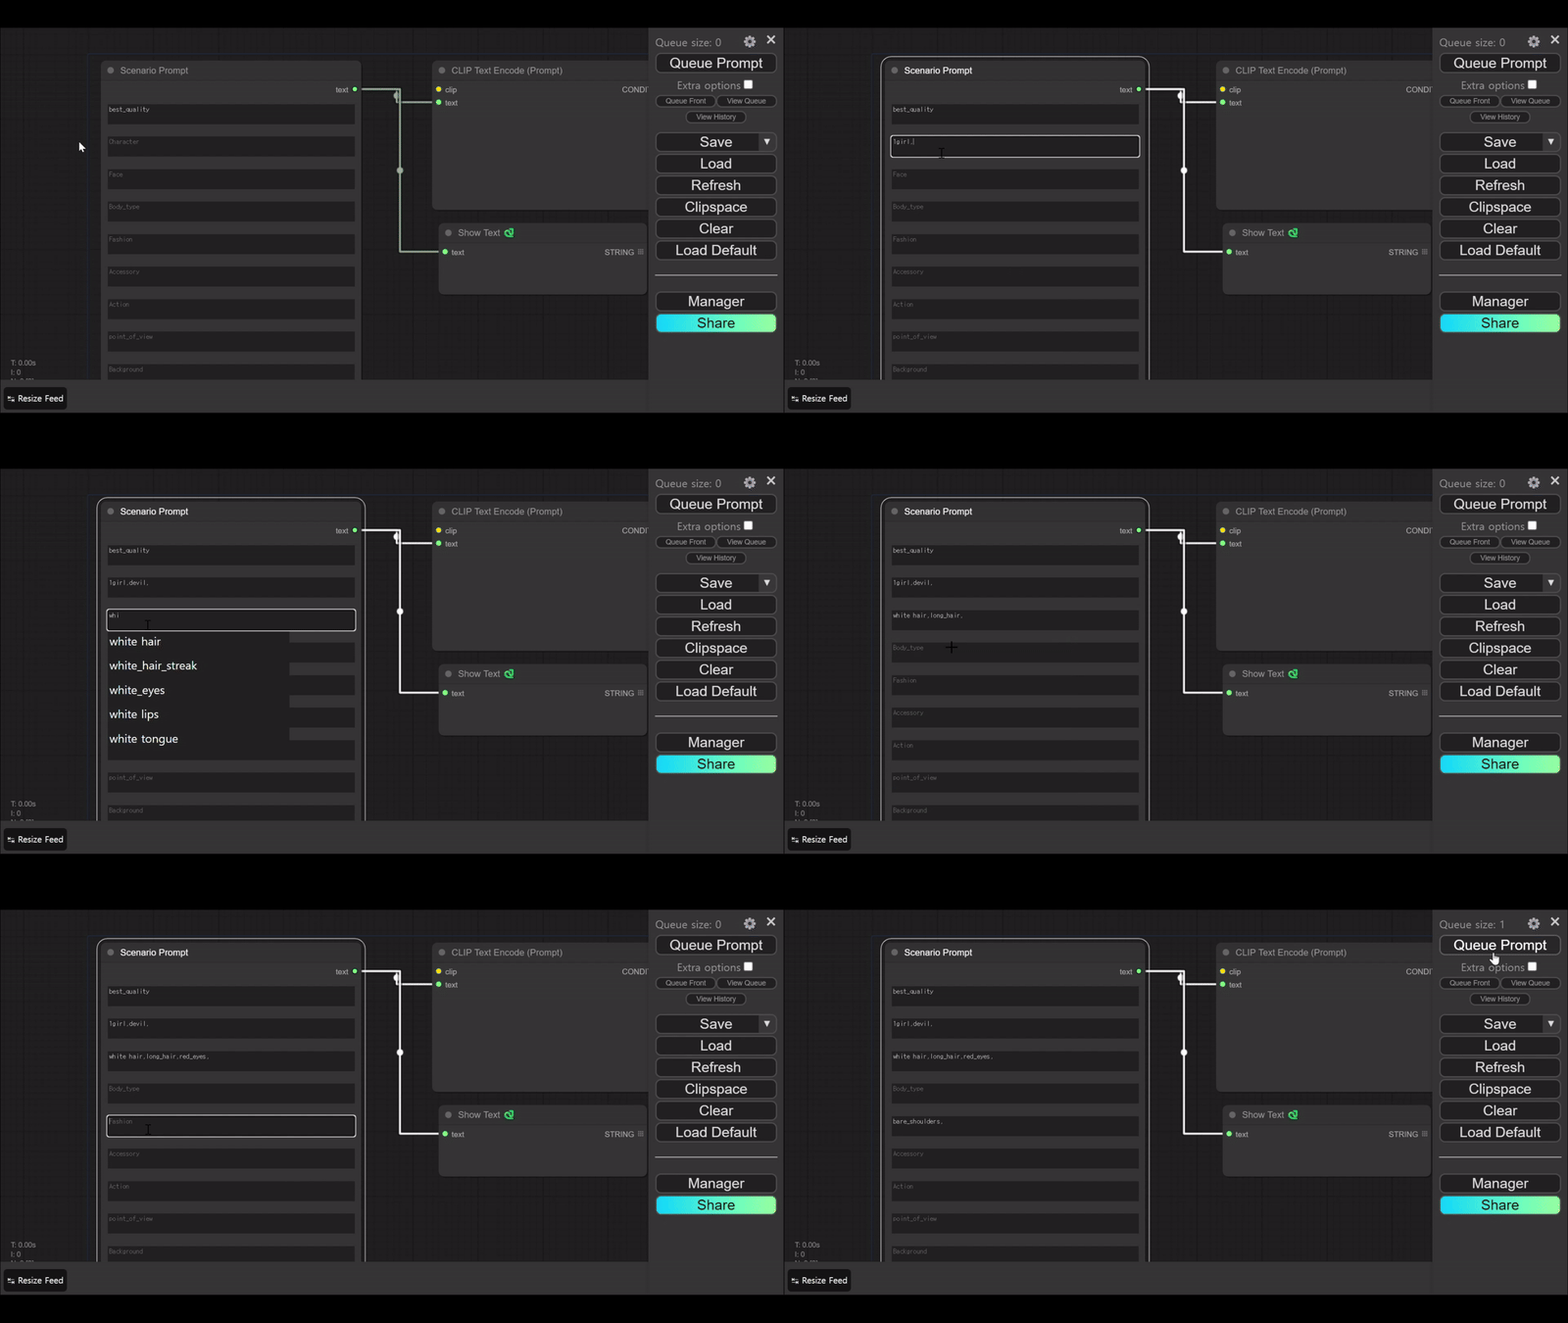
Autocomplete
It was inspired by the two source codes above: ComfyUI - CustomNode Unlimited Prompt and NovelAI.app.
The tags used for autocomplete are also based on NovelAI.app's googlesheet.

Reference
https://github.com/gangjun06/NovelAI.app
https://github.com/PluMaZero/ComfyUI-SpaceFlower
