Nodes Browser
ComfyDeploy: How ComfyUI-denoise-mask-scheduler works in ComfyUI?
What is ComfyUI-denoise-mask-scheduler?
ComfyUI-denoise-mask-scheduler experimental approach involves selectively applying a denoise mask at each step during the inpainting inference process in diffusion models.
How to install it in ComfyDeploy?
Head over to the machine page
- Click on the "Create a new machine" button
- Select the
Editbuild steps - Add a new step -> Custom Node
- Search for
ComfyUI-denoise-mask-schedulerand select it - Close the build step dialig and then click on the "Save" button to rebuild the machine
ComfyUI-denoise-mask-scheduler
ComfyUI-denoise-mask-scheduler experimental approach involves selectively applying a denoise mask at each step during the inpainting inference process in diffusion models.
Introduction
In inpainting tasks, the non-mask area should remain unchanged. However, this often results in visible mask boundaries. If minor alterations to parts of the non-mask area are acceptable, this approach can be quite effective.
At each sampling step, the denoise mask is progressively modified according to predefined rules using the denoise_mask_function of comfyui modelpatcher options. I refer to this process as the denoise mask schedule. This schedule can include transformations like mask skipping, random masking, and morphology adjustments.
However, only the skip option is currently implemented. New schedules will be continuously added as effective ones are identified.
Install
Download the repository and unpack into the custom_nodes folder in the ComfyUI installation directory.
Or clone via GIT, starting from ComfyUI installation directory:
cd custom_nodes
git clone https://github.com/MiddleKD/ComfyUI-denoise-mask-scheduler.git
Nodes
Skip mask and Apply alpha
- using sampling step

- using sigma value(noise strength)

Workflows
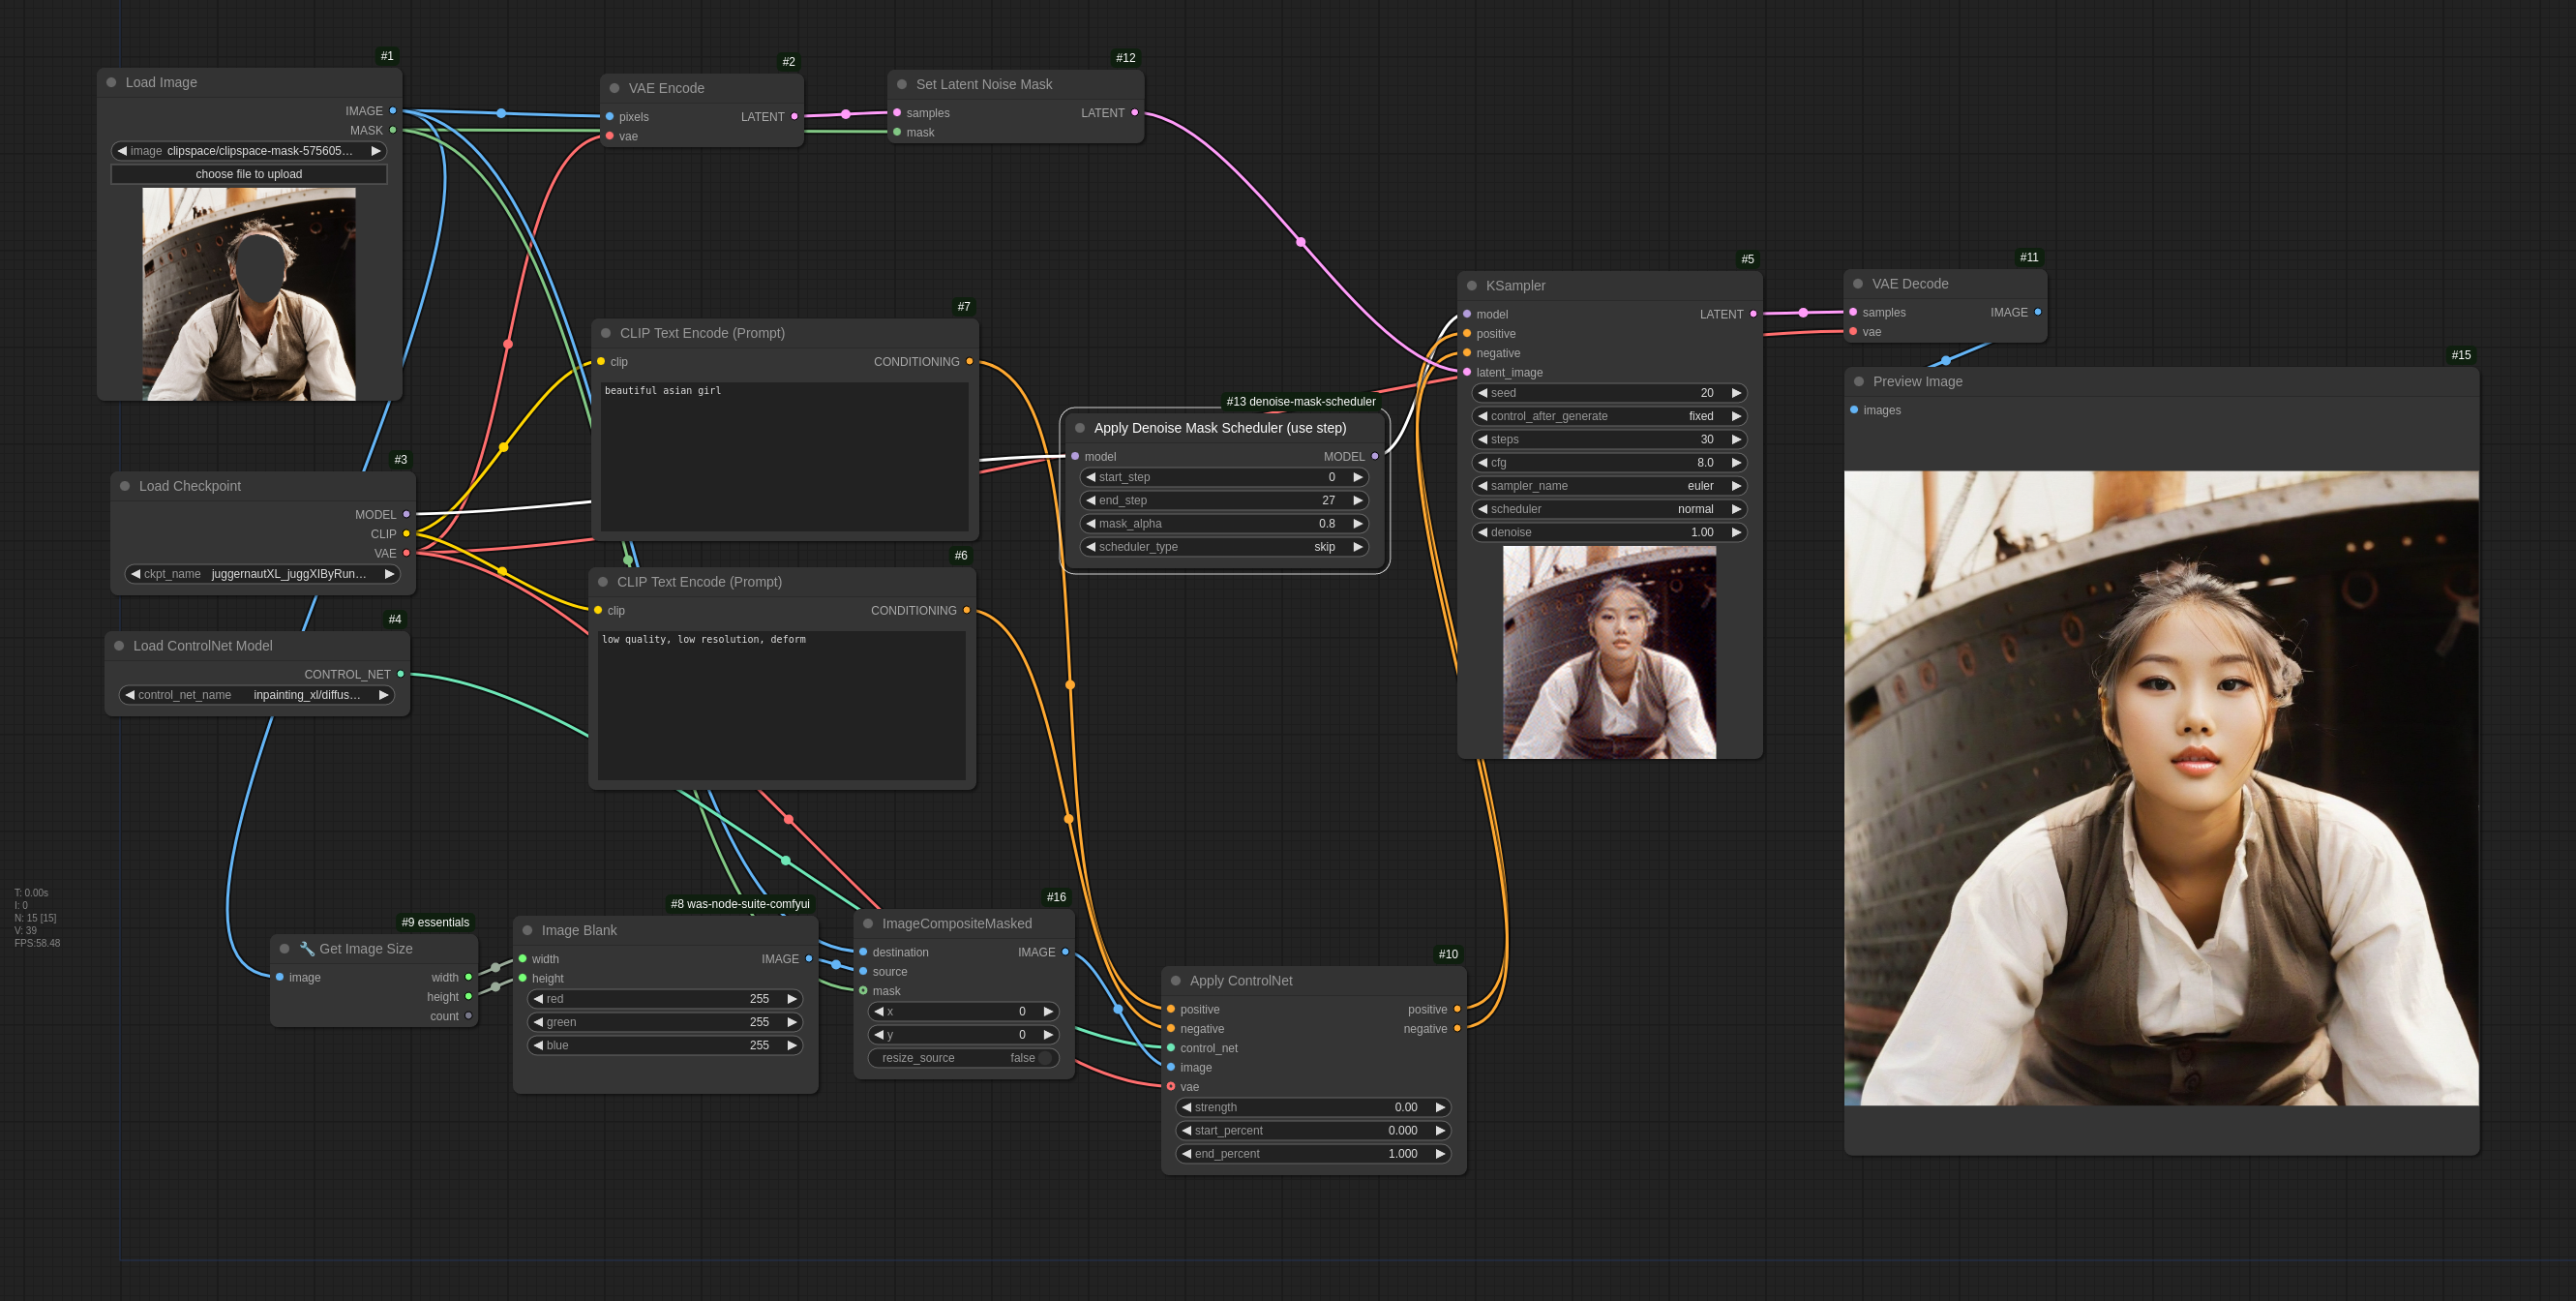
Skip mask and Apply alpha

- basic inpainting
 input/basic/denoise-mask-scheduler
 - inpainting controlnet
 input/controlnet/controlnet+denoise-mask-scheduler (look at the forehead)