Nodes Browser
ComfyDeploy: How ComfyUI-Paint3D-Nodes works in ComfyUI?
What is ComfyUI-Paint3D-Nodes?
Paint3D Nodes is a custom ComfyUI node for 3D model texture inpainting based on [a/Paint3D](https://arxiv.org/pdf/2312.13913).
How to install it in ComfyDeploy?
Head over to the machine page
- Click on the "Create a new machine" button
- Select the
Editbuild steps - Add a new step -> Custom Node
- Search for
ComfyUI-Paint3D-Nodesand select it - Close the build step dialig and then click on the "Save" button to rebuild the machine
Introduction
Paint3D Nodes is a custom ComfyUI node for 3D model texture inpainting based on Paint3D.

References
Environment Setup
|-----------|--------------|
| miniconda | 24.4.0       |
|-----------|--------------|
| python    | 3.10.14      |
|-----------|--------------|
| pytorch   | 2.1.0+cu121  |
|-----------|--------------|
| xformers  | 0.0.22.post4 |
|-----------|--------------|
| kaolin    | 0.15.0       |
|-----------|--------------|
Install Dependencies
pip install -r requirements.txt
pip install kaolin==0.15.0 -f https://nvidia-kaolin.s3.us-east-2.amazonaws.com/torch-2.1.0_cu121.html
References
If the installed torch version does not support kaolin, uninstall it and reinstall the compatible version
# If the currently installed torch version is not compatible with the kaolin requirement, uninstall torch and reinstall the compatible version
pip uninstall torch torchvision torchaudio
pip install torch==2.1.0 torchvision==0.16.0 torchaudio==2.1.0 --extra-index-url https://download.pytorch.org/whl/cu121
ControlNet
- uvpos - https://huggingface.co/GeorgeQi/Paint3d_UVPos_Control
- depth, inpaint - https://huggingface.co/comfyanonymous/ControlNet-v1-1_fp16_safetensors
Understanding the Workflow
To help understand this project, I will briefly introduce the execution flow and custom nodes by following a sample workflow. All Paint3D nodes have the prefix 3D_.
1. Standby Phase
Load models, and set the common prompt for sampling and inpainting. The TrainConfig node pre-configures and saves all parameters required for the next steps, sharing them through the TrainConfigPipe node.
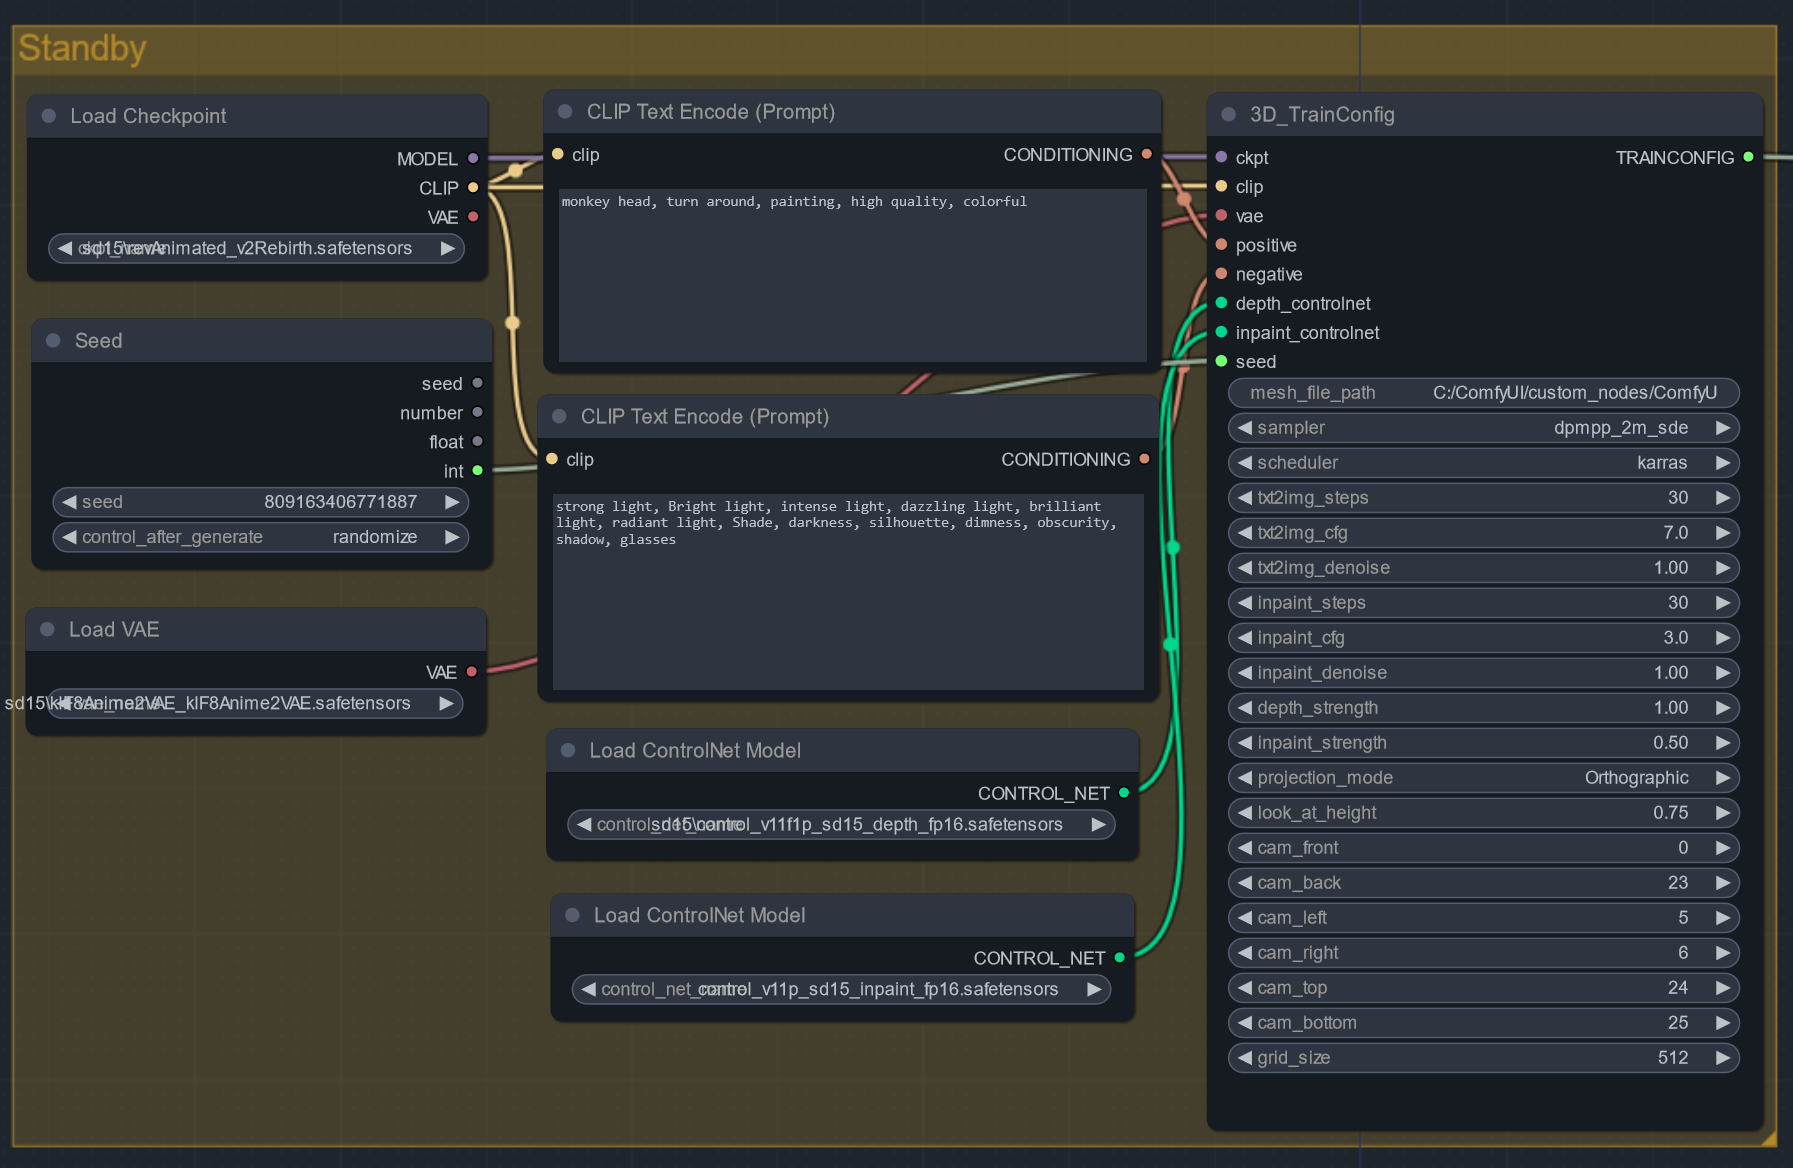
For albedo textures, it's recommended to set negative prompts such as strong light, bright light, intense light, dazzling light, brilliant light, radiant light, shade, darkness, silhouette, dimness, obscurity, shadow, glasses to minimize lighting and shadows during the sampling process. Personally, I find the effect to be minor, but better than nothing.
This project relies on a UV map-specific ControlNet, so only the SD1.5 version is supported.
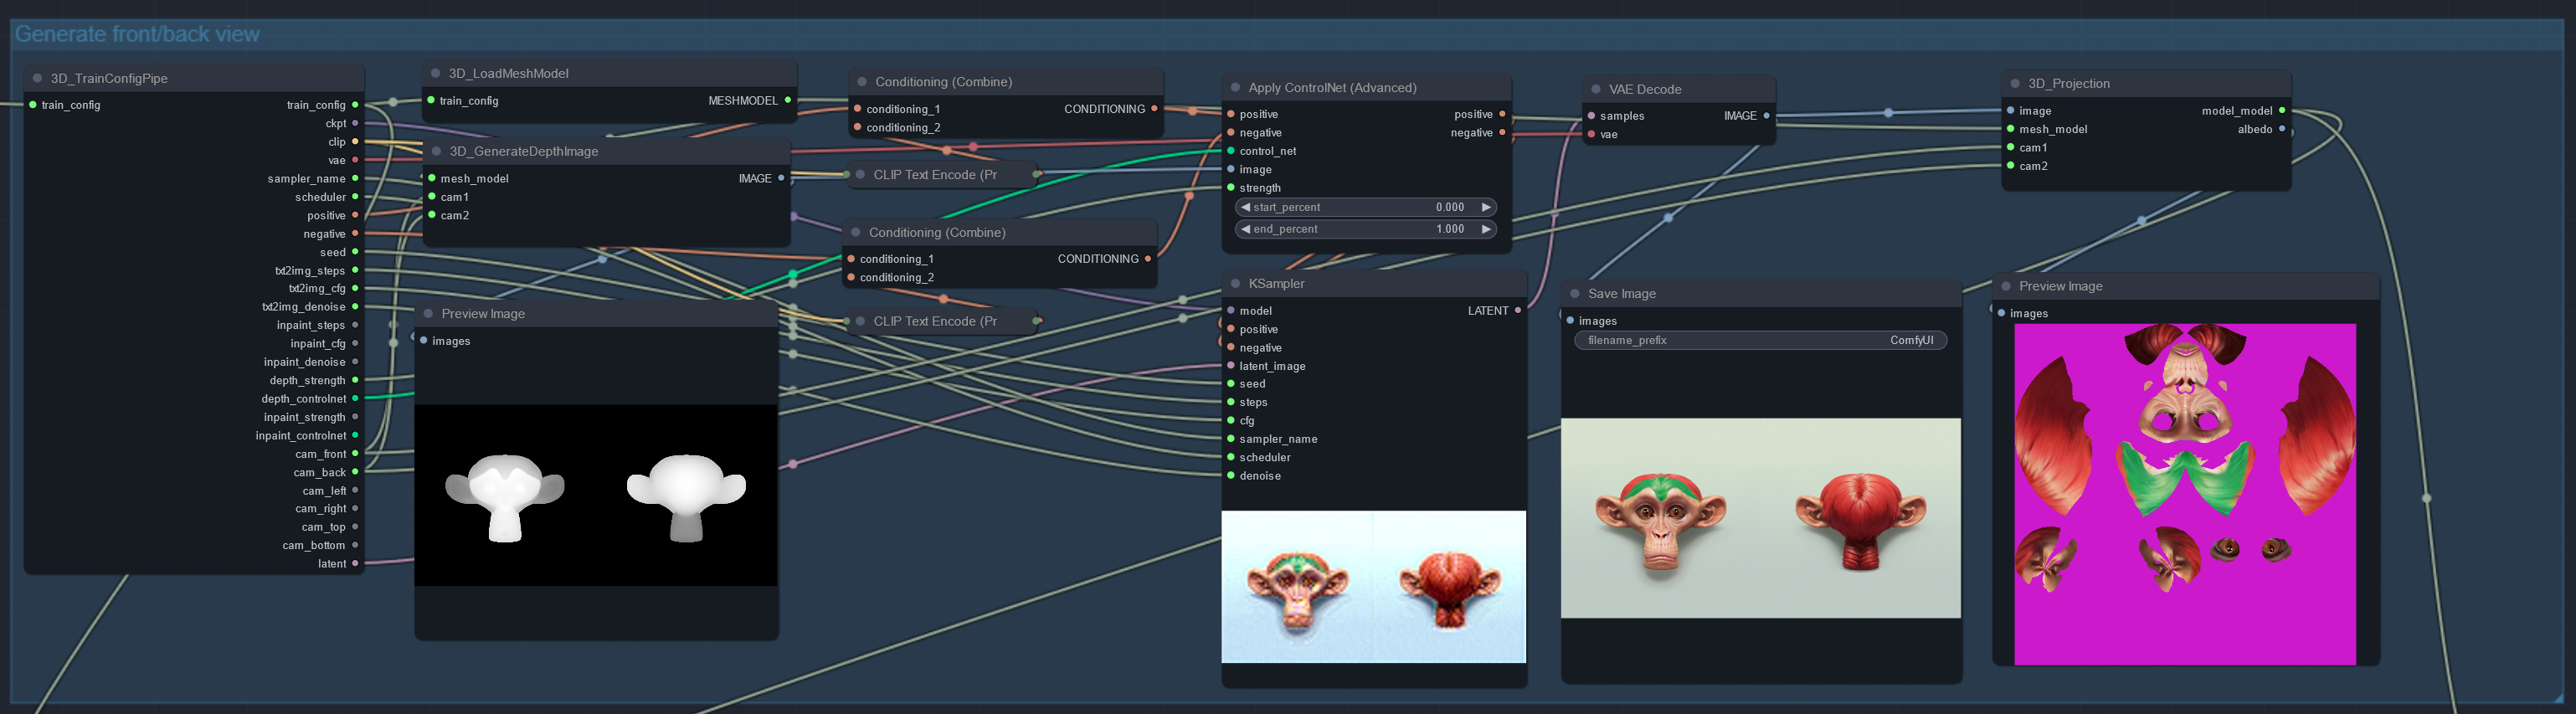
2. Generating and Projecting Front/Back Sampling Images
The LoadMeshModel node reads the obj file from the path set in the mesh_file_path of the TrainConfig node and loads the mesh information into memory. The GenerateDepthImage node creates two depth images of the model rendered from the mesh information and specified camera positions (0~25). These images are stitched into one and used as the depth ControlNet for sampling. The sampled images are projected onto the model's texture by the Projection node.
3. Creating and Projecting Inpainting Images While Rotating
The GenerateInpaintMask node detects unpainted areas in the viewport rendered from the specified camera positions and generates mask images. These images are used for depth and inpaint ControlNet to perform inpainting. The inpainted images are applied to the model's texture according to the mask area.

This process involves inpainting four times using images rotated 45°/90°/135° to the left/right and up/down from the front. (The paper only uses left/right 45° and up/down images from the front, but I added two more steps to enhance the detail of the UV Pos ControlNet in the next stage.)
4. UV Map Inpainting
The GenerateInpaintUVMap node creates a UV Pos image from the model. This is used as the image for the UV Pos ControlNet to create a light-less texture (removing light and shadow). Finally, the UV Pos map is used as a mask image to inpaint the boundary areas of the projection and unprojected square areas.

The generated texture is upscaled to 2k resolution and saved as a PNG file through the SaveUVMapImage node. The images, models, and texture files created up to this point can be found in the newly created Paint3D directory at the location of the obj file.