Nodes Browser
ComfyDeploy: How Pruna nodes for ComfyUI works in ComfyUI?
What is Pruna nodes for ComfyUI?
This repository explains how to accelerate image generation in ComfyUI using Pruna, an inference optimization engine that makes AI models faster, smaller, cheaper, and greener. ComfyUI is a popular node-based GUI for image generation models, for which we provide a custom compilation node that accelerates Stable Diffusion (SD) and Flux inference, while preserving output quality.
How to install it in ComfyDeploy?
Head over to the machine page
- Click on the "Create a new machine" button
- Select the
Editbuild steps - Add a new step -> Custom Node
- Search for
Pruna nodes for ComfyUIand select it - Close the build step dialig and then click on the "Save" button to rebuild the machine
Pruna nodes for ComfyUI
This repository explains how to accelerate image generation in ComfyUI using Pruna, an inference optimization engine that makes AI models faster, smaller, cheaper, and greener. ComfyUI is a popular node-based GUI for image generation models, for which we provide two custom nodes:
- a compilation node, that optimizes inference speed through model compilation, without compromising output quality.
- a caching node that smartly reuses intermediate computations to accelerate inference with minimal quality degradation.
Both of them can be applied to Stable Diffusion (SD) and Flux models.
Here, you'll find:
Installation
Prerequisites
- Create a new conda environment with Python 3.10
- Install ComfyUI
- Install the latest version of Pruna or Pruna Pro.
Note that the Pruna Pro version is required to use the caching node or the x_fast compilation mode.
Steps
- Navigate to your ComfyUI installation's
custom_nodesfolder:
cd <path_to_comfyui>/custom_nodes
- Clone this repository:
git clone https://github.com/PrunaAI/ComfyUI_pruna.git
- Launch ComfyUI, for example, with:
cd <path_to_comfyui> && python main.py --disable-cuda-malloc --gpu-only
The Pruna node will appear in the nodes menu in the Pruna category.
Important note: The compilation node requires launching ComfyUI with the --disable-cuda-malloc flag;
otherwise the node may not function properly. For optimal performance, we also recommend setting the
--gpu-only flag.
Usage
Workflows
We provide two types of workflows: one using a Stable Diffusion model and another based on Flux. To these models, we apply caching, compilation or their combination.
| Optimization Technique | Stable Diffusion | Flux | |--------------------------|-----------------|------| | Compilation | SD Compilation (Preview) | Flux Compilation (Preview) | | Caching | SD Caching (Preview) | Flux Caching (Preview) | | Caching + Compilation | SD Caching + Compilation (Preview) | Flux Caching + Compilation (Preview) |
To load the workflow:
- Drag and drop the provided json file into the ComfyUI window
- OR Click
Openin theWorkflowtab, as shown here, and select the file
To run the workflow, make sure that you have first set up the desired model.
Model Setup
Example 1: Stable Diffusion
You have two options for the base model:
Option 1: SafeTensors Format (Recommended)
- Download the safetensors version
- Place it in
<path_to_comfyui>/models/checkpoints
Option 2: Diffusers Format
- Download the Diffusers version of SD v1.4
- Place it in
<path_to_comfyui>/models/diffusers - Replace the
Load Checkpointnode with aDiffusersLoadernode
The node is tested using the SafeTensors format, so for the sake of reproducibility, we recommend using that format. However, we don't expect any performance differences between the two.
After loading the model, you can choose the desired workflow, and you're all set!
Note: In this example, we use the Stable Diffusion v1.4 model. However, our nodes are compatible with any other SD model — feel free to use your favorite one!
Example 2: Flux
To use Flux, you must separately download all model components—including the VAE, CLIP, and diffusion model weights—and place them in the appropriate folder.
Steps to set up Flux:
-
For the CLIP models: Get the following files:
Move them to
<path_to_comfyui>/models/clip/. -
For the VAE model: Get the VAE model, and move it to
<path_to_comfyui>/models/vae/directory. -
For the Flux model: You first need to request access to the model here. Once you have access, download the weights and move them to
<path_to_comfyui>/models/diffusion_models/.
Now, just load the workflow and you're ready to go!
Hyperparameters
Through the GUI, you can configure various optimization settings. Specifically:
-
Compilation: We currently support two compilation modes:
x_fastandtorch_compile, withx_fastset as the default. -
Caching: Our caching mechanism supports the
adaptivealgorithm, which allows you to adjust thethresholdandmax_skip_stepsparameters:threshold: Acceptable values range from0.001to0.2.max_skip_steps: Acceptable values range from1to5.
We recommend using the default values (
threshold = 0.01,max_skip_steps = 4), but you can experiment with different settings to balance speed and quality. In general, increasing the threshold results in more aggressive caching, which may improve performance at the expense of image quality. Note that, if you want to change the parameters of the nodes after the first execution, you have to restart the workflow.
Note: Caching and
x_fastcompilation require access to the Pruna Pro version.
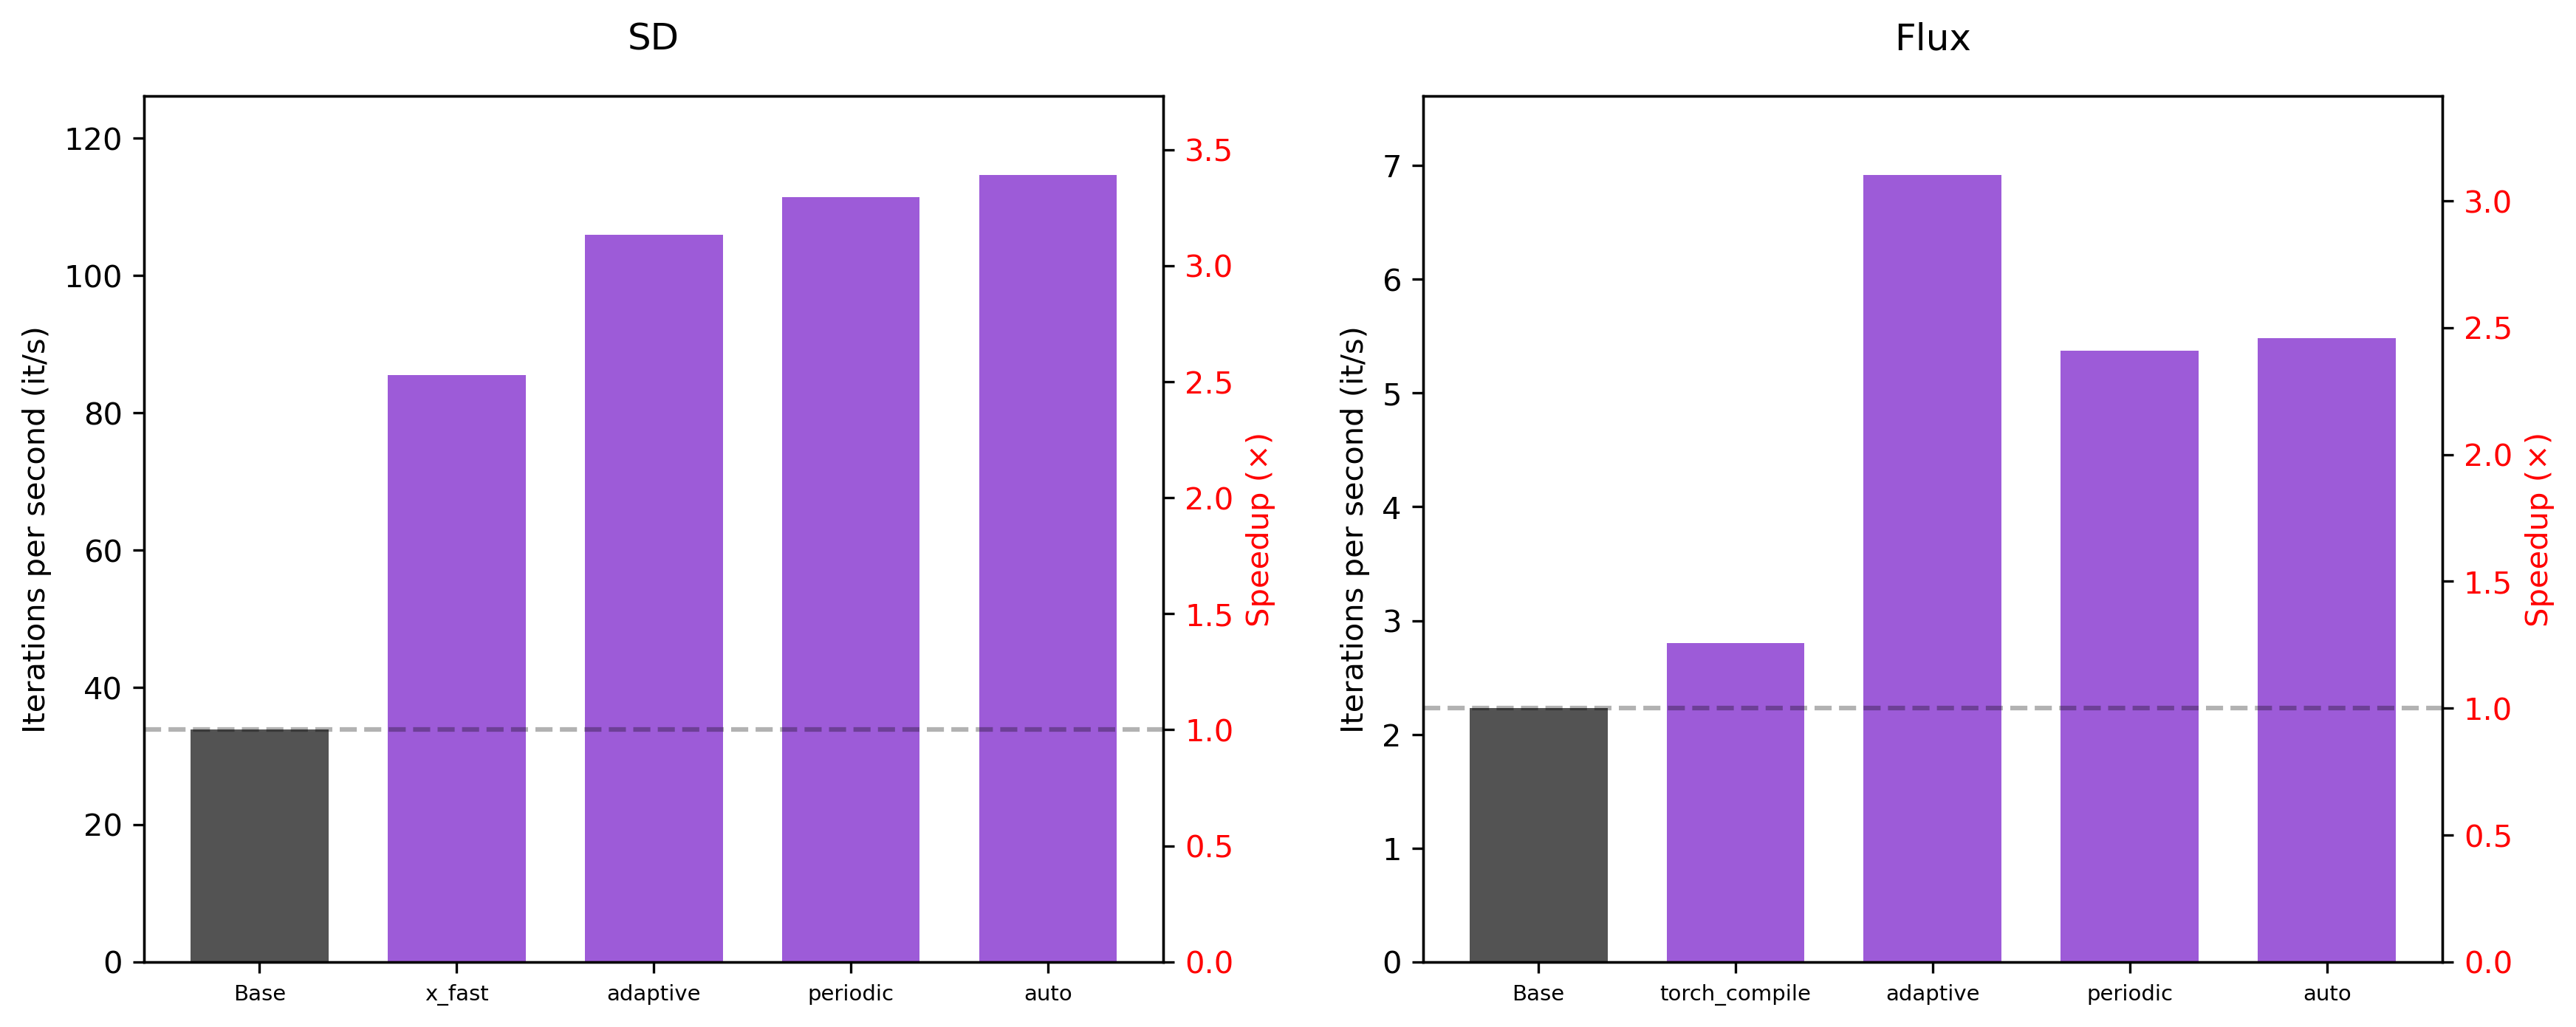
Performance
The node was tested on an NVIDIA L40S GPU. Below, we compare the performance of the base model, with the models
optimized with Pruna's compilation and caching nodes. We run two types of experiments: one using 50 denoising steps and another
using 28 steps. We compare the iterations per second (as reported by ComfyUI) and the end-to-end time required to generate a single image.
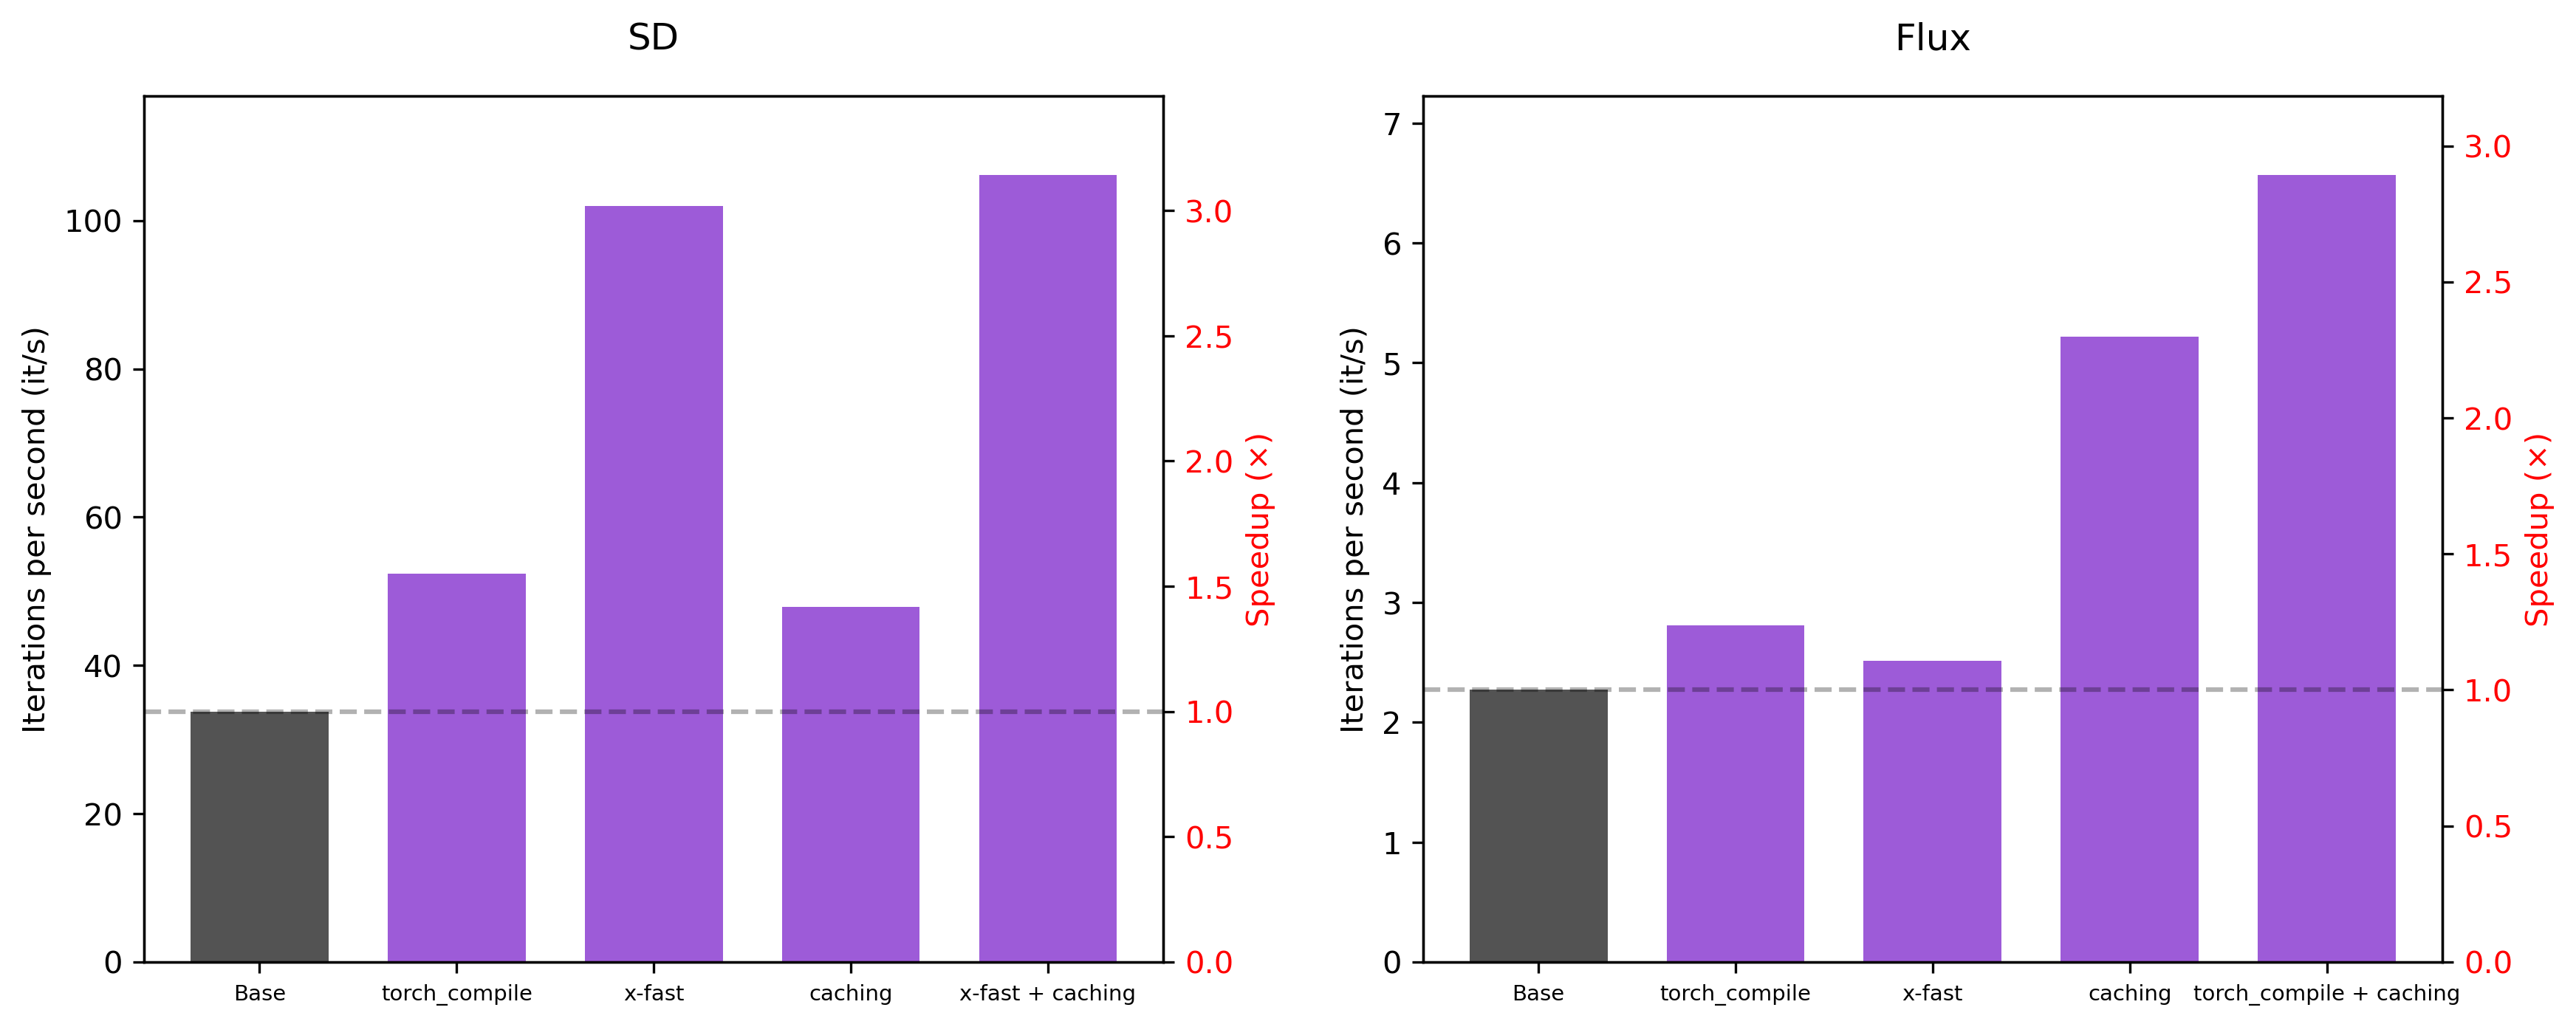
50 steps
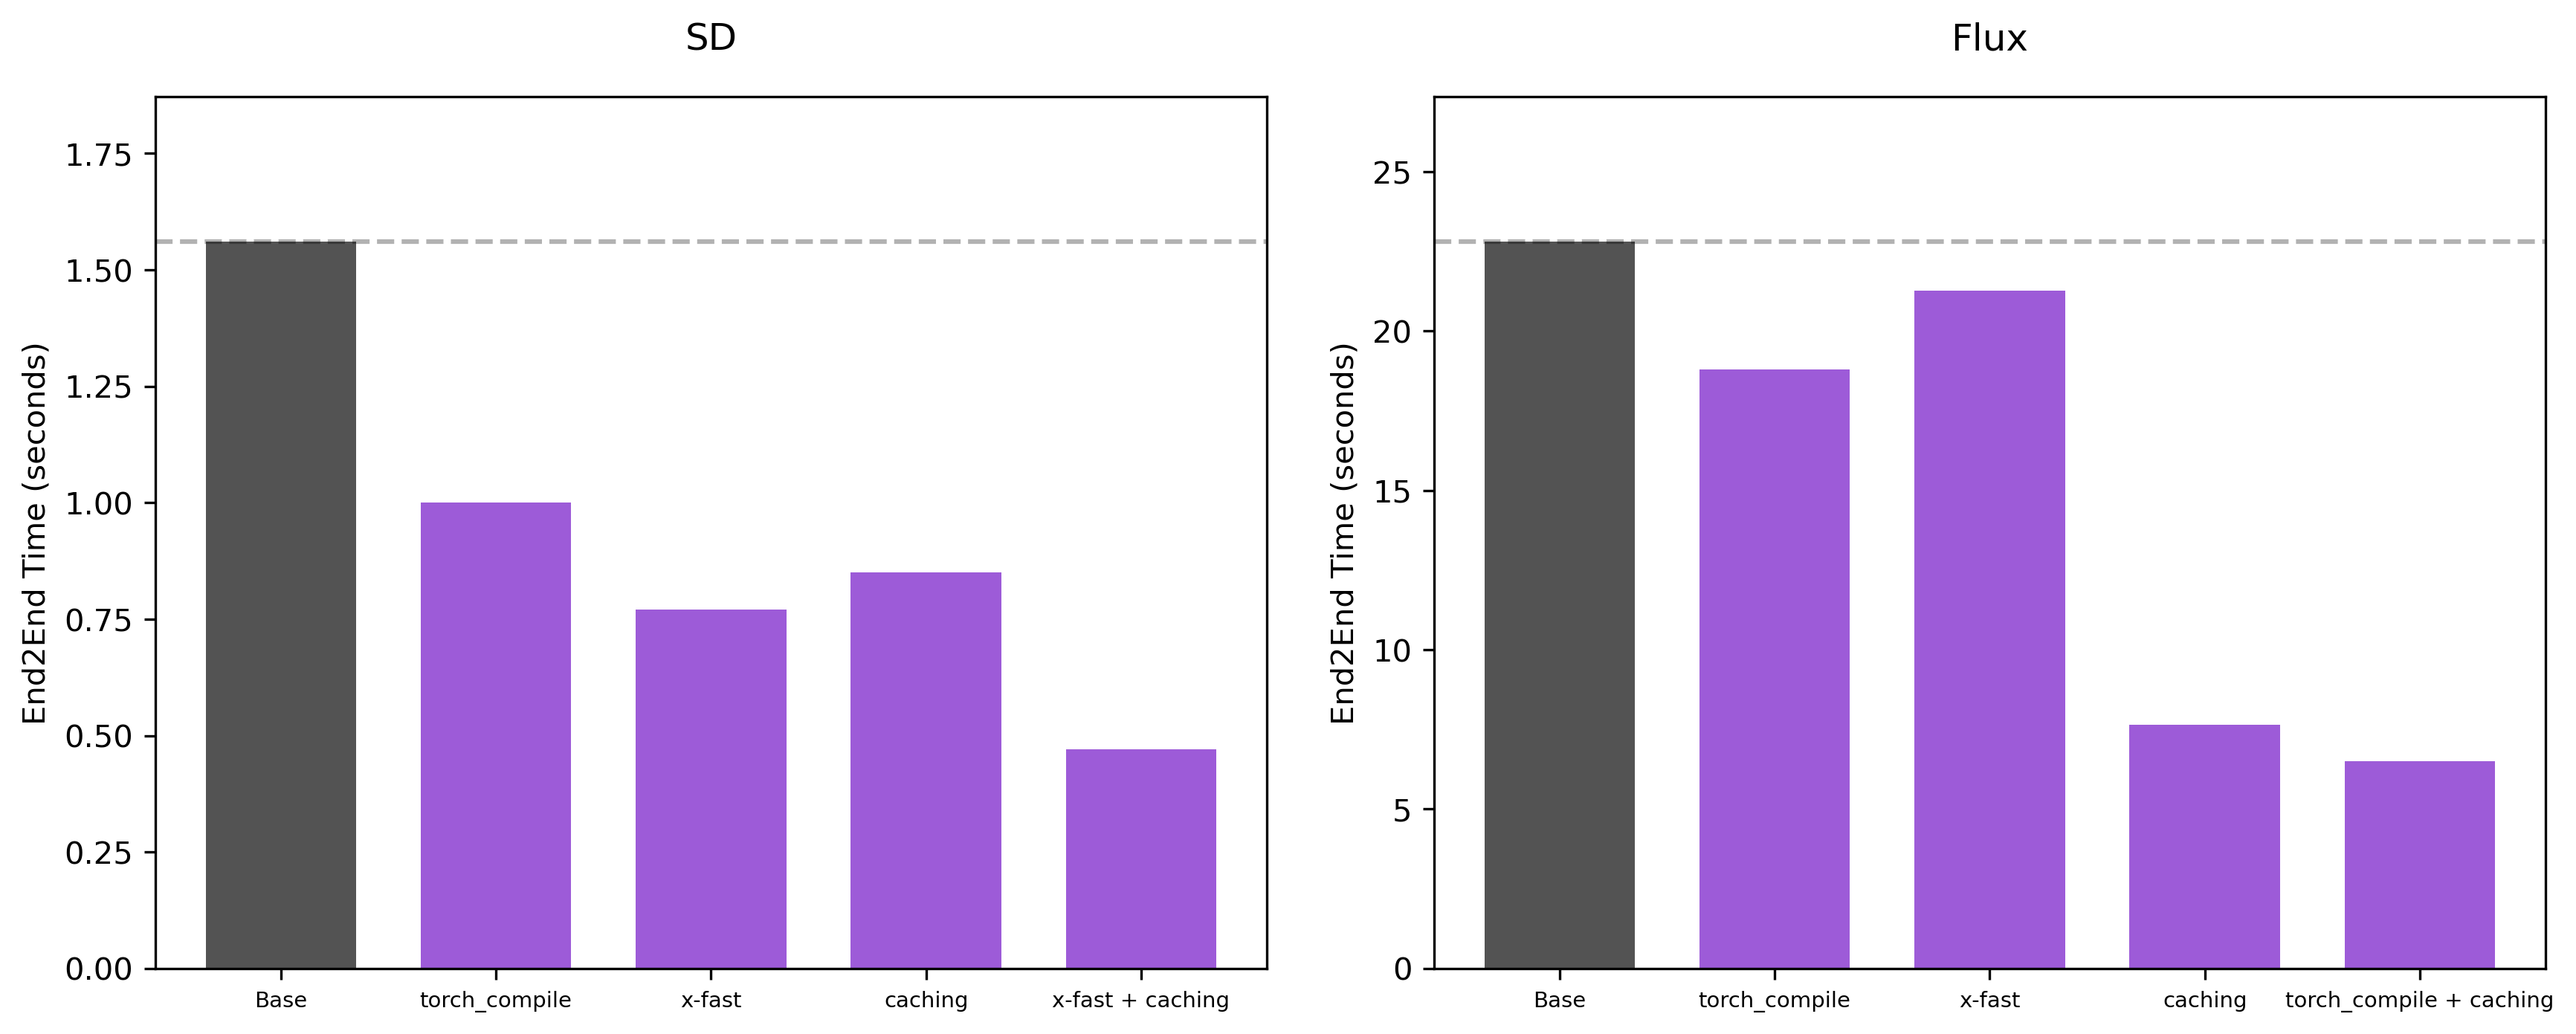
Hyperparameters: For caching, we use the default hyperparameters, which are threshold = 0.01 and max_skip_steps = 4.
28 steps
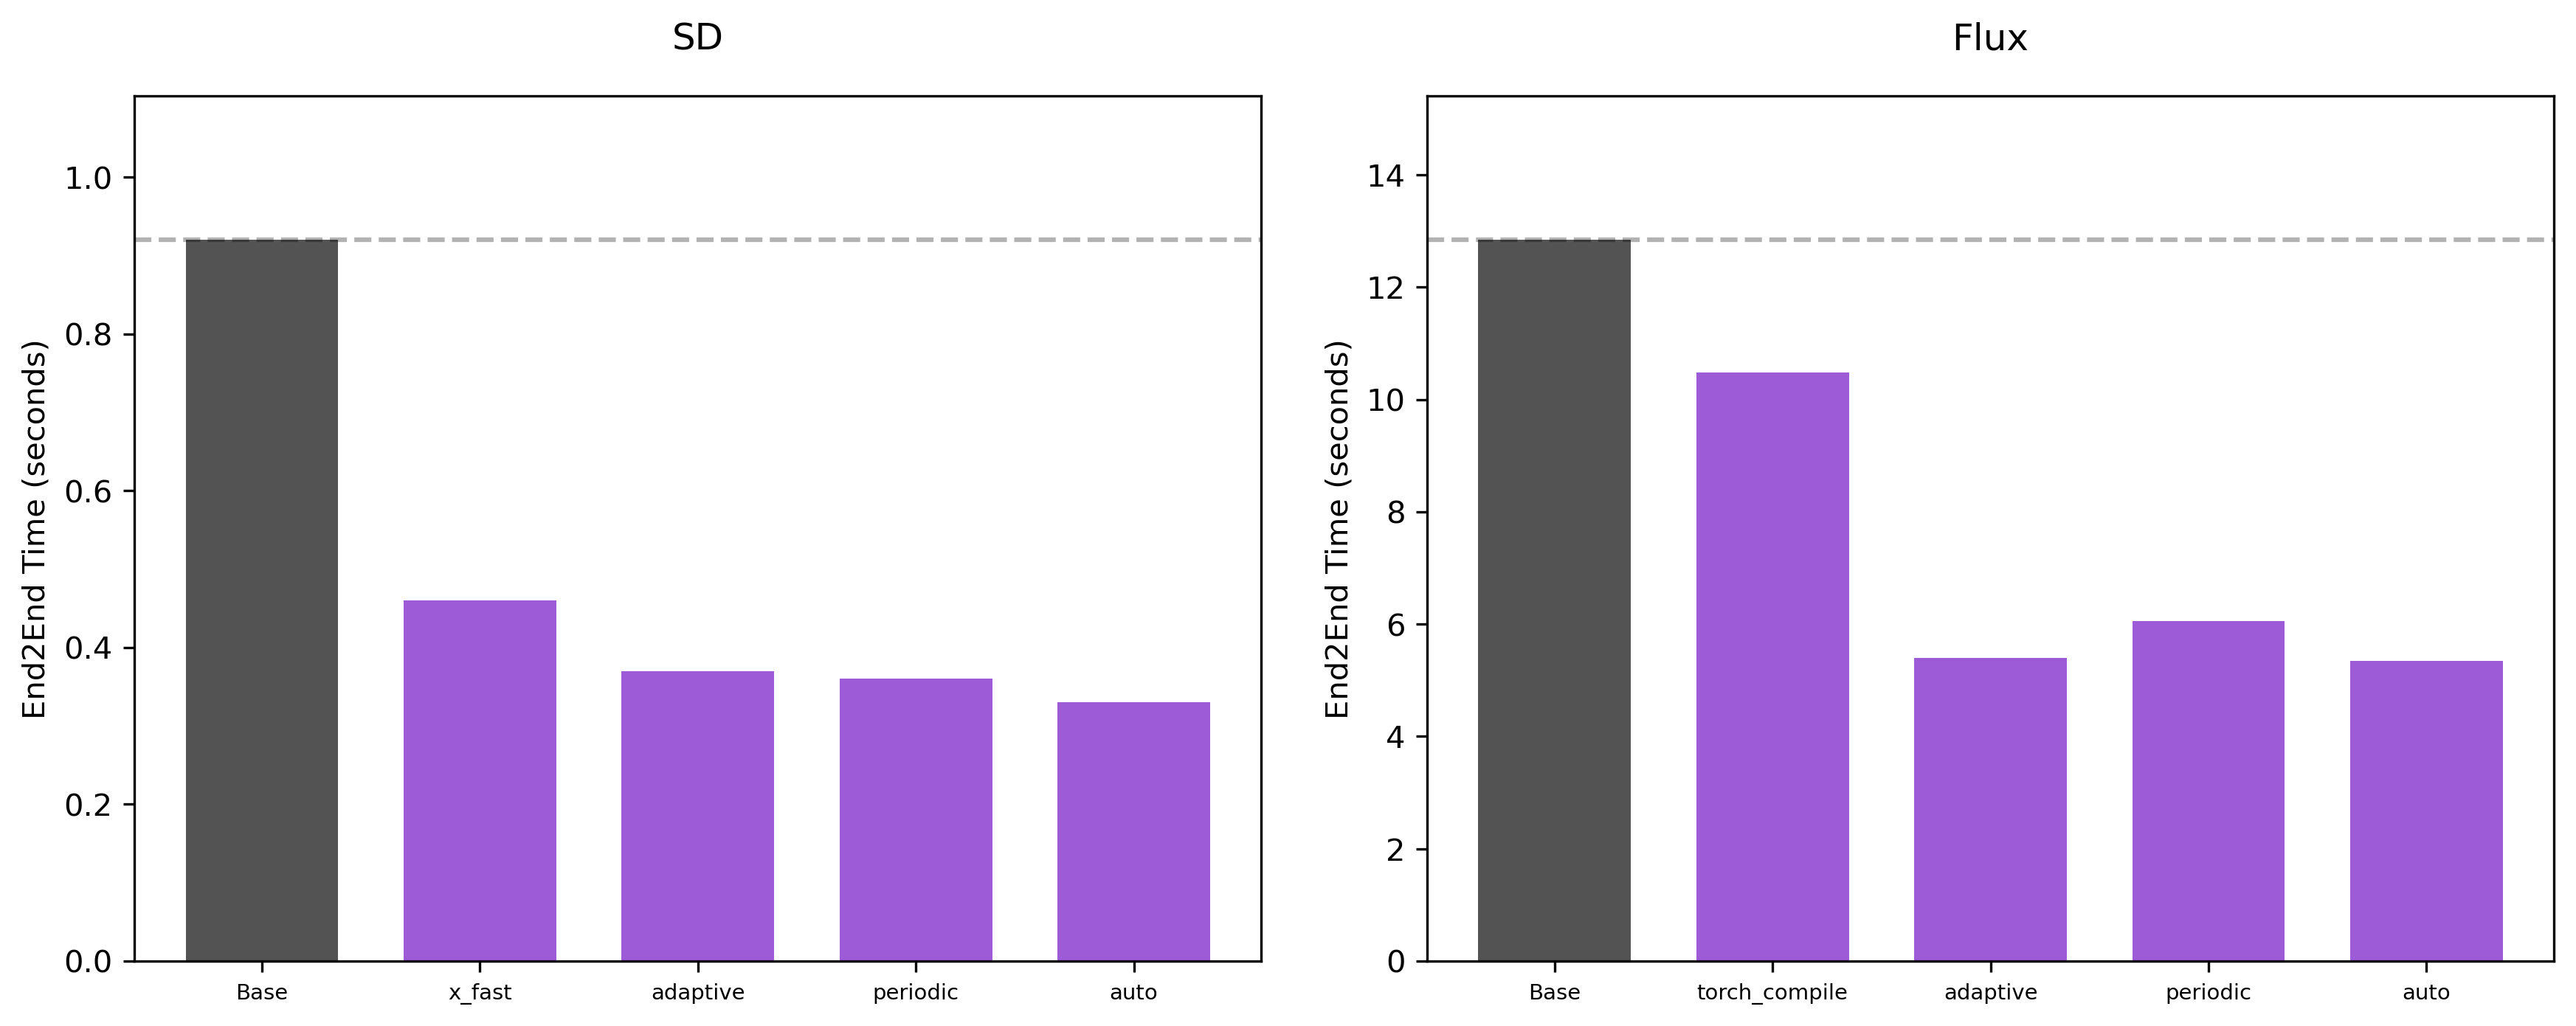
Hyperparameters: For the SD model, when the number of denoising steps is small, the caching node with the
default hyperparameters tends to not provide substantial speedups. For that reason, here, only for
the SD model, we set the threshold to 0.02.
Contact
For questions, feedback or community discussions, feel free to join our Discord.
For bug reports or technical issues, please open an issue in this repository.