Nodes Browser
ComfyDeploy: How ComfyUI Web Viewer works in ComfyUI?
What is ComfyUI Web Viewer?
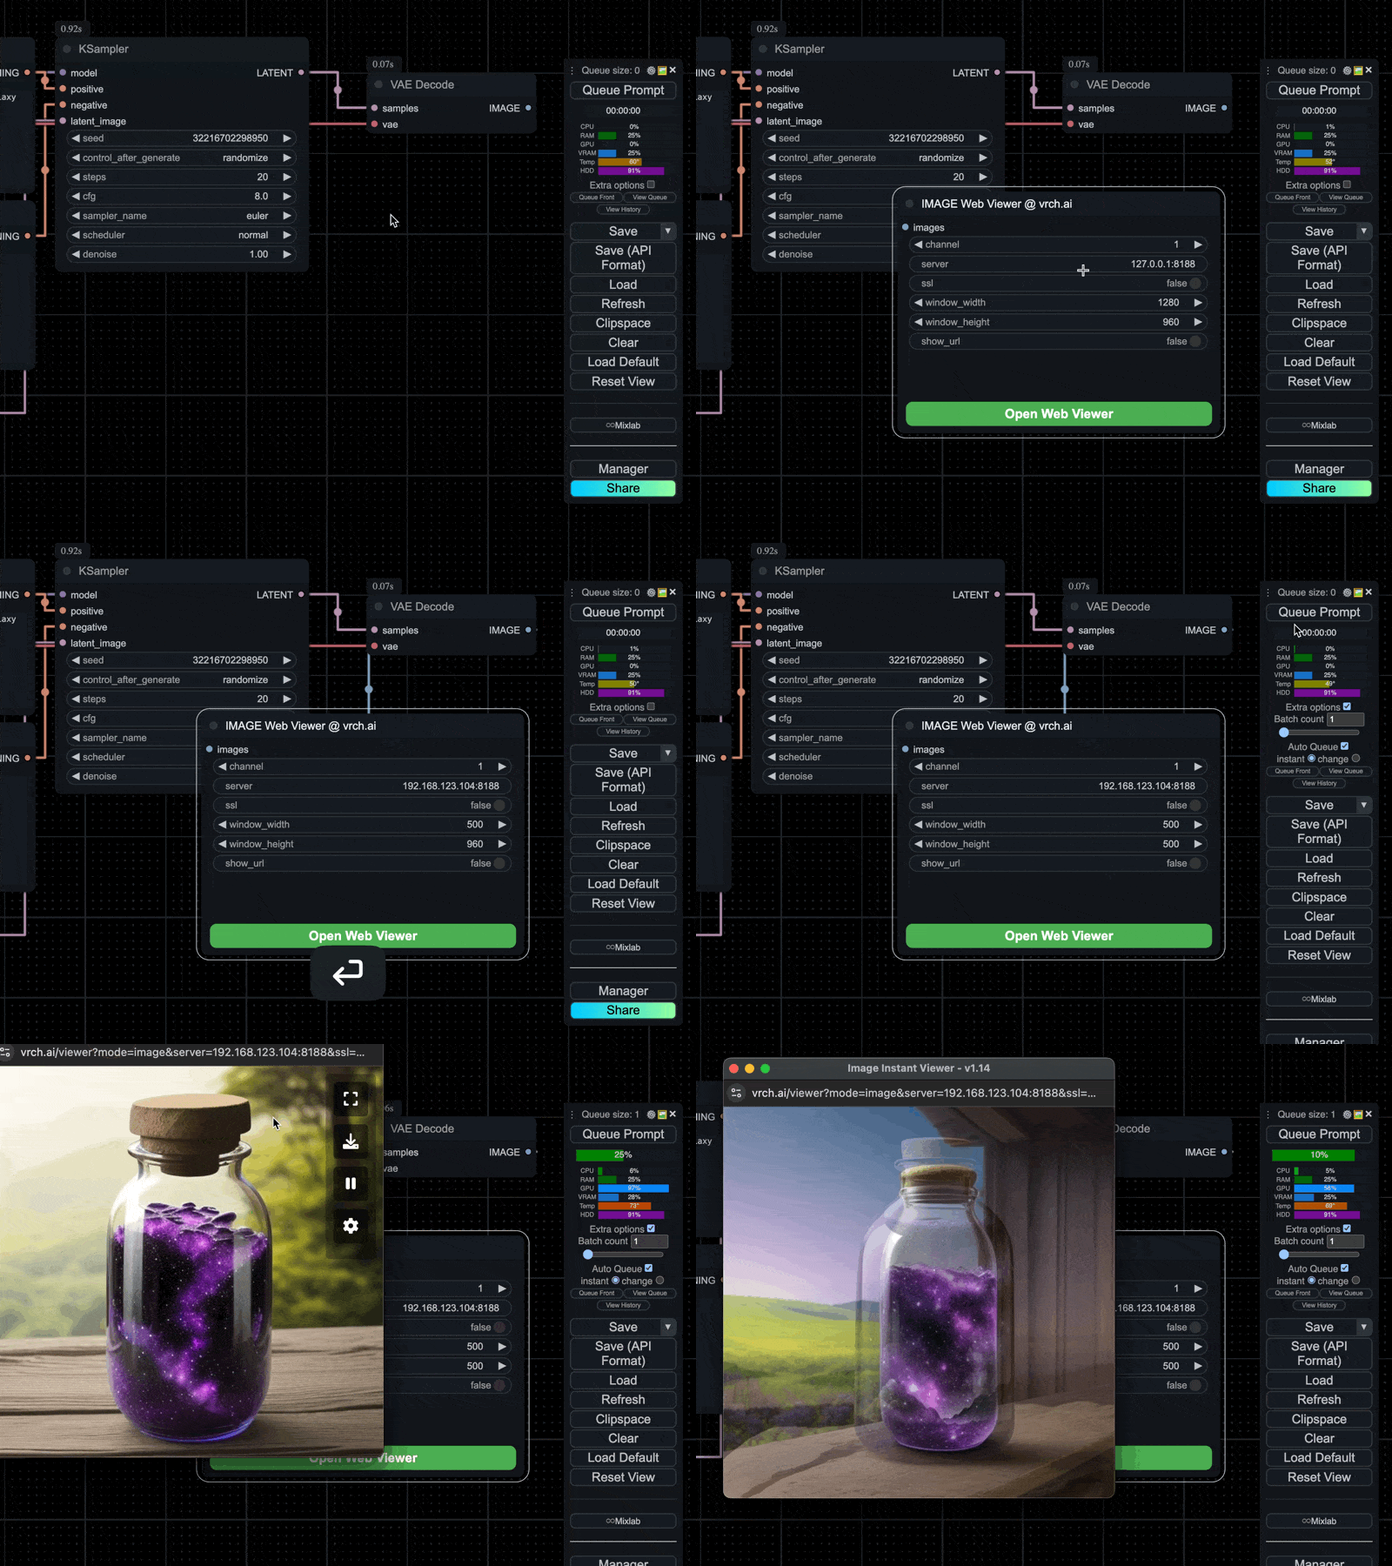
The ComfyUI Web Viewer by [a/vrch.ai](https://vrch.ai) is a custom node collection offering a real-time AI-generated interactive art framework. This utility integrates realtime streaming into ComfyUI workflows, supporting keyboard control nodes, OSC control nodes, sound input nodes, and more. Accessible from any device with a web browser, it enables real time interaction with AI-generated content, making it ideal for interactive visual projects and enhancing ComfyUI workflows with efficient content management and display.
How to install it in ComfyDeploy?
Head over to the machine page
- Click on the "Create a new machine" button
- Select the
Editbuild steps - Add a new step -> Custom Node
- Search for
ComfyUI Web Viewerand select it - Close the build step dialig and then click on the "Save" button to rebuild the machine
ComfyUI Web Viewer
The ComfyUI Web Viewer by vrch.ai is a custom node collection offering a real-time AI-generated interactive art framework. This utility integrates realtime streaming into ComfyUI workflows, supporting keyboard control nodes, OSC control nodes, sound input nodes, and more. Accessible from any device with a web browser, it enables real time interaction with AI-generated content, making it ideal for interactive visual projects and enhancing ComfyUI workflows with efficient content management and display.
✨ Features:
- Real-Time AI Generation & Interaction: Immediate response for interactive creativity.
- Multi-Input Support: Easily integrates keyboard, OSC, and audio input for versatile interactivity.
- Universal Web Accessibility: Compatible with any device equipped with a web browser.
🚀 Support Us:
If you find the ComfyUI Web Viewer useful or inspiring, consider supporting us:
- 💖 Sponsor: Help us maintain and enhance the project through GitHub Sponsors.
- ⭐ Star the Project: A star on GitHub greatly motivates us and helps increase visibility!
- 📩 Business Inquiries: For commercial collaborations, reach us at hi@vrch.io.
Changelog
see CHANGELOG
Installation
Method 1: Auto Installation (Recommended)
Simply search for ComfyUI Web Viewer in ComfyUI Manager and install it directly.
Method 2: Manual Installation
- Clone this repo into the
custom_nodesdirectory of ComfyUIgit clone git@github.com:VrchStudio/comfyui-web-viewer.git - Install dependencies:
or if you use thepip install -r requirements.txtwindowsportable install, run this inComfyUI_windows_portablefolder:python_embeded\python.exe -m pip install -r ComfyUI\custom_nodes\comfyui-web-viewer\requirements.txt - Restart ComfyUI
How to Use
Web Viewer Nodes

- Documentation: Usage of Web Viewer nodes
- Example workflows:
- Tutorials:
WebSocket Web Viewer Nodes
- Documentation: Usage of WebSocket Viewer nodes
- Example workflows:
- [TBA]
- Tutorials:
- [TBA]
OSC Control Nodes
- Documentation: Usage of OSC Control nodes
- TouchOSC Control Panel:
- Example workflows:
- Tutorials:
Key Control Nodes
- Documentation: Usage of Key Control nodes
- Example workflows:
Audio Nodes
- Documentation: Usage of Audio nodes
- Example workflows:
Image Nodes
- Documentation: Usage of Image nodes
- Example workflows:
Text Nodes
- Documentation: Usage of Text nodes
- Example workflows:
- Tutorials:
Other Example Workflows
- Rapid Text to Image (8K)
- Auto Switch to Instant Queue and Run Workflow
- Apple Vision Pro Ultrawide Wallpaper (5K)
- Audio Picture Book with Your Own Voice (FLUX version)
- Audio Picture Book with Your Own Voice (SDXL version)
Troubleshootings
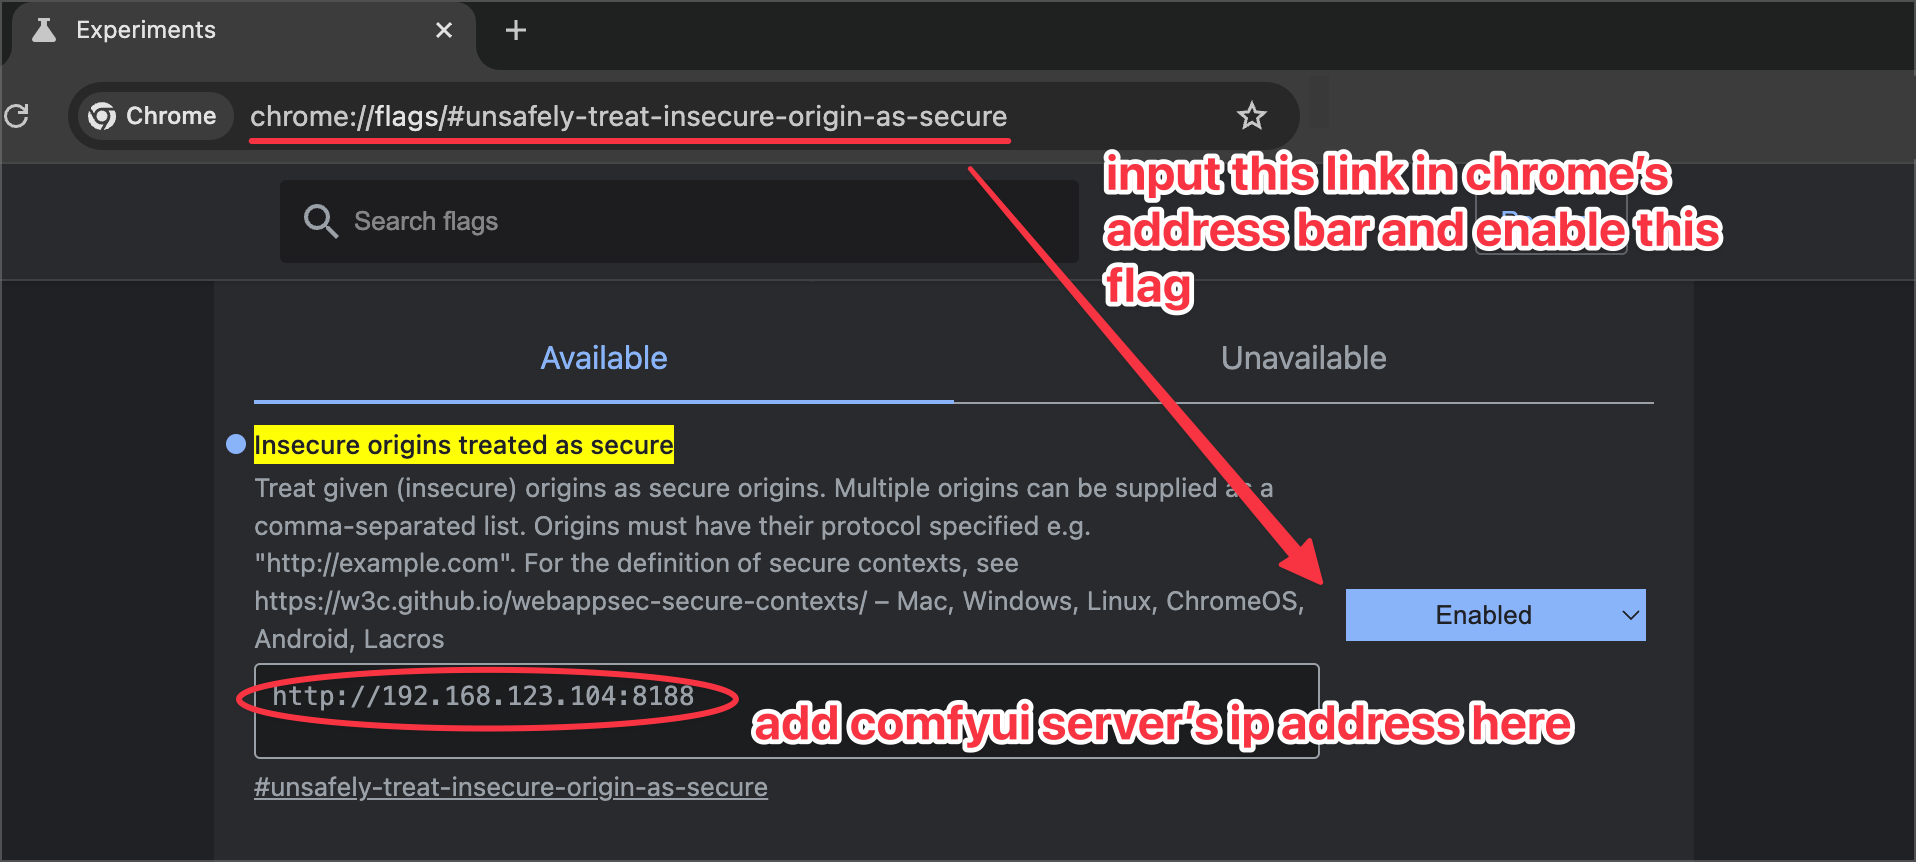
1. Image Not Displayed in Popped-Up Image Viewer Window
For Chrome, you may need to add the ComfyUI server's IP address manually in chrome://flags/#unsafely-treat-insecure-origin-as-secure to enable access to the content. For other browsers, an http-to-http setup should allow for seamless access without additional configuration.

2. How can I resolve the CORS policy error when trying to display images?
If you’re encountering a CORS policy error with a message like this:
"origin 'https://vrch.ai' has been blocked by CORS policy: No 'Access-Control-Allow-Origin' header is present on the requested resource"
or
"WARNING: request with non matching host and origin 127.0.0.1 !=vrch.ai, returning 403"
you can resolve this by launching the ComfyUI service with the --enable-cors-header flag appended. For example:
python main.py --enable-cors-header
For additional details, refer to this discussion on GitHub.
3. Why can’t the ComfyUI service run at HTTPS/TLS/SSL on port 8189?
ComfyUI Web Viewer provides a build-in, self-signed certificate (intended for development only, not production use). To launch the ComfyUI service with HTTPS enabled on port 8189, use the following command:
# Start ComfyUI with HTTPS using the built-in certificate and key
python main.py --tls-keyfile ./custom_nodes/comfyui-web-viewer/https/key.pem --tls-certfile ./custom_nodes/comfyui-web-viewer/https/cert.pem --port 8189 --listen
For more details, refer to the ComfyUI official instructions.
Version Update
This project uses bump2version for version management. To update the version:
- Ensure you have
bump2versioninstalled:pip install bump2version - To update the version, run:
Replacepython update_version.py [major|minor|patch][major|minor|patch]with the part of the version you want to increment. - This will automatically:
- Update the version number in
__init__.py - Update the CHANGELOG.md file
- Create a new git commit and tag (if you're using git)
- Update the version number in
- After running the script, review and update the CHANGELOG.md file with details about the new version's changes.
- Note: make sure you've put changes in
Unreleasedsection manually
- Note: make sure you've put changes in
Contributing
Created and maintained by the vrch.io team.
Contributions are welcome! Please feel free to submit a Pull Request.
Contact Us
For any inquiries, you can contact us at hi@vrch.io.