Nodes Browser
ComfyDeploy: How ComfyUI-X-Portrait-Nodes works in ComfyUI?
What is ComfyUI-X-Portrait-Nodes?
Implementation of X-Portrait nodes for ComfyUI, animate portraits with an input video and a reference image.
How to install it in ComfyDeploy?
Head over to the machine page
- Click on the "Create a new machine" button
- Select the
Editbuild steps - Add a new step -> Custom Node
- Search for
ComfyUI-X-Portrait-Nodesand select it - Close the build step dialig and then click on the "Save" button to rebuild the machine
X-Portrait Nodes
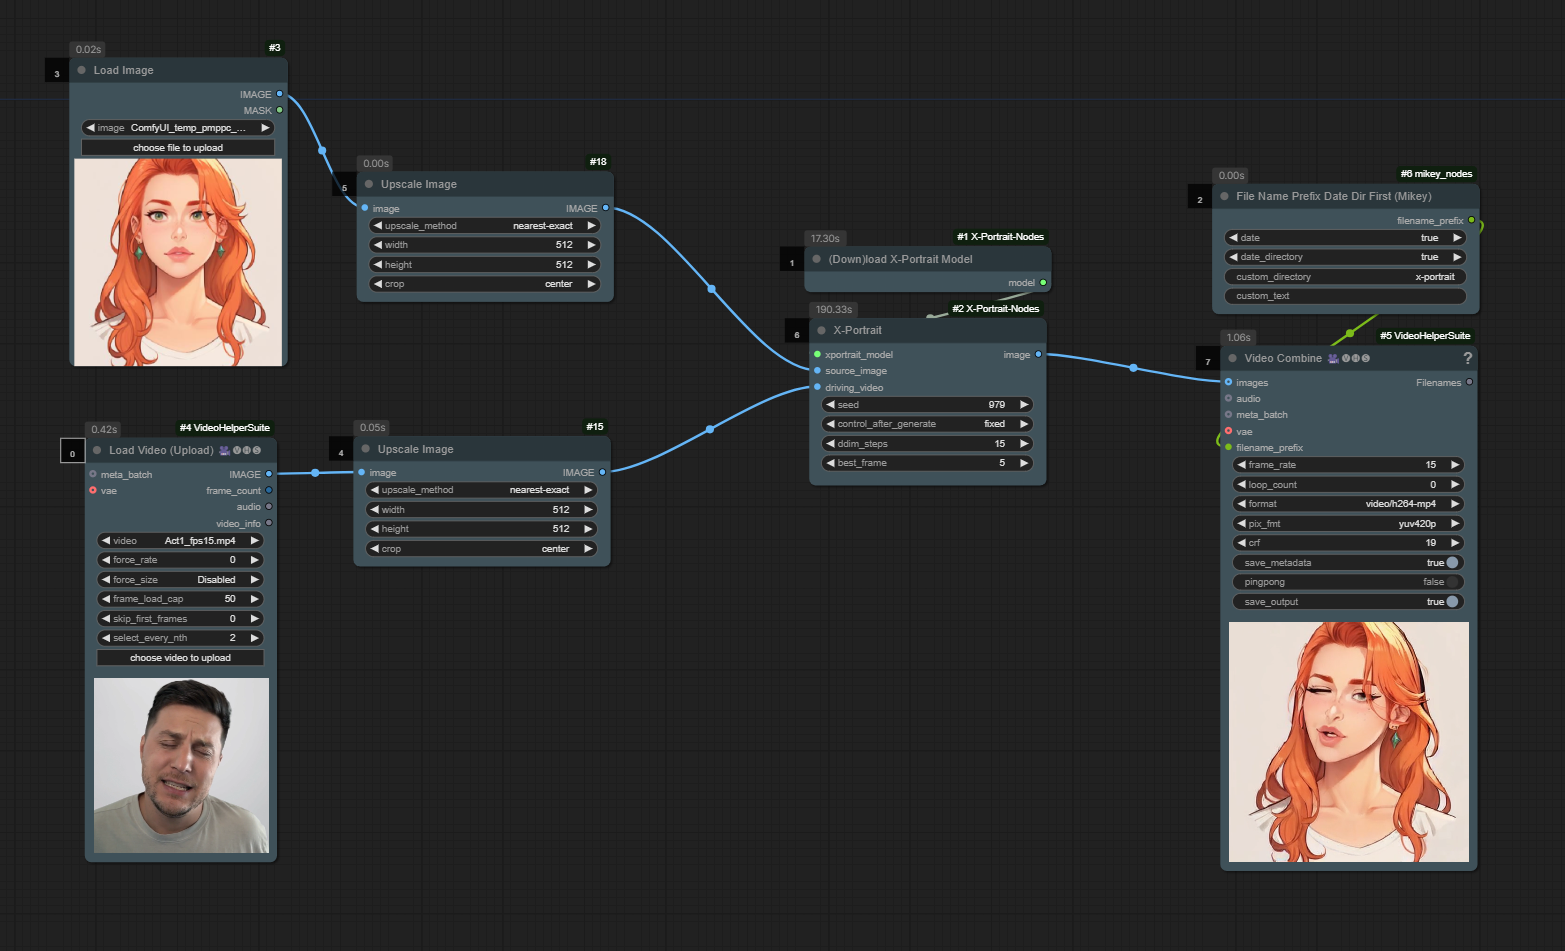
Animate portraits with an input video and a reference image using X-Portrait in ComfyUI.
<img src="assets/x-portrait-nodes.png" alt="x-portrait nodes" width="400"/>- source_image: the reference image for generation, should be square and max 512x512.
- driving_video: the driving video containing a face, should match the resolution of the source_image and max 512x512.
- seed: controls current generation seed
- ddim_steps: how many samples (steps) for generating the output. Diminishing returns after 15.
- best_frame: which frame of the driving_video most closely matches the source_image.
⭐ Example Workflow (in examples/)

🔧 Installation and Usage
- ComfyUI Manager:
- This node pack is available to install via the ComfyUI Manager. You can find it in the Custom Nodes section by searching for "X-Portrait" and clicking on the entry called "X-Portrait Nodes".
- Clone the repository:
- Navigate to ComfyUI/custom_nodes folder in terminal or command prompt.
- Clone the repo using the following command:
git clone https://github.com/akatz-ai/ComfyUI-X-Portrait-Nodes.git
- Restart ComfyUI