Nodes Browser
ComfyDeploy: How ComfyUI-ImageMetadataExtension works in ComfyUI?
What is ComfyUI-ImageMetadataExtension?
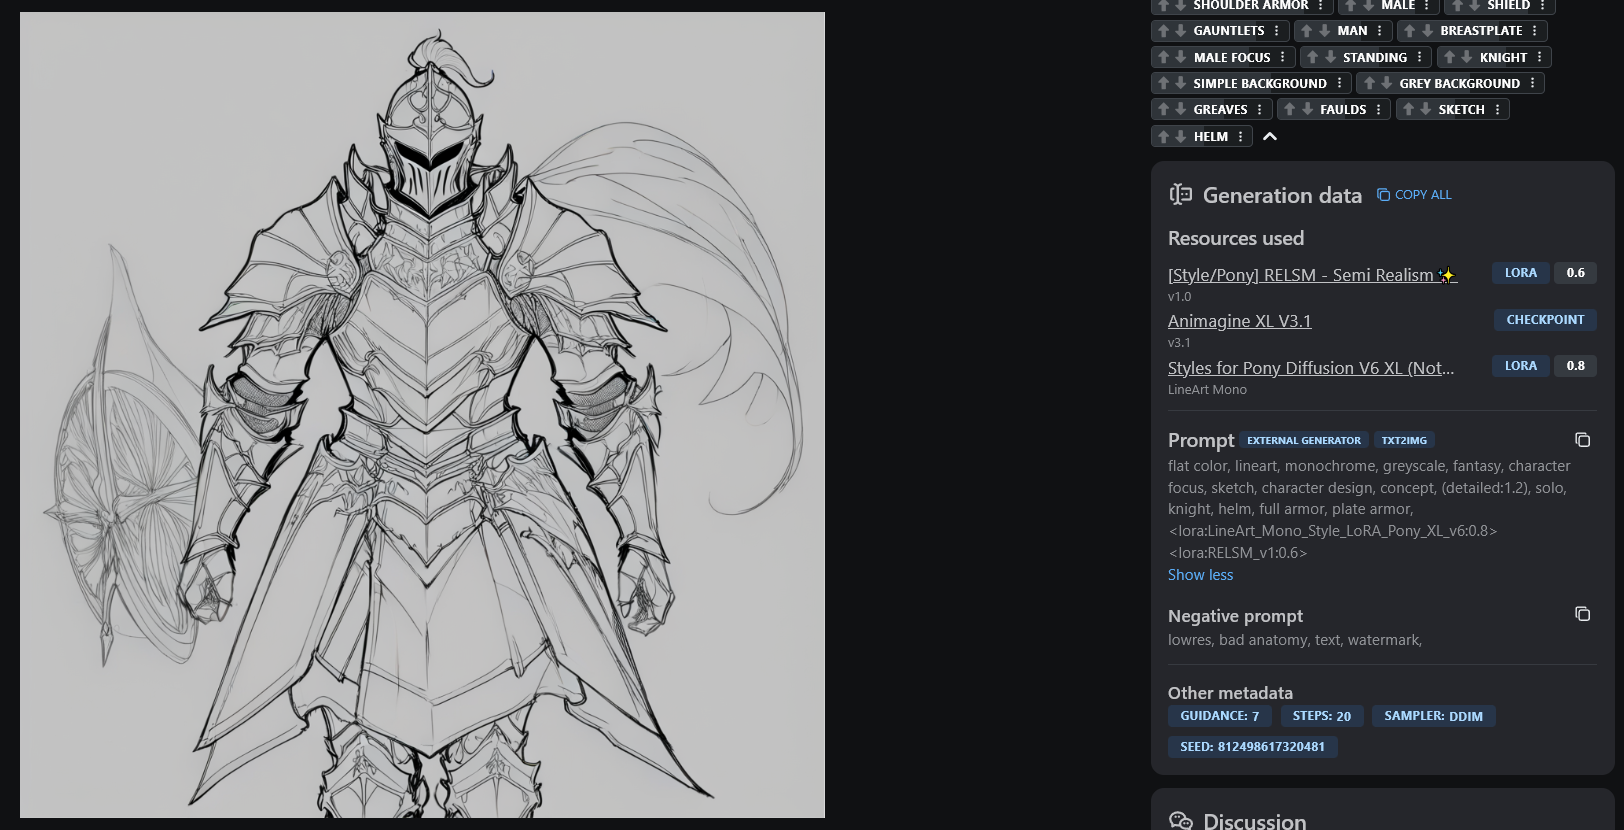
Custom node for ComfyUI. It adds additional metadata for saved images, ensuring compatibility with the Civitai website.
How to install it in ComfyDeploy?
Head over to the machine page
- Click on the "Create a new machine" button
- Select the
Editbuild steps - Add a new step -> Custom Node
- Search for
ComfyUI-ImageMetadataExtensionand select it - Close the build step dialig and then click on the "Save" button to rebuild the machine
ComfyUI-ImageMetadataExtension
Custom node for ComfyUI. It adds additional metadata for saved images, ensuring compatibility with the Civitai website.
This is a fork of nkchocoai/ComfyUI-SaveImageWithMetaData.
Key differences:
-
Simplified the node by removing unnecessary fields for general use.
-
Included metadata for LoRa weights.
-
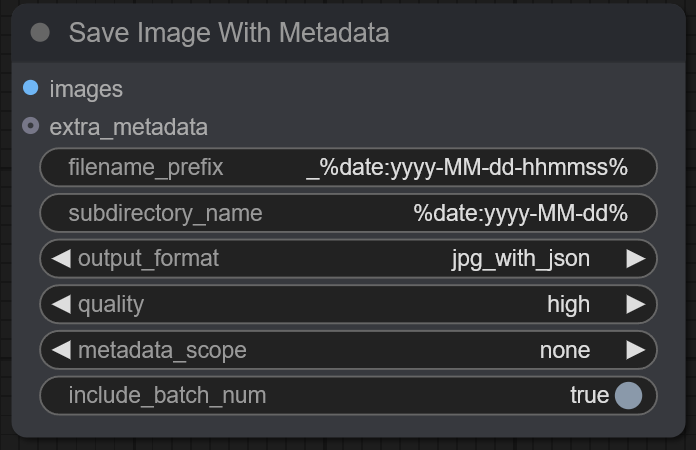
The
subdirectory_namefield allows you to specify a custom name or use mask values to create a subdirectory for saved images. For example, using the mask%date:yyyy-MM%(formatting options) will create a directory named with the current year and month (e.g.,2024-10), organizing your images by the date they were generated. -
The
output_formatdefines the saved image format:png,jpg,webp– saves in the specified format.png_with_json,jpg_with_json,webp_with_json– saves in the chosen format and writes workflow metadata to a JSON file with the same name.
-
The
qualityoption has the following levels:max/lossless WebP– 100%high– 80%medium– 60%low– 30%
(Lower quality, smaller file size. PNG images ignore this setting.)
-
The
metadata_scopeoption controls metadata inclusion:full– default metadata + extra metadata.default– same as the SaveImage node.workflow_only– workflow metadata only.none– no metadata.
Installation
Recommended Installation
Use the ComfyUI-Manager to install.
ComfyUI-ImageMetadataExtension
Manual Installation
- Navigate to the
custom_nodesdirectory inside your ComfyUI folder. - Clone this repository:
git clone https://github.com/edelvarden/ComfyUI-ImageMetadataExtension.git
Usage
Basic usage looks like (workflow.json):
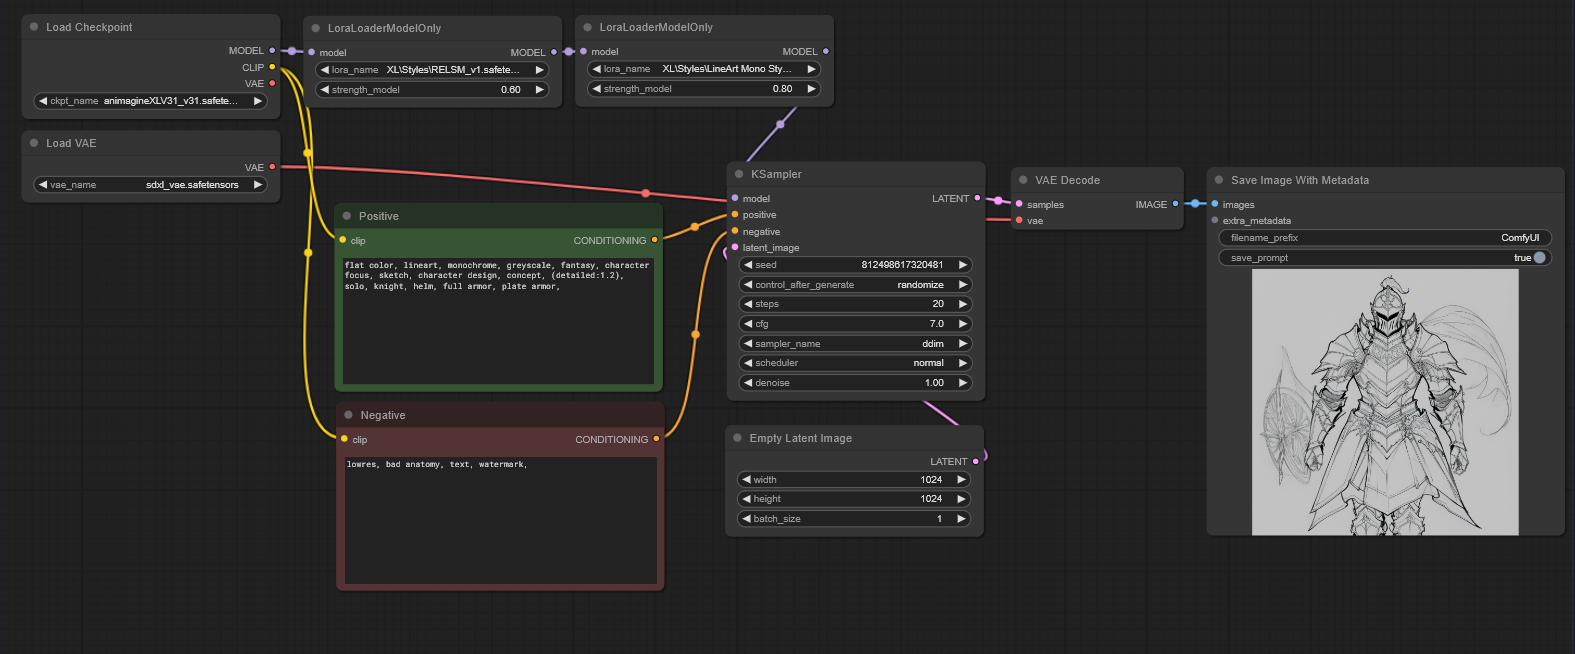
Lora strings are automatically added to the prompt area, allowing the Civitai website to understand the weights you used. Other metadata is also successfully included.
Formatting Options
- The
filename_prefixandsubdirectory_namesupport the following options:
| Key | Information to be Replaced | | --------------- | ------------------------------------- | | %seed% | Seed value | | %width% | Image width | | %height% | Image height | | %pprompt% | Positive prompt | | %pprompt:[n]% | First n characters of positive prompt | | %nprompt% | Negative prompt | | %nprompt:[n]% | First n characters of negative prompt | | %model% | Checkpoint name | | %model:[n]% | First n characters of checkpoint name | | %date% | Date of generation (yyyyMMddhhmmss) | | %date:[format]% | Date of generation |
- See the following table for the identifiers specified by
[format]in%date:[format]%:
| Identifier | Description | | ---------- | --------------------------- | | yyyy | Year | | yy | Short year format | | MM | Month | | dd | Day | | hh | Hour | | mm | Minute | | ss | Second |