Nodes Browser
ComfyDeploy: How comfyui-finegrain works in ComfyUI?
What is comfyui-finegrain?
ComfyUI custom nodes to interact with the Finegrain API.
How to install it in ComfyDeploy?
Head over to the machine page
- Click on the "Create a new machine" button
- Select the
Editbuild steps - Add a new step -> Custom Node
- Search for
comfyui-finegrainand select it - Close the build step dialig and then click on the "Save" button to rebuild the machine
comfyui-finegrain
Finegrain API ComfyUI custom nodes.
Account creation (Prerequisite)
To use these custom nodes, you need Finegrain API credentials:
- Sign up for an account at https://editor.finegrain.ai/signup:

- Once installed (see below), update
config.iniwith your Finegrain API credentials:
[finegrain]
credentials = myemail@email.com:my_password
priority = low
timeout = 60
[!Note]
credentialscan either beemail:passwordor an API key, which you can create in Account Settings > New API key
Installation
Installing the nodes is pretty straight forward, check out our Discord server if you need help.
Requirements
-
Ensure you have Python 3.12 (or later) installed.
-
Ensure you have Git installed.
-
Ensure you have ComfyUI installed.
ComfyUI Manager installation (recommended)
-
Ensure you have ComfyUI Manager installed.
-
In ComfyUI, open the manager by clicking the
Managerbutton in the top right corner. -
Click
Custom Nodes Managerin the menu. -
Search for
comfyui-finegrainin the search bar and click theInstallbutton.
Alternatively, if you load one of the workflows below, you should be able to install the nodes directly
by clicking the Install Missing Custom Nodes button in the Manager's menu.
Comfy Registry installation
The nodes are published at https://registry.comfy.org/publishers/finegrain/nodes/comfyui-finegrain.
-
Ensure you have Comfy CLI installed.
-
Install the custom nodes using Comfy CLI:
comfy node registry-install comfyui-finegrain
The above command should automatically install the nodes' requirements. If it somehow doesn't, you can manually install them with:
On Linux:
# ensure you activated the python virtual environment used by ComfyUI
pip install -r custom_nodes/comfyui-finegrain/requirements.txt
On Windows:
.\python_embeded\Scripts\pip.exe install -r .\ComfyUI\custom_nodes\comfyui-finegrain\requirements.txt
Manual installation
The nodes are published at https://registry.comfy.org/publishers/finegrain/nodes/comfyui-finegrain.
- Clone the repository:
cd custom_nodes
git clone https://github.com/finegrain-ai/comfyui-finegrain.git
- Install the nodes' requirements:
On Linux:
# ensure you activated the python virtual environment used by ComfyUI
pip install -r custom_nodes/comfyui-finegrain/requirements.txt
On Windows:
.\python_embeded\Scripts\pip.exe install -r .\ComfyUI\custom_nodes\comfyui-finegrain\requirements.txt
Workflow examples
[!Note] All the below workflow examples were made using comfyui-finegrain v2.0.0. <br> To import them into ComfyUI, drag and drop the .png file into the ComfyUI window.
All our workflows are also available on OpenArt: https://openart.ai/workflows/profile/finegrain
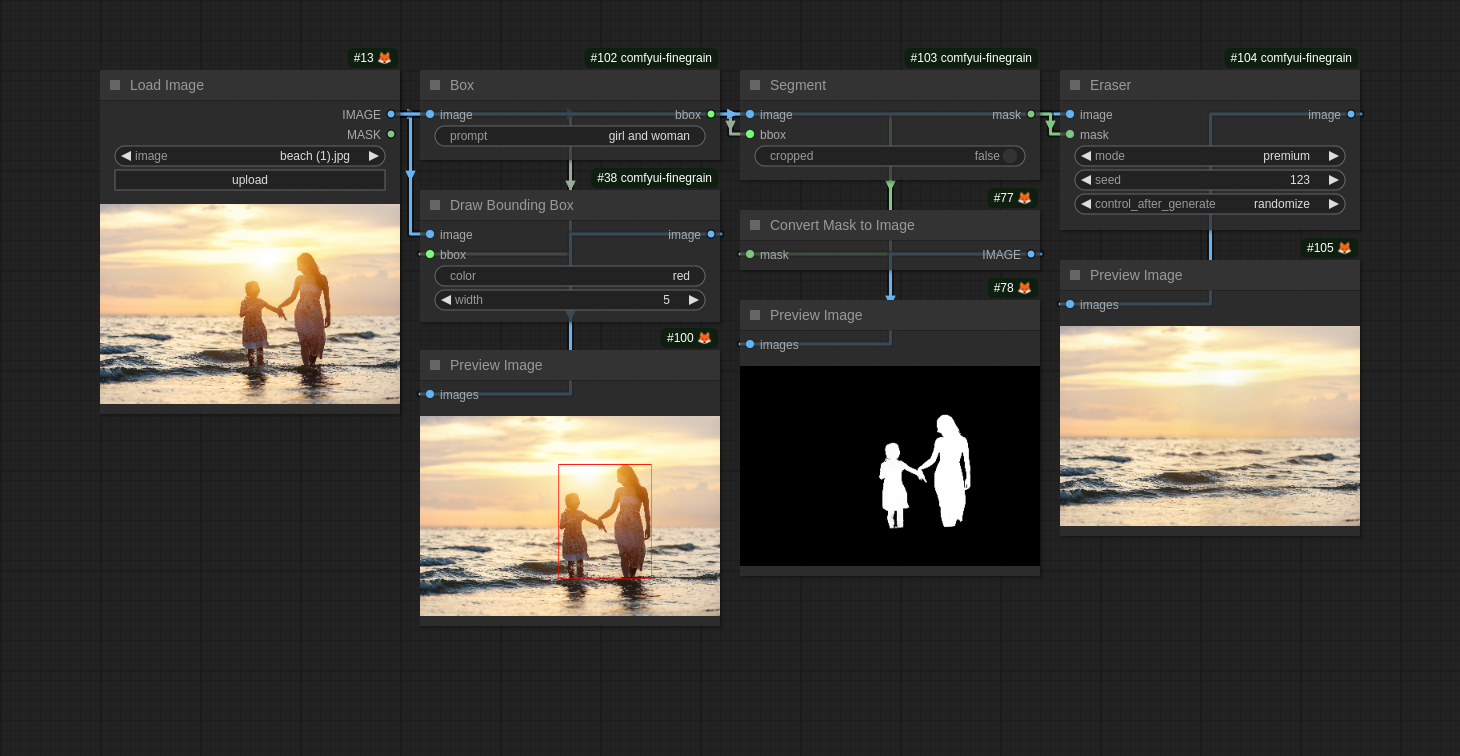
Prompt to erase
Instantly remove any object, along with its shadows and reflections, just by naming it.
Prompt to cutout
Instantly isolate any object in a photo into a perfect cutout, just by naming it.

Prompt to recolor
Instantly change the color of any object in a photo, even through occlusions, just by naming it.

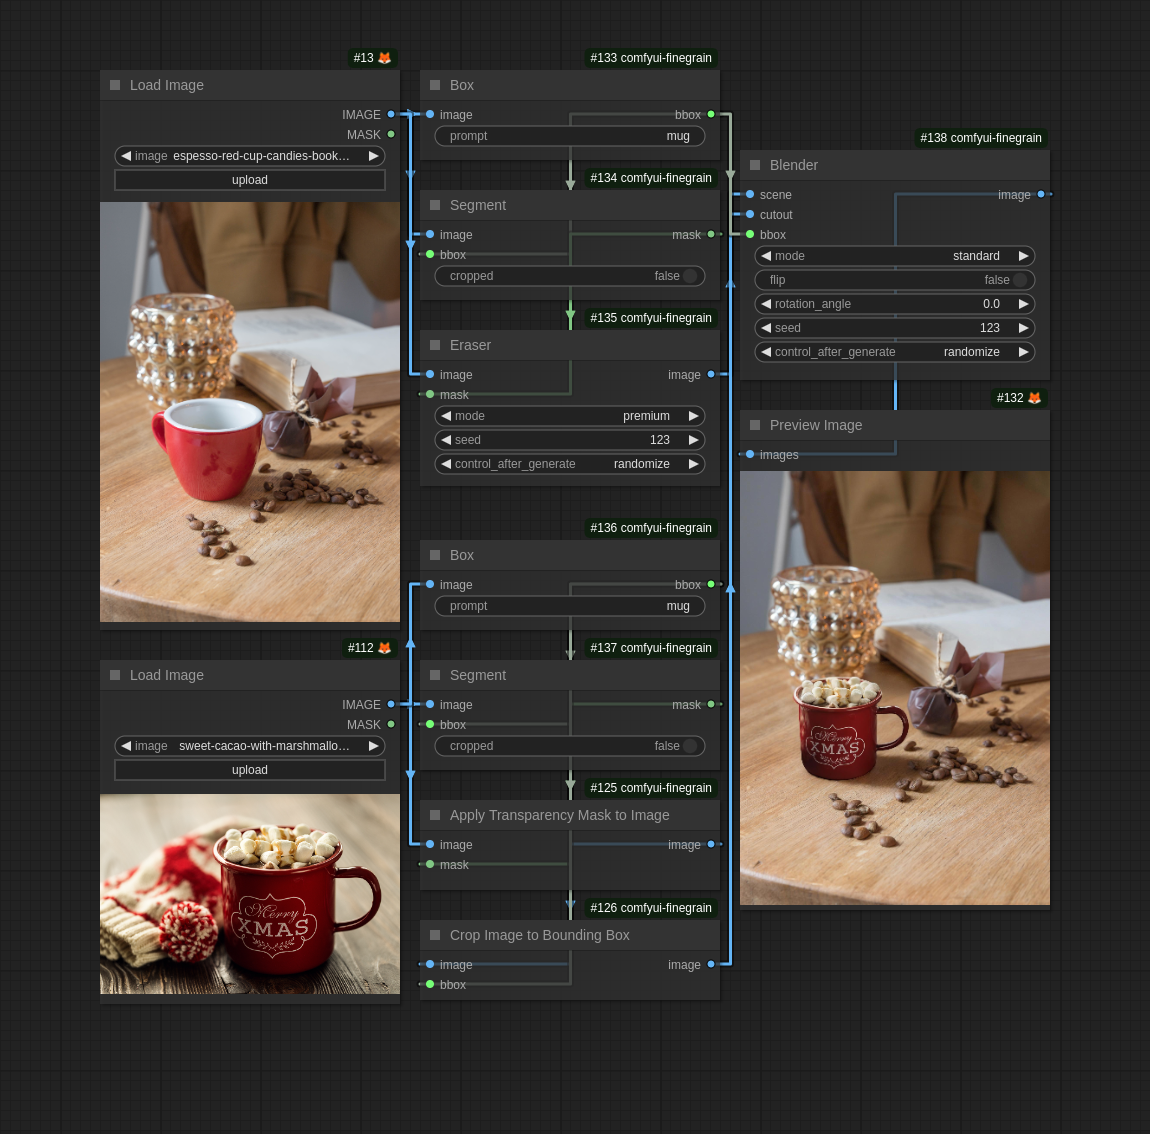
Swap
Replace any object in a photo with another, recreating shadows and reflections so naturally it looks like the new object was always there — perfectly preserved in every detail.
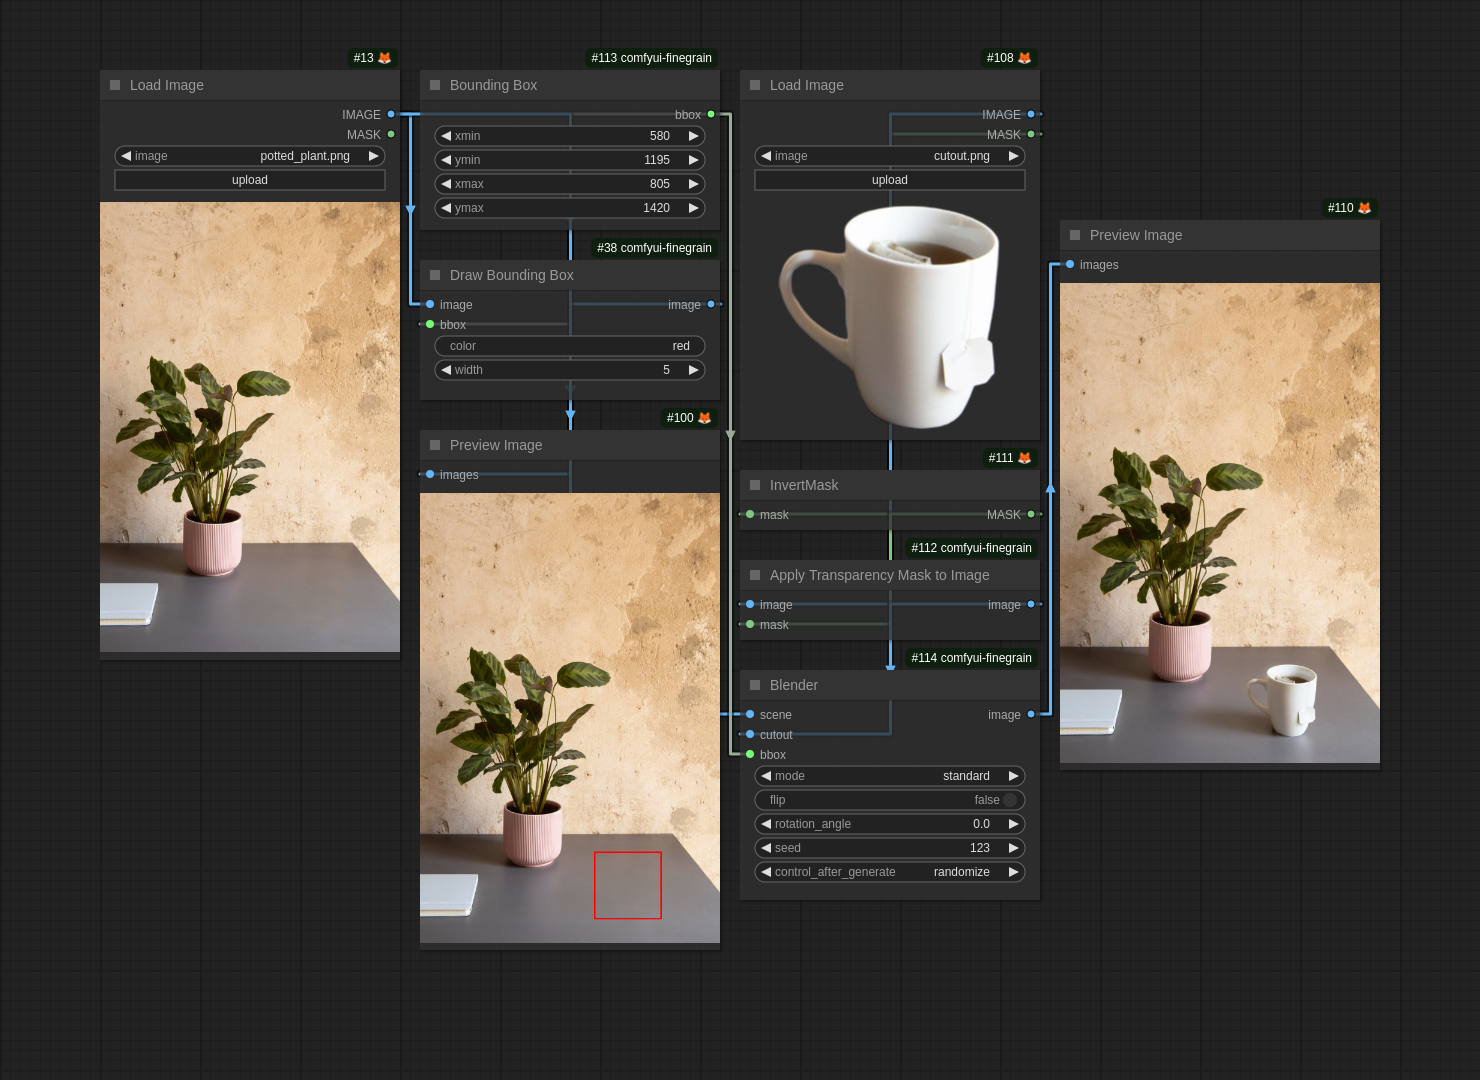
Blend
Seamlessly integrate any object into a scene, recreating shadows and reflections for a result so natural it looks like it was always there — perfectly preserved in every detail.
Generate packshot
Generate Packshot – Transform any mundane photo into a stunning white-background image with a perfectly natural shadow.

Remove background
Remove Background – Our pixel-perfect, high-resolution take on a classic, effortlessly extracting the main object from its background.
