Nodes Browser
ComfyDeploy: How ComfyUI-SendToDiscord works in ComfyUI?
What is ComfyUI-SendToDiscord?
ComfyUI-SendToDiscord is a custom node for ComfyUI that simplifies sending preview images to Discord via webhooks. It supports both single-image uploads and batch mode, making it an efficient tool for sharing your generated images directly with your Discord server.
How to install it in ComfyDeploy?
Head over to the machine page
- Click on the "Create a new machine" button
- Select the
Editbuild steps - Add a new step -> Custom Node
- Search for
ComfyUI-SendToDiscordand select it - Close the build step dialig and then click on the "Save" button to rebuild the machine
ComfyUI-SendToDiscord
ComfyUI-SendToDiscord is a custom node for ComfyUI that simplifies sending preview images to Discord via webhooks. It supports both single-image uploads and batch mode, making it an efficient tool for sharing your generated images directly with your Discord server.
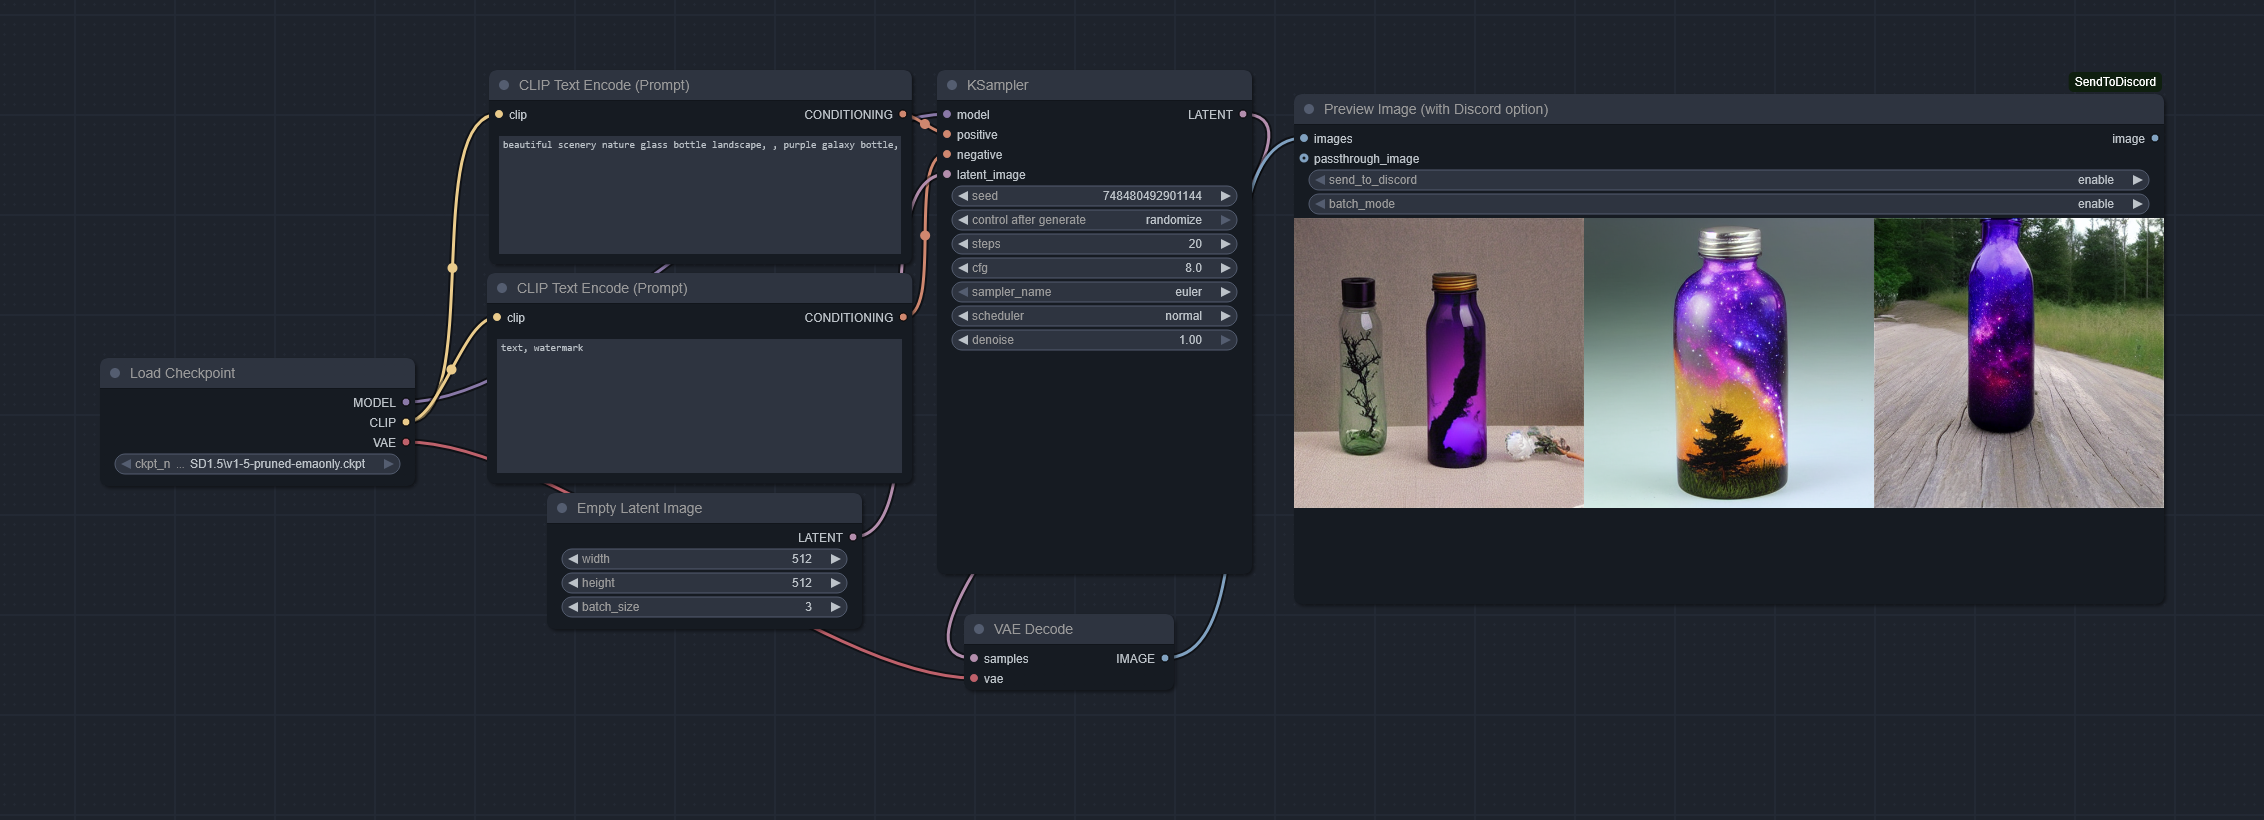
- Workflow included in the image
Features
- Send individual or batches of images directly to a Discord channel via webhooks.
- Includes metadata (e.g., prompts and additional PNG information) in saved images.
- Configurable batch size and compression level.
- Simple setup with a
config.inifile for webhook URL configuration.
Requirements
- Python 3.10+
Pillow,requests, andnumpylibraries (automatically installed viarequirements.txt).
Installation
- Find it at ComfyUI Registry
- Or using comfy-cli:
comfy node registry-install comfyui-sendtodiscord
Manual Install
- Clone the repository into your ComfyUI custom nodes directory:
git clone https://github.com/gmorks/ComfyUI-SendToDiscord.git - Install dependencies:
cd ComfyUI-SendToDiscord pip install -r requirements.txt - Configure the
config.inifile:- Locate the
config.ini.templatefile in the root directory. - Copy it and rename it to
config.ini:cp config.ini.template config.ini - Open the
config.inifile and replace the placeholder with your Discord webhook URL:; Configuration file for ComfyUI-SendToDiscord ; Replace 'your-webhook-url-here' with your Discord webhook URL. ; You can get a webhook URL by going to your Discord server settings, then Integrations, then Webhooks, then New Webhook. [Discord] webhook_url = your-webhook-url-here
- Locate the
Dependencies
This node has been tested with the following Python packages:
Pillow>=9.5.0requests>=2.28.2numpy>=1.23.5
If you encounter issues, please ensure these versions or higher are installed, or consult the official ComfyUI documentation for compatible dependencies.
Usage
- Open ComfyUI.
- Add the "Preview Image (with Discord option)" node to your workflow.
- Configure the node parameters:
- Send to Discord: Enable or disable image uploads to Discord.
- Batch Mode: Enable to accumulate images and send them in a single batch.
- Generate your images, and they will be uploaded automatically to the specified Discord channel.
Configuration
The node uses the following parameters:
- images: The list of images to process.
- send_to_discord: Enable or disable sending images to Discord (enable/disable).
- batch_mode: Accumulate images and send them as a batch (enable/disable).
Example Workflow
You can add this node after your image generation process to preview and share your results directly.
License
This project is licensed under the MIT License. See the LICENSE file for details.