Nodes Browser
ComfyDeploy: How 😸 YFG Comical Nodes works in ComfyUI?
What is 😸 YFG Comical Nodes?
Utility custom nodes for special effects, image manipulation and quality of life tools.
How to install it in ComfyDeploy?
Head over to the machine page
- Click on the "Create a new machine" button
- Select the
Editbuild steps - Add a new step -> Custom Node
- Search for
😸 YFG Comical Nodesand select it - Close the build step dialig and then click on the "Save" button to rebuild the machine
YFG Comical ComfyUI Custom Nodes
</div>A collection of ComfyUI utility custom nodes. Hope these provide some functionality not offered in the core app or other custom nodes. Some nodes take existing nodes and add enhanced functionality and/or improved quality of life features.
<small><i><a href='http://ecotrust-canada.github.io/markdown-toc/'>Table of contents generated with markdown-toc</a></i></small>
Nodes
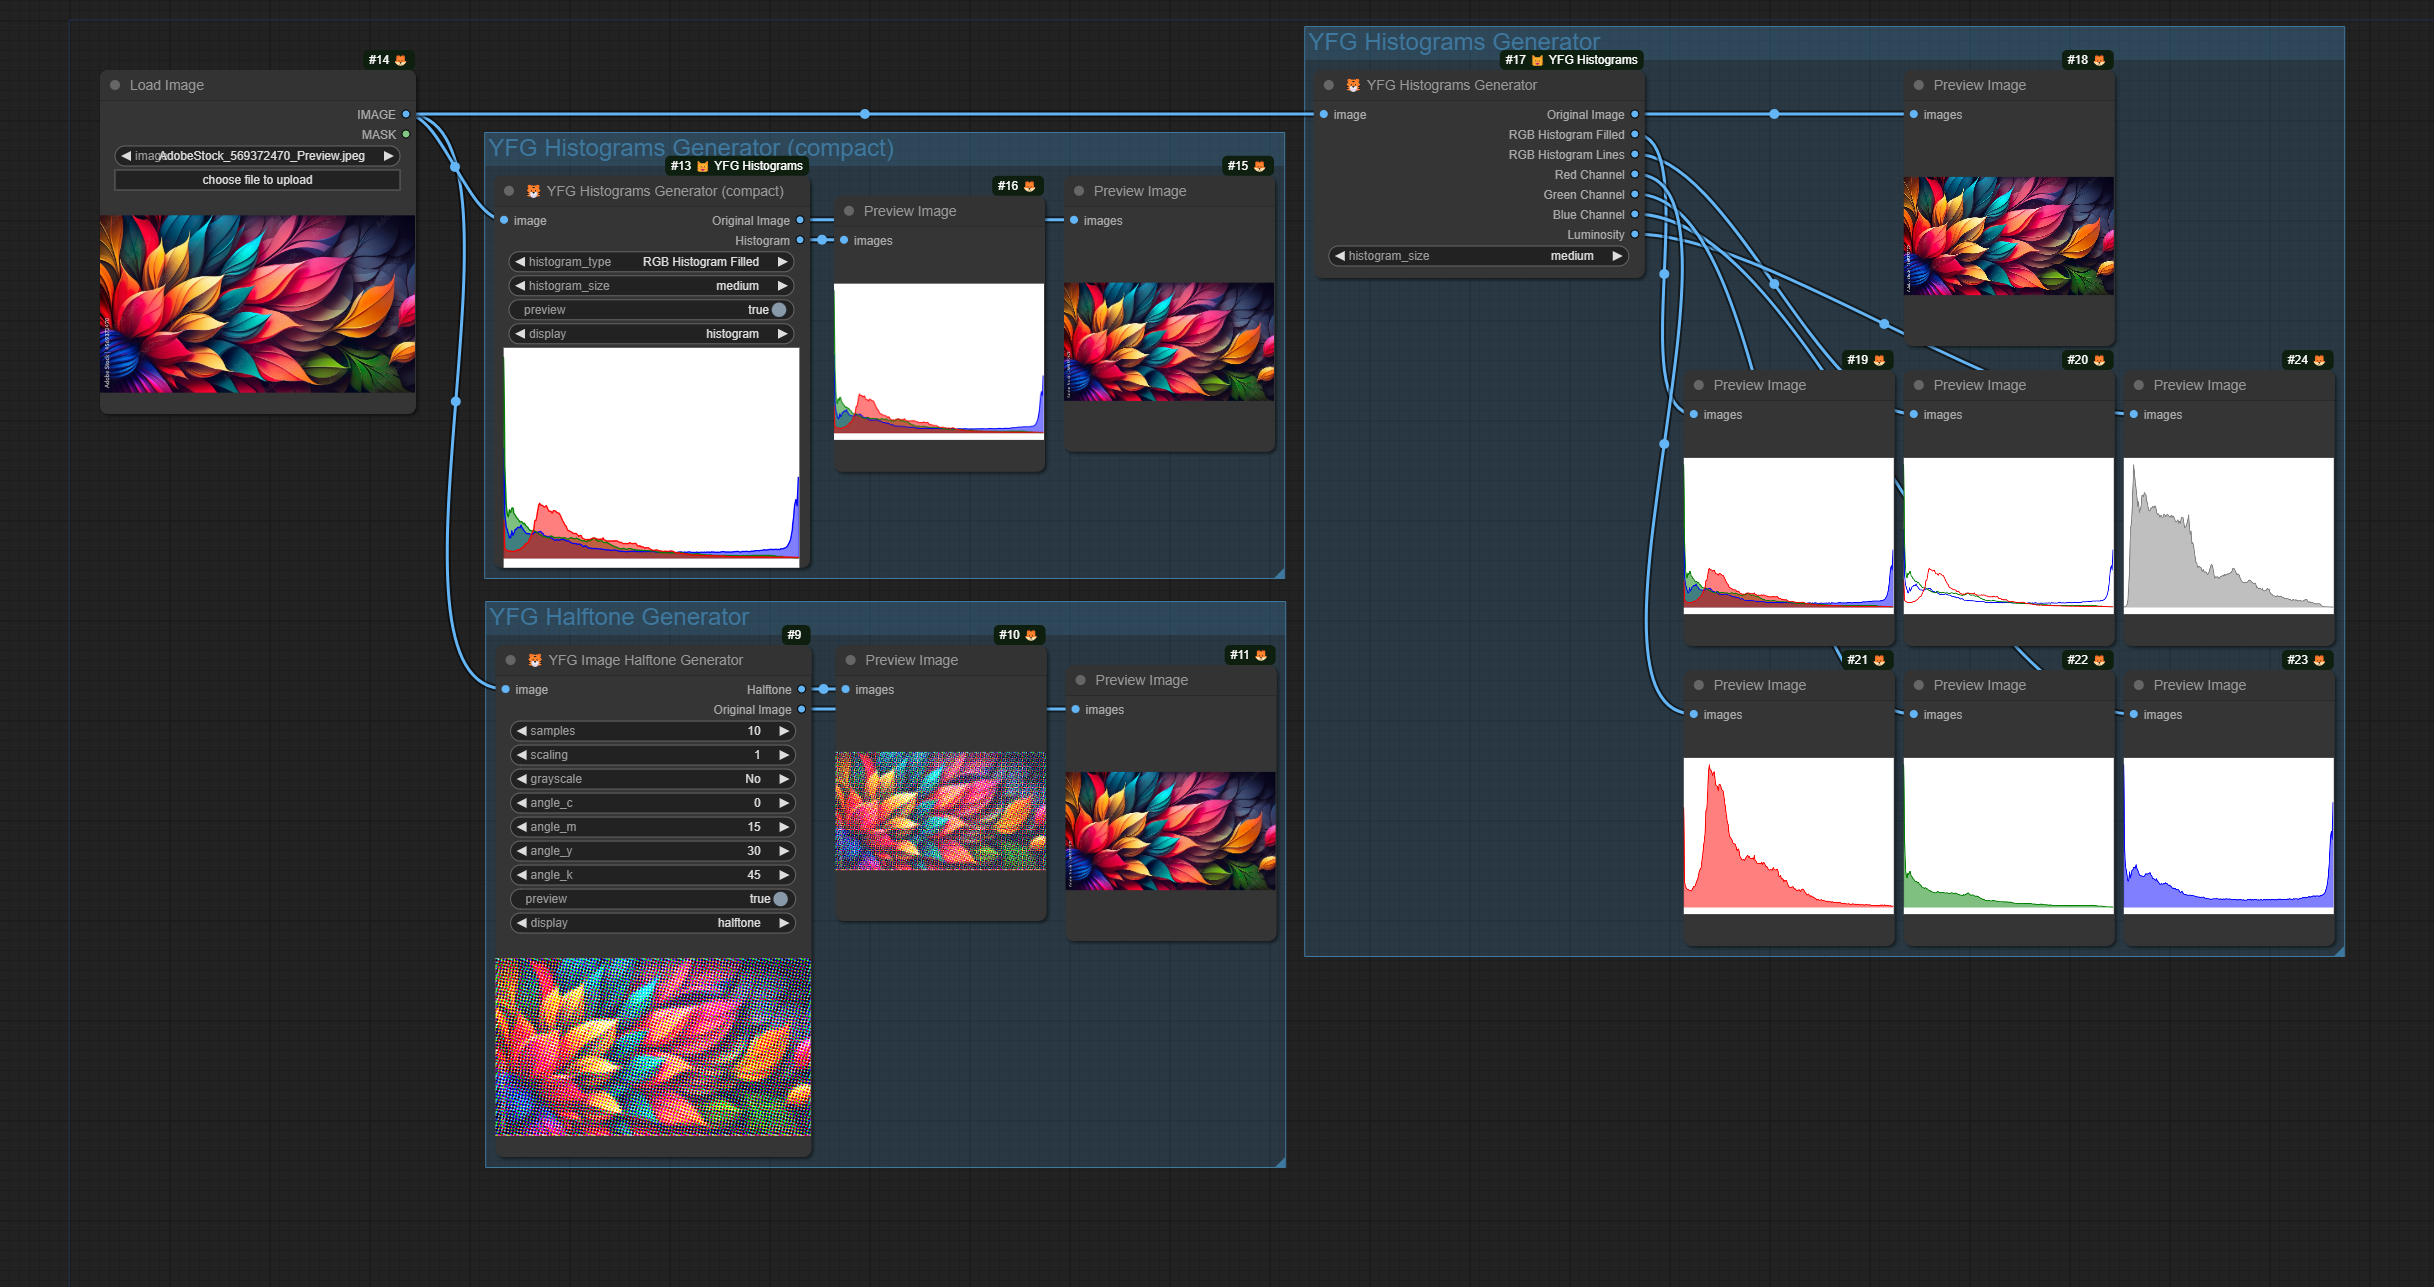
Image Histograms Generator
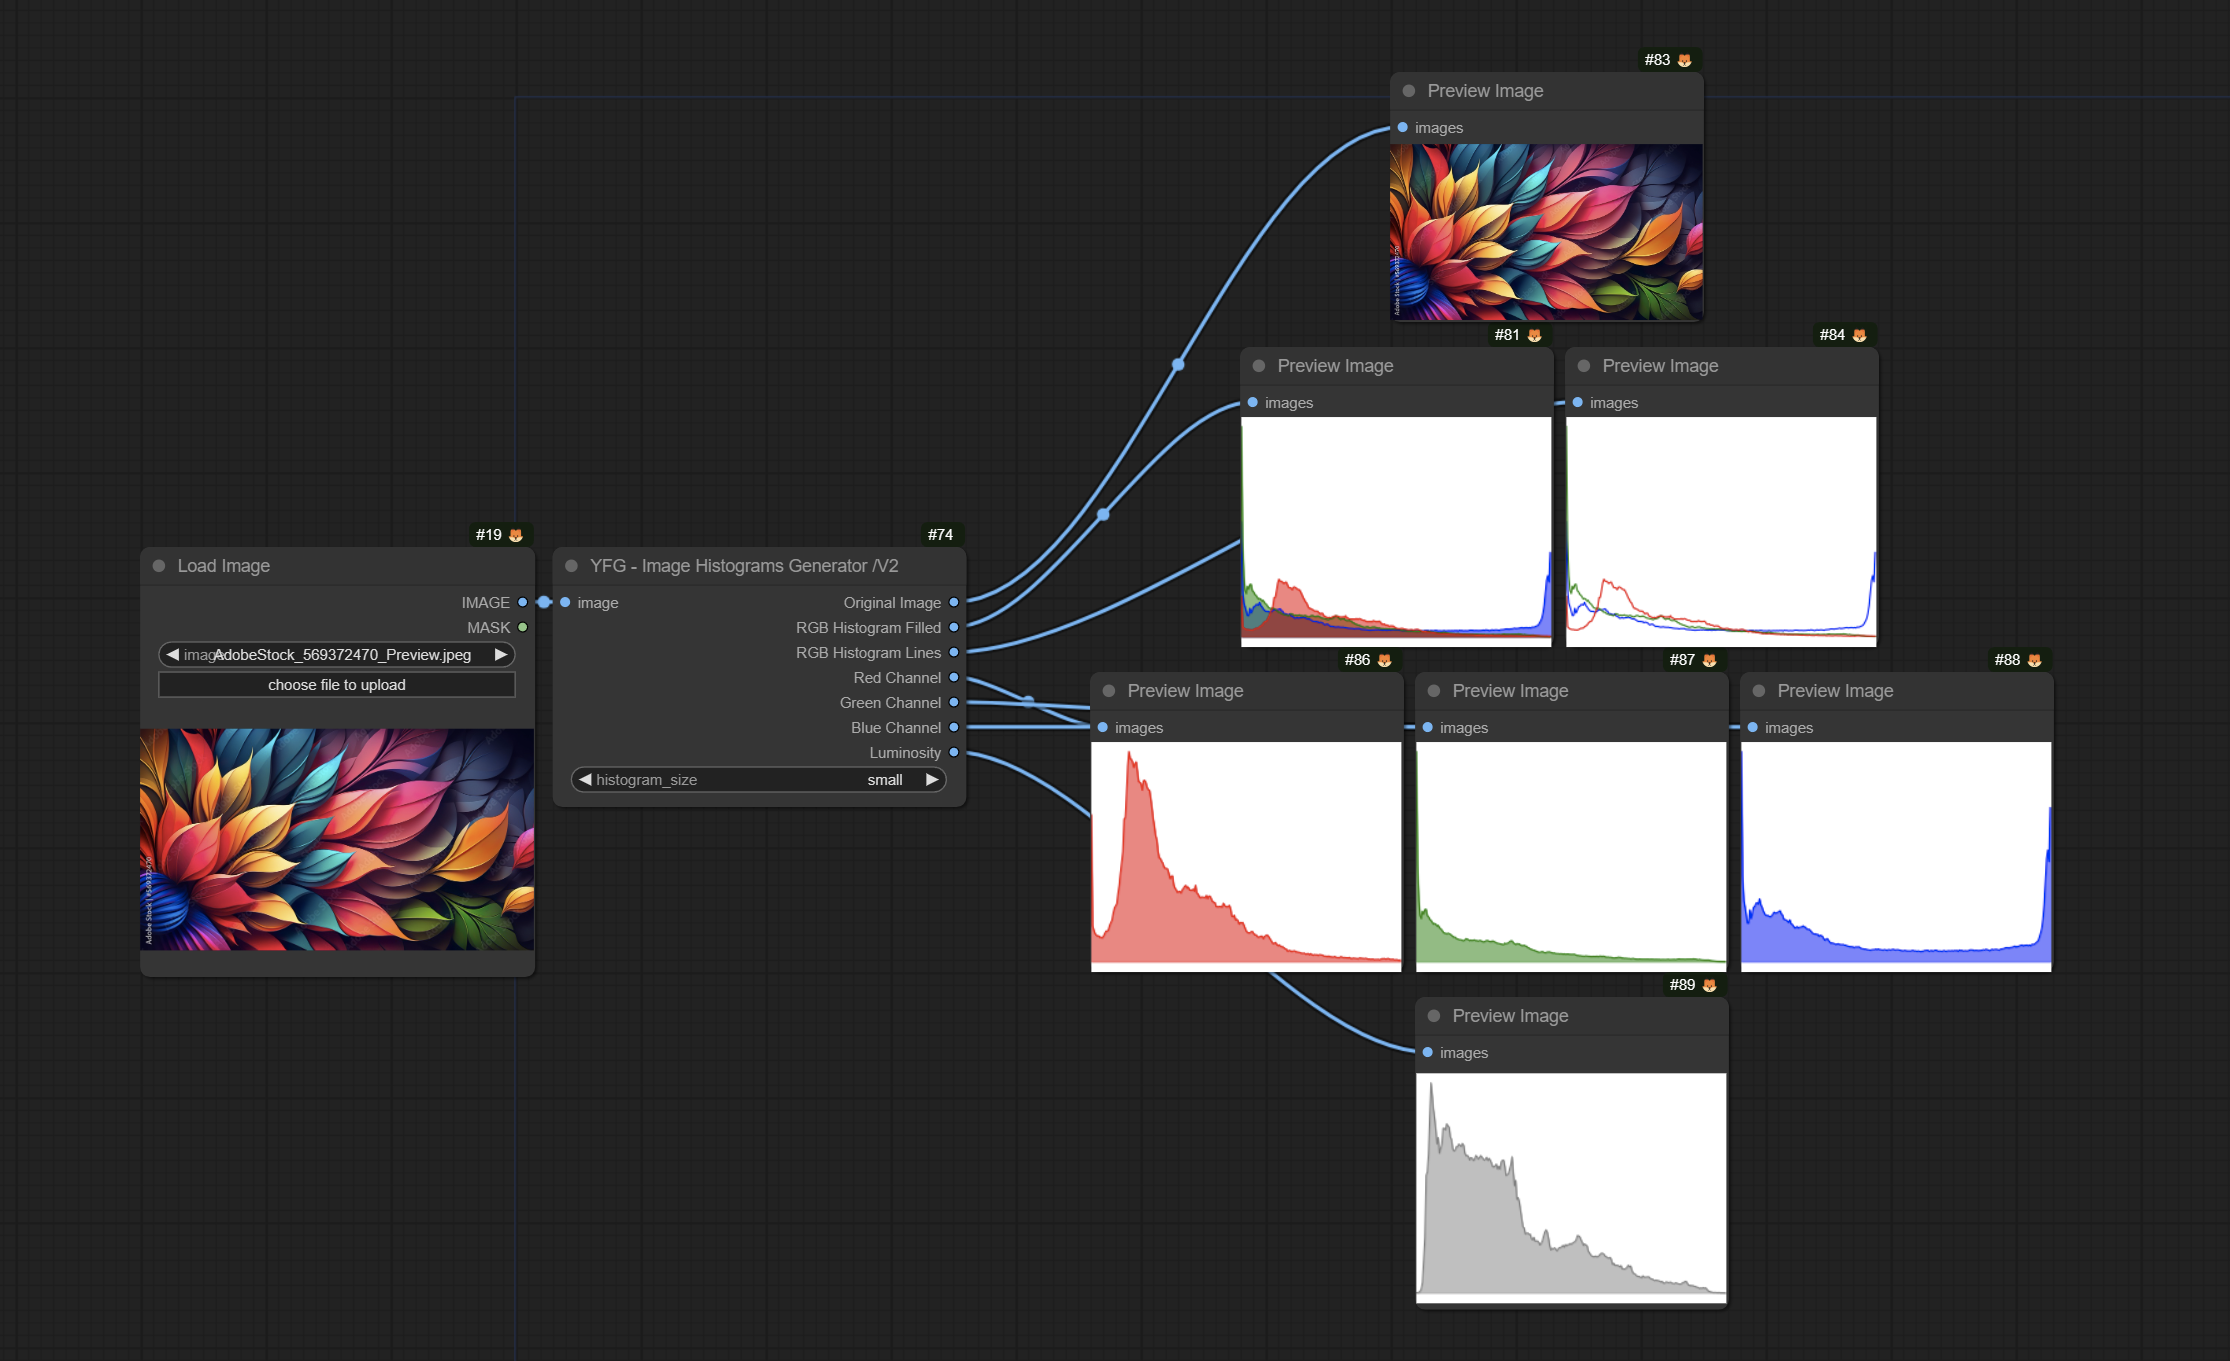
This node allows you to take an input image, calculate its histogram for the color channels as well as the L channel and display a graphical representation of the data.
Image Histograms Generator (compact)

This version of the node reduces the number of outputs to just two: Original and Histogram. You have a choice of using the node as a preview node and chose what to display in the node: The selected Histogram or the Orginal Image. The Histogram output will send the selected Histogram to the next node.
Image Halftone Generator
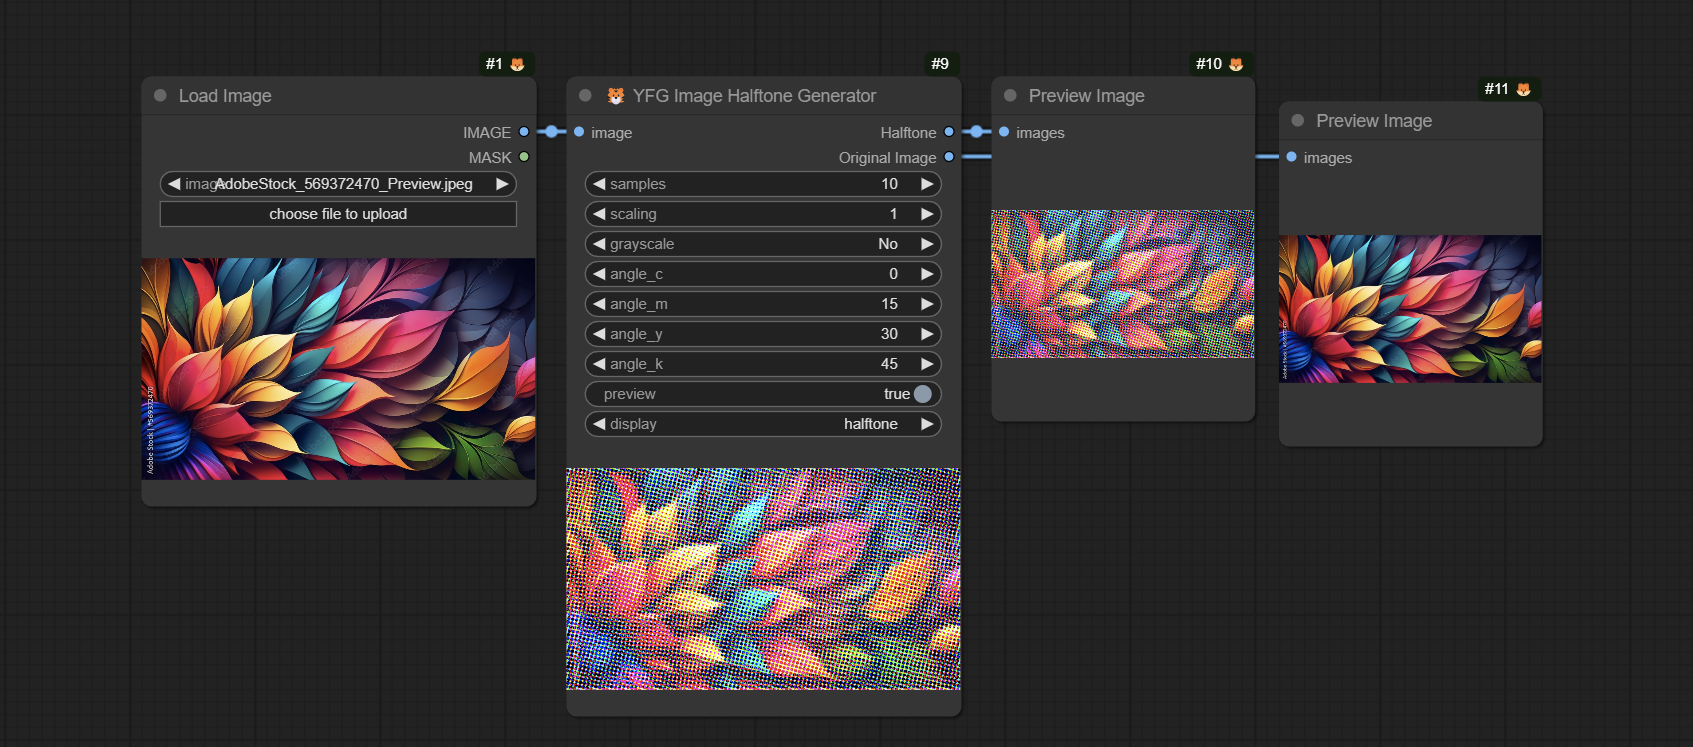
This node is based on original code by Phil Gyford https://github.com/philgyford/python-halftone and ComfyUI node by aimingfail https://civitai.com/models/143293/image2halftone-node-for-comfyui
This node generates a halftone image from the input image. It can self-display and send the output to other downstream nodes. You have a choice of displaying the Original Image or the generated Halftone image. The display can also be turned off.
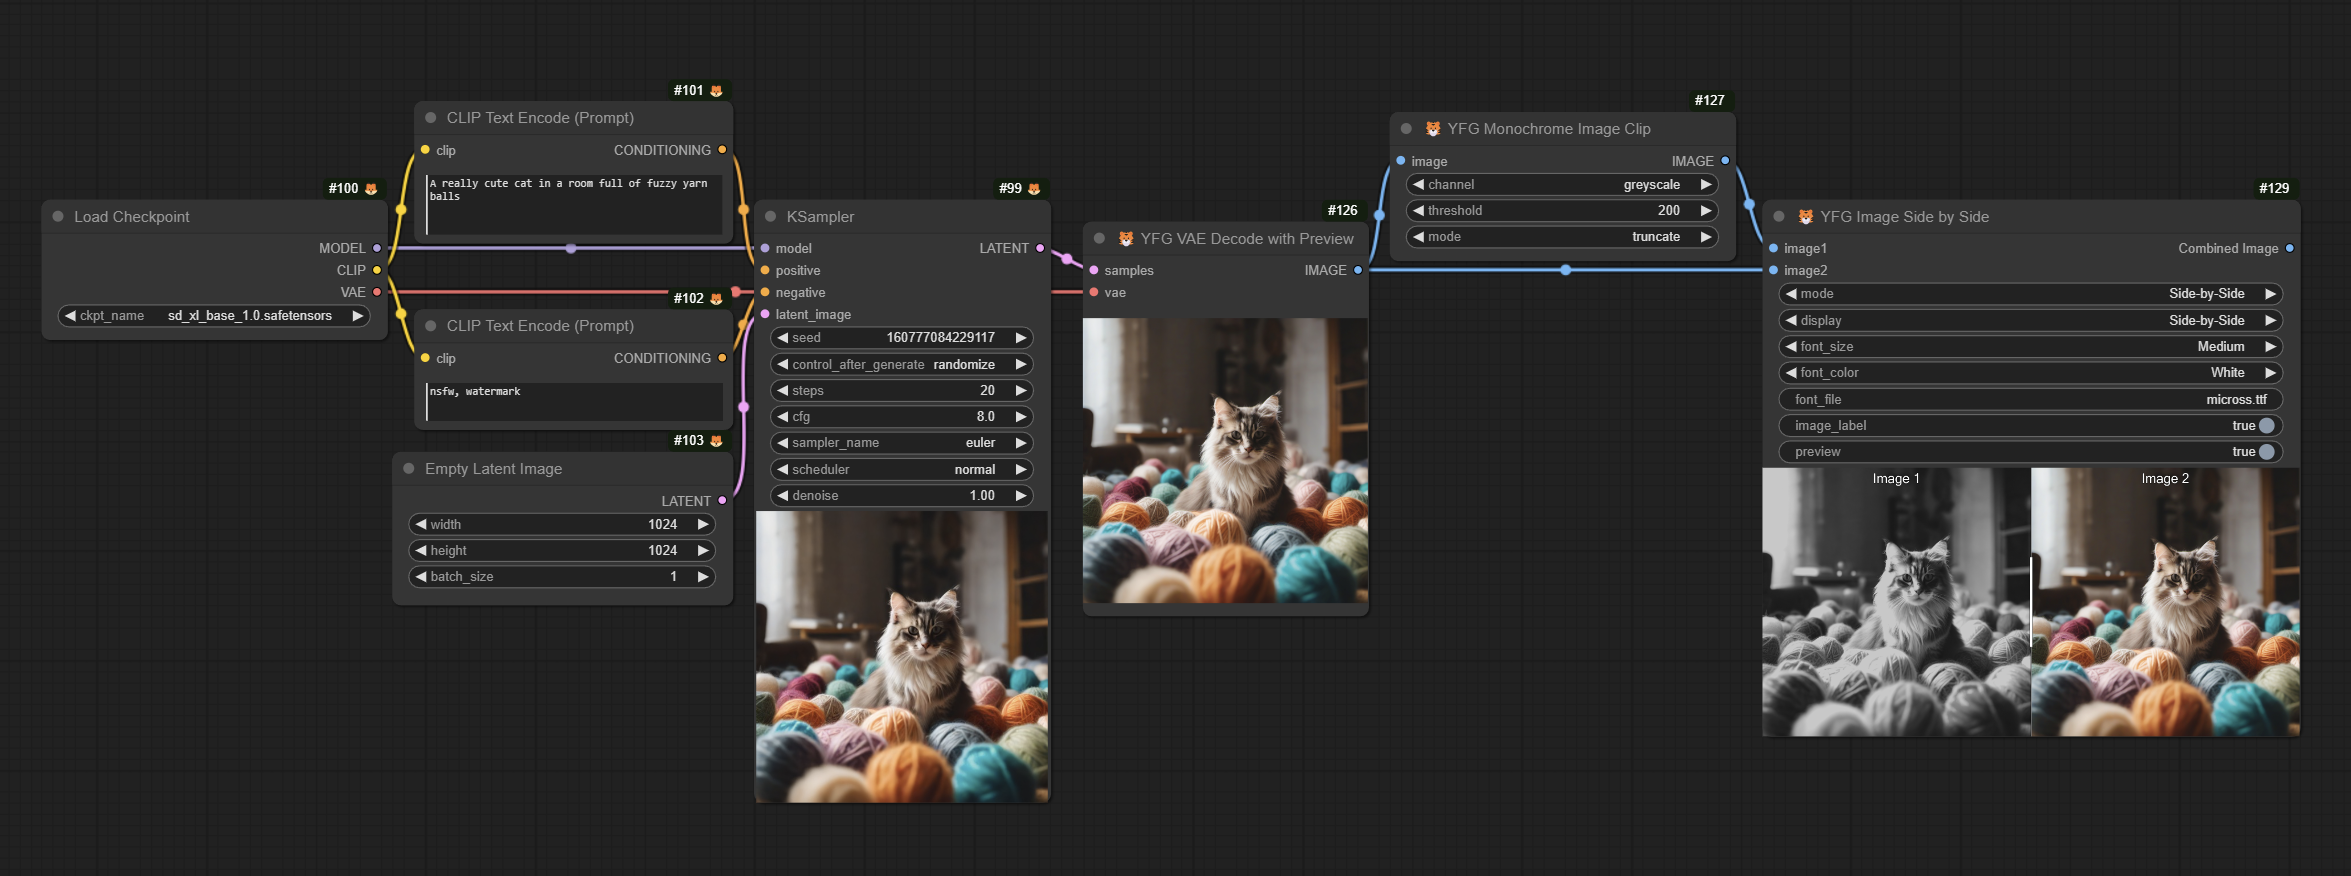
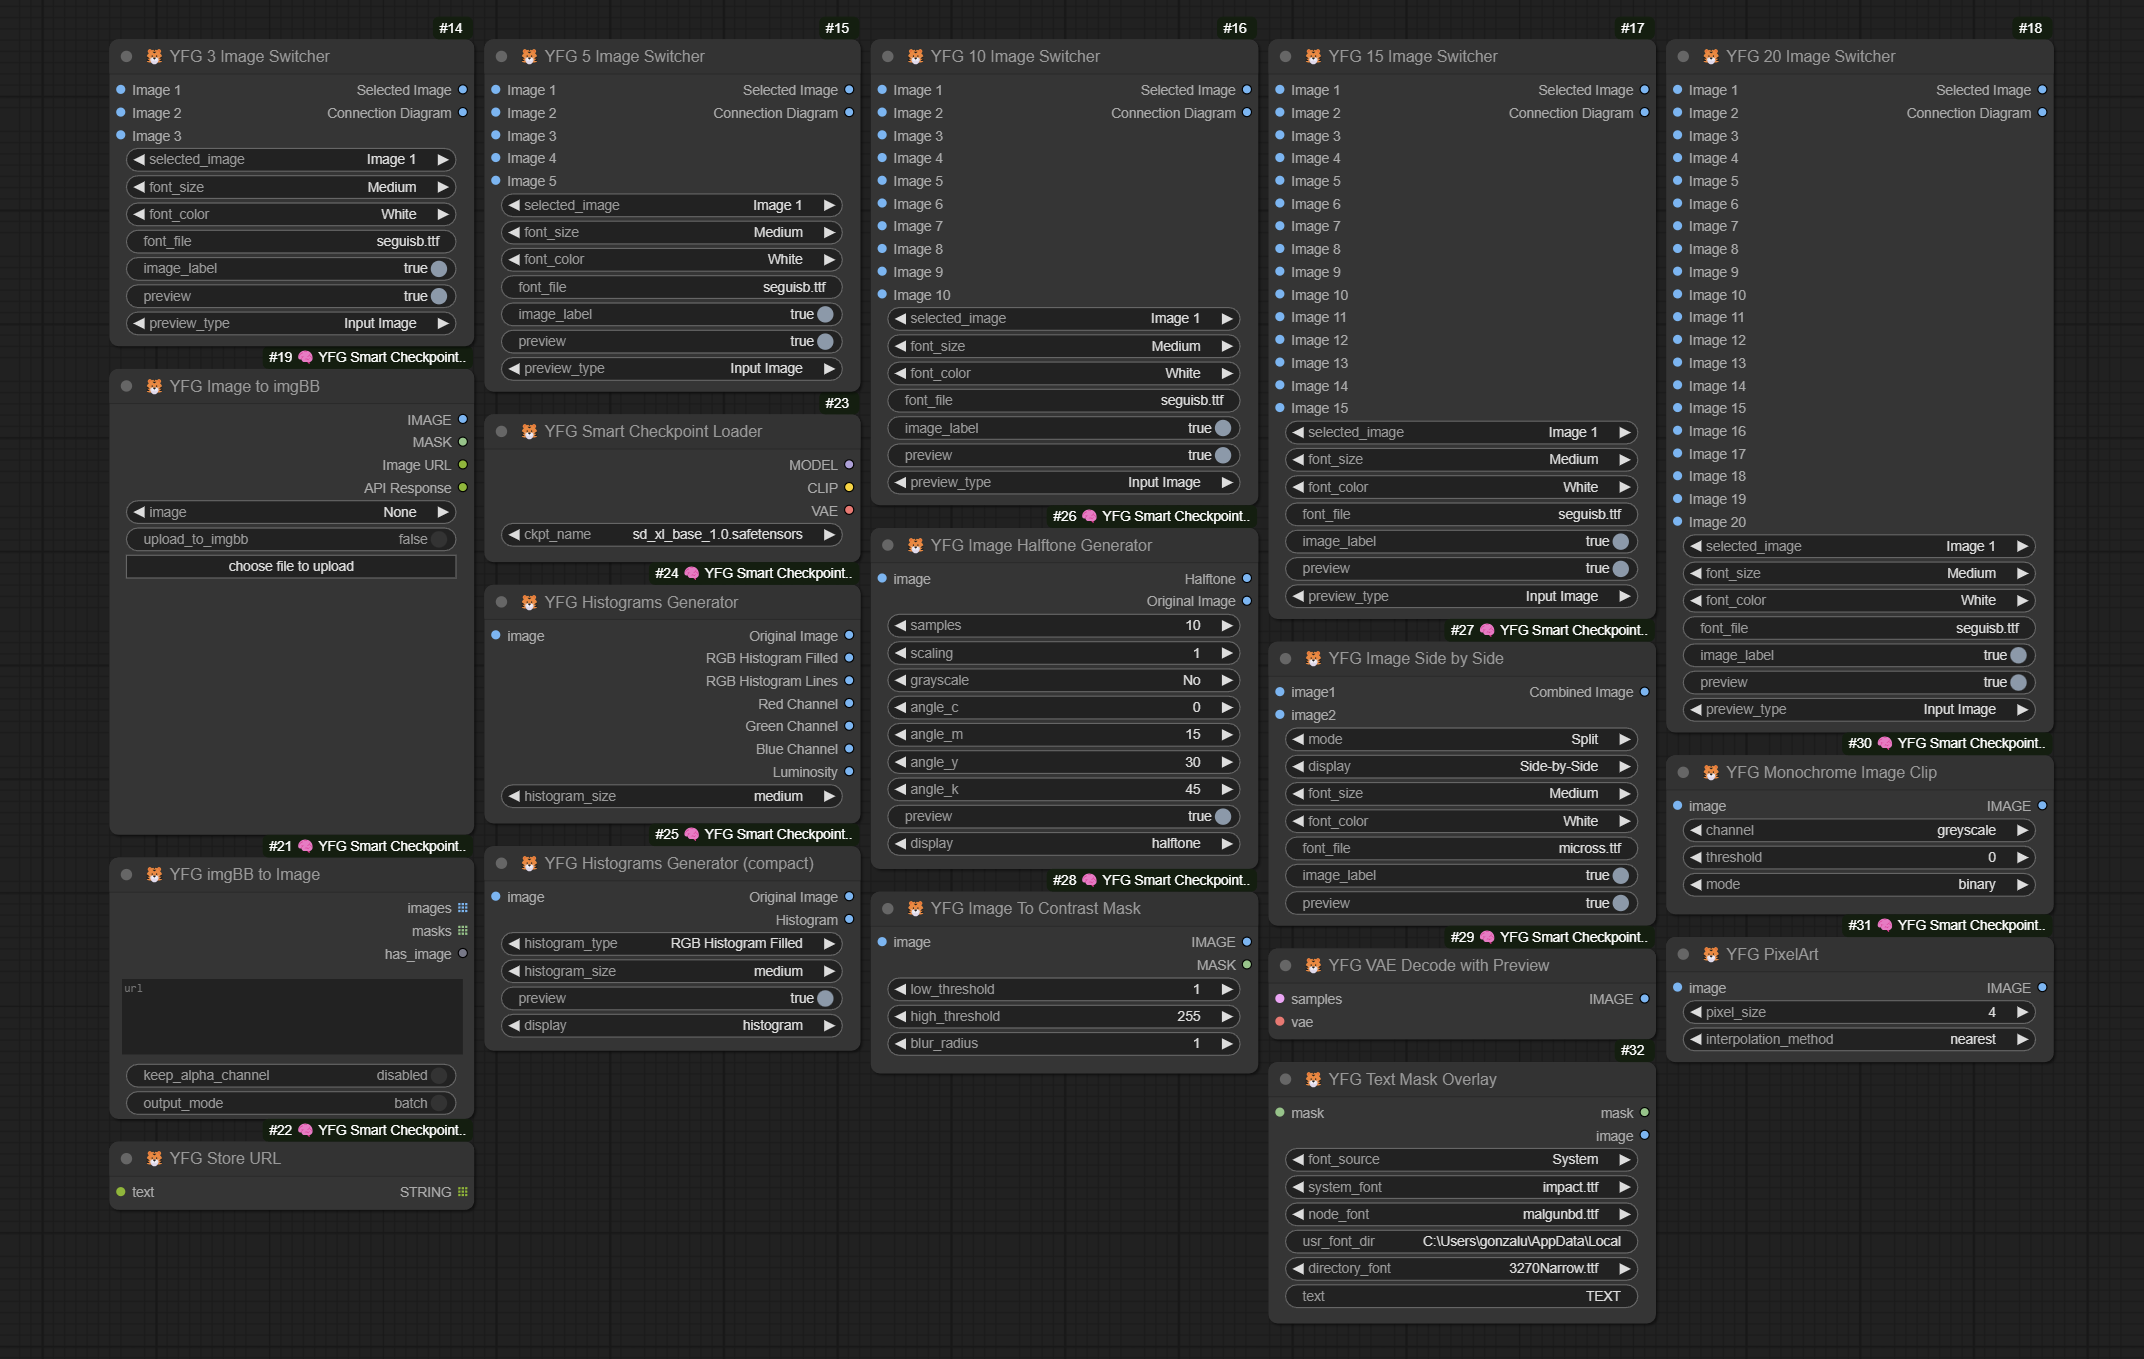
Image Side by Side

This node generates either a Side-by-Side image of a Split image from two input images. You can turn on node self-preview or send the resulting image to other downstream nodes. The header labels can be turned off and the font, size and color can also be selected.
Here is an example of the images Side by Side instead of split.
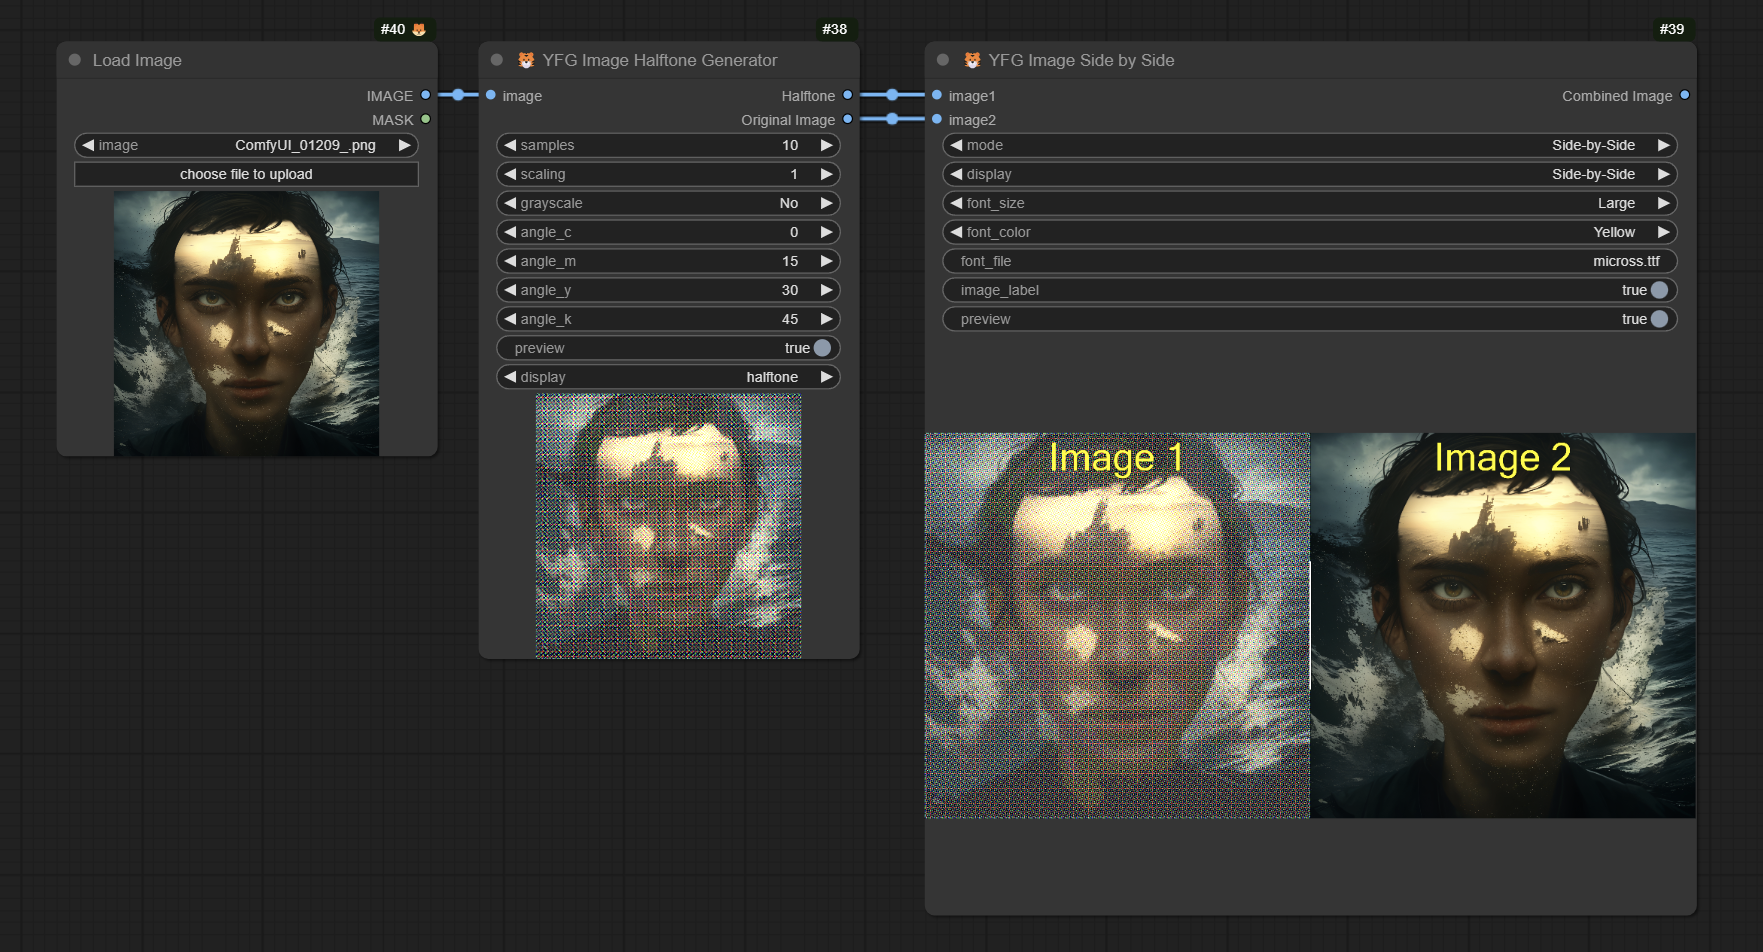
Image to imgBB
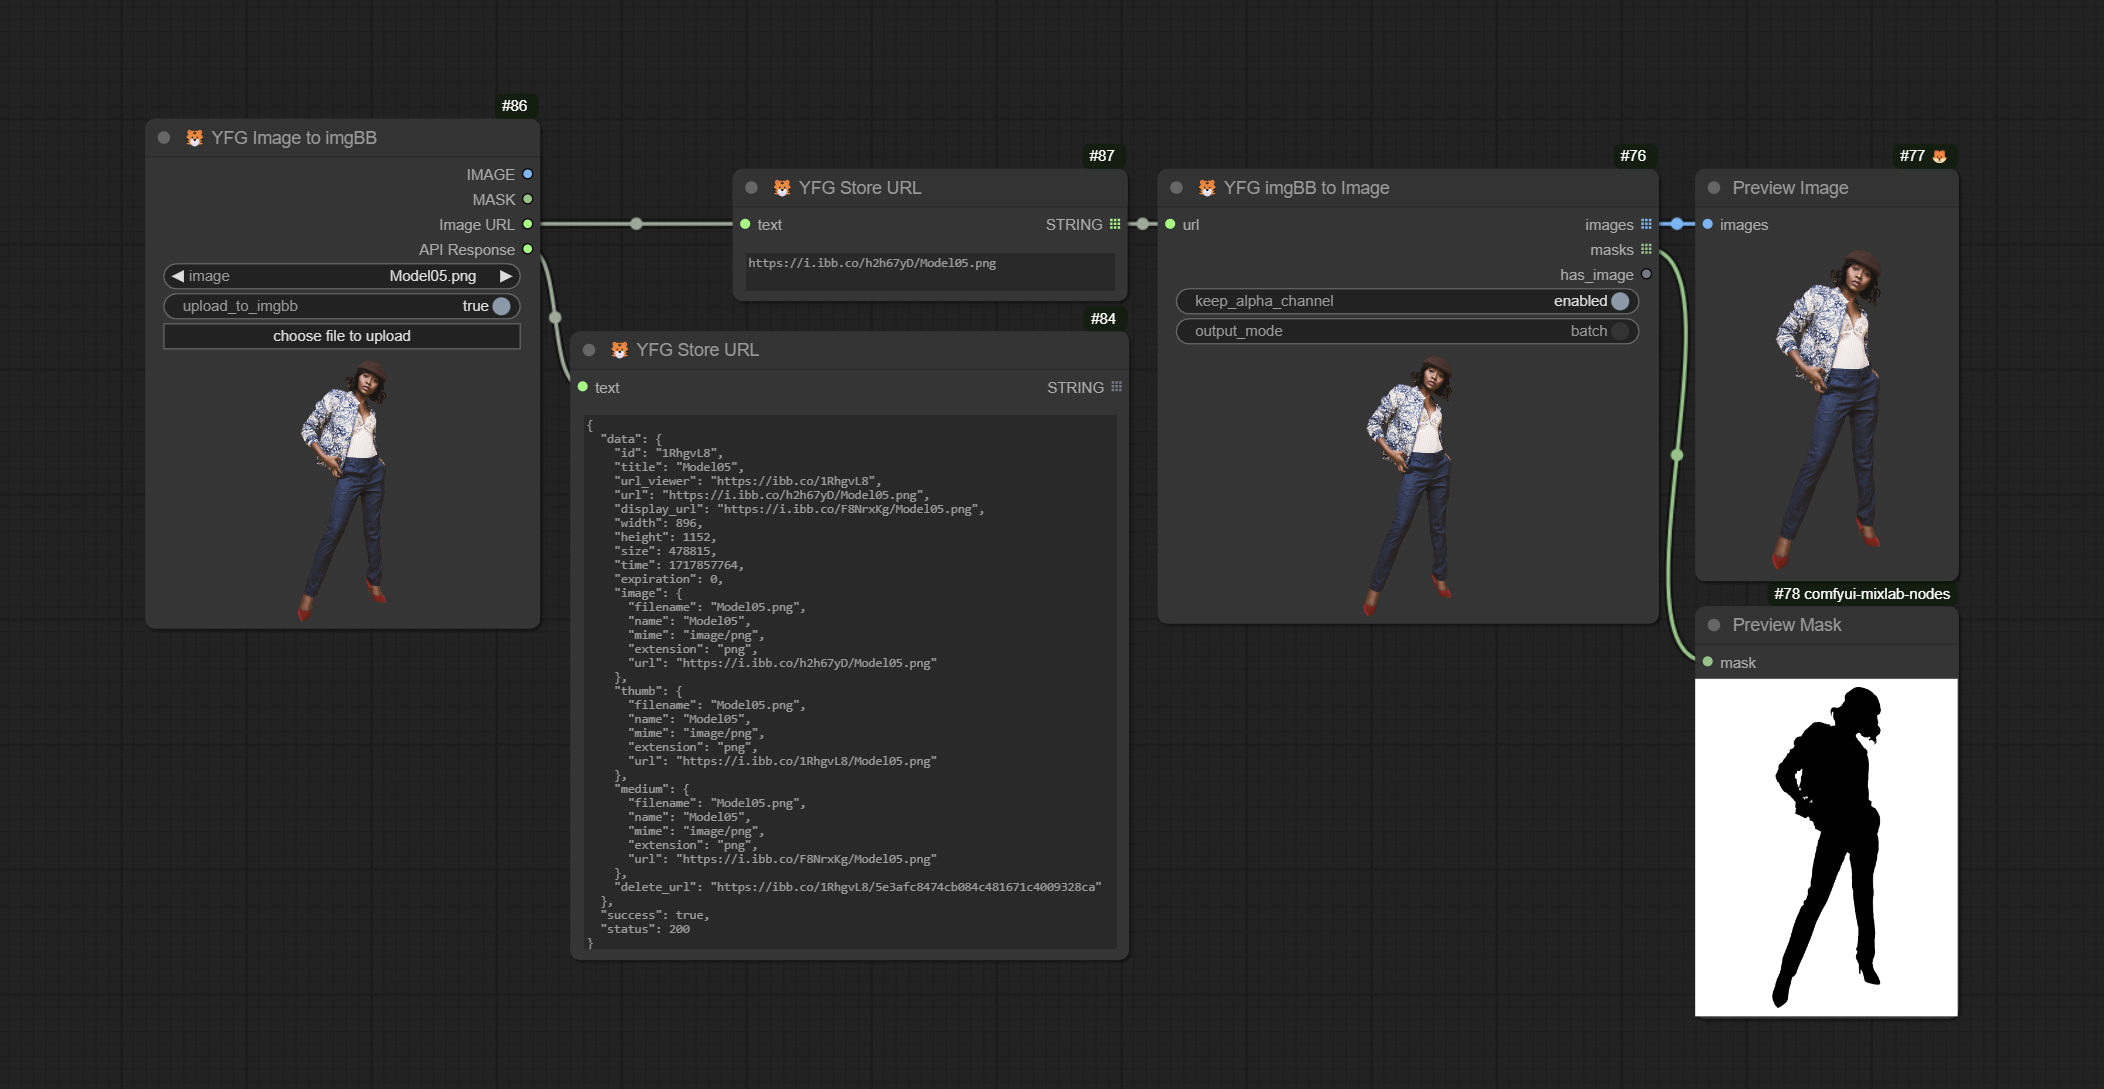
These nodes enable uploading and downloading to / from the imgBB image sharing service. Also included are nodes for downloading images from imgBB and an image URL node that preserves the uploaded image URL in the workflow for easy sharing of originals with others. Perfect for sharing workflows while making original images available for others.
Setup
In order to use these nodes, you must have an account with imgBB service. Once you have your account, navigate to https://api.imgbb.com/ and generate an API key. You will need to configure this key in the imgbb_api_key.json file in the node's subfolder ./loaders/.
There is a sample file imgbb_api_key_example.json you can copy and rename to imgbb_api_key.json, edit it and enter your API key replacing the text "YOUR_API_KEY_HERE" with your key. See example below.
{
  "api_key": "8a54a1b12353d43105d62fxadr3286a3323x"
}
Smart Checkpoint Loader
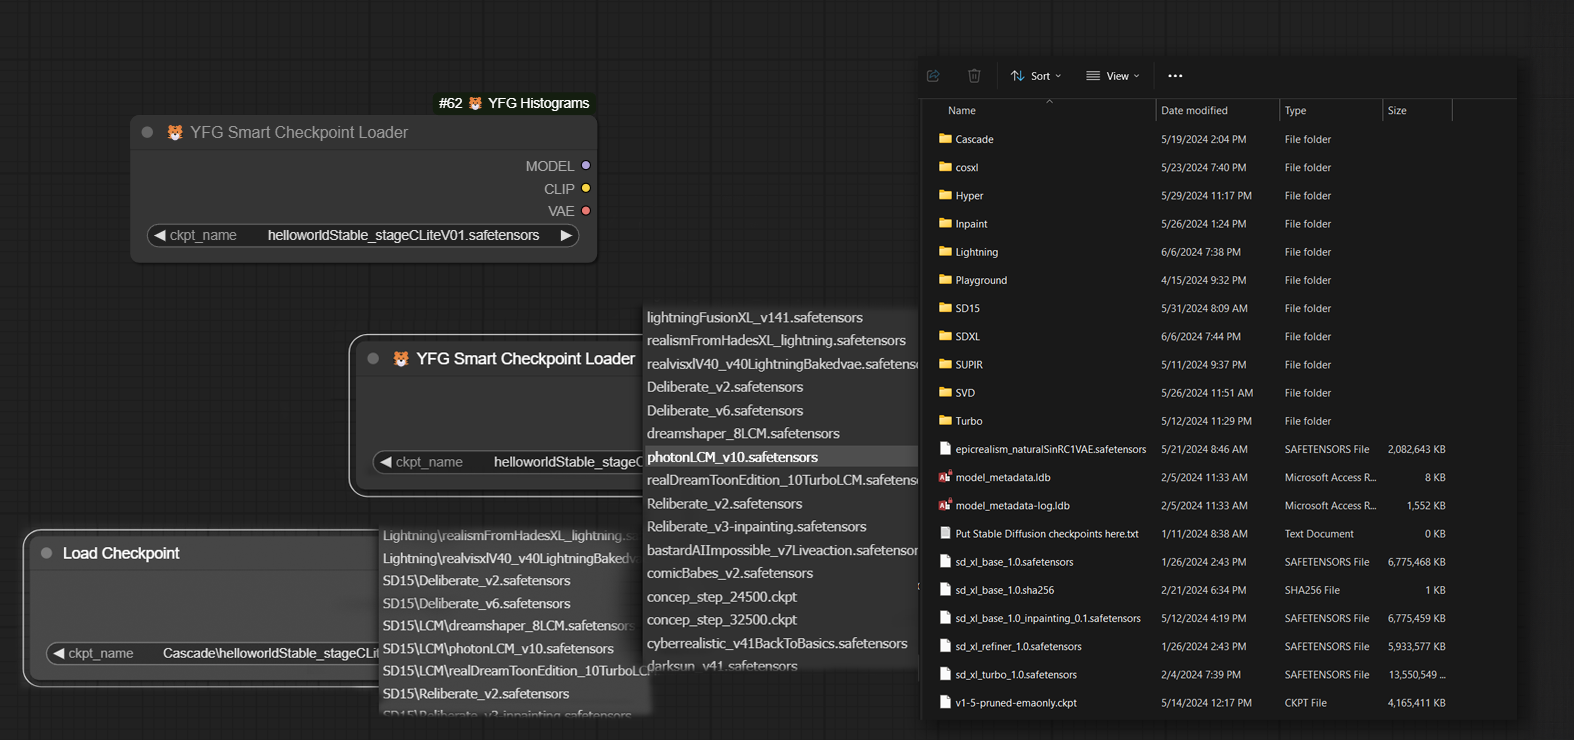
This is a one-for-one replacement of the core Load Checkpoint node with one key difference: It flattens your directory structure regardless of how complex and makes all checkpoints appear as if on one folder. This is ideal for sharing workflows where the original author may have a different directory structure than other users. Makes organizing checkpoints and sharing workflows easier.
Mono Clip
Generates a black and white or greyscale clipped image. Choice of three options with reverse mode for each. Suitable for masking and special effects.
This node is based on original code by XSS https://civitai.com/models/24869?modelVersionId=29755
VAE Decode with Preview
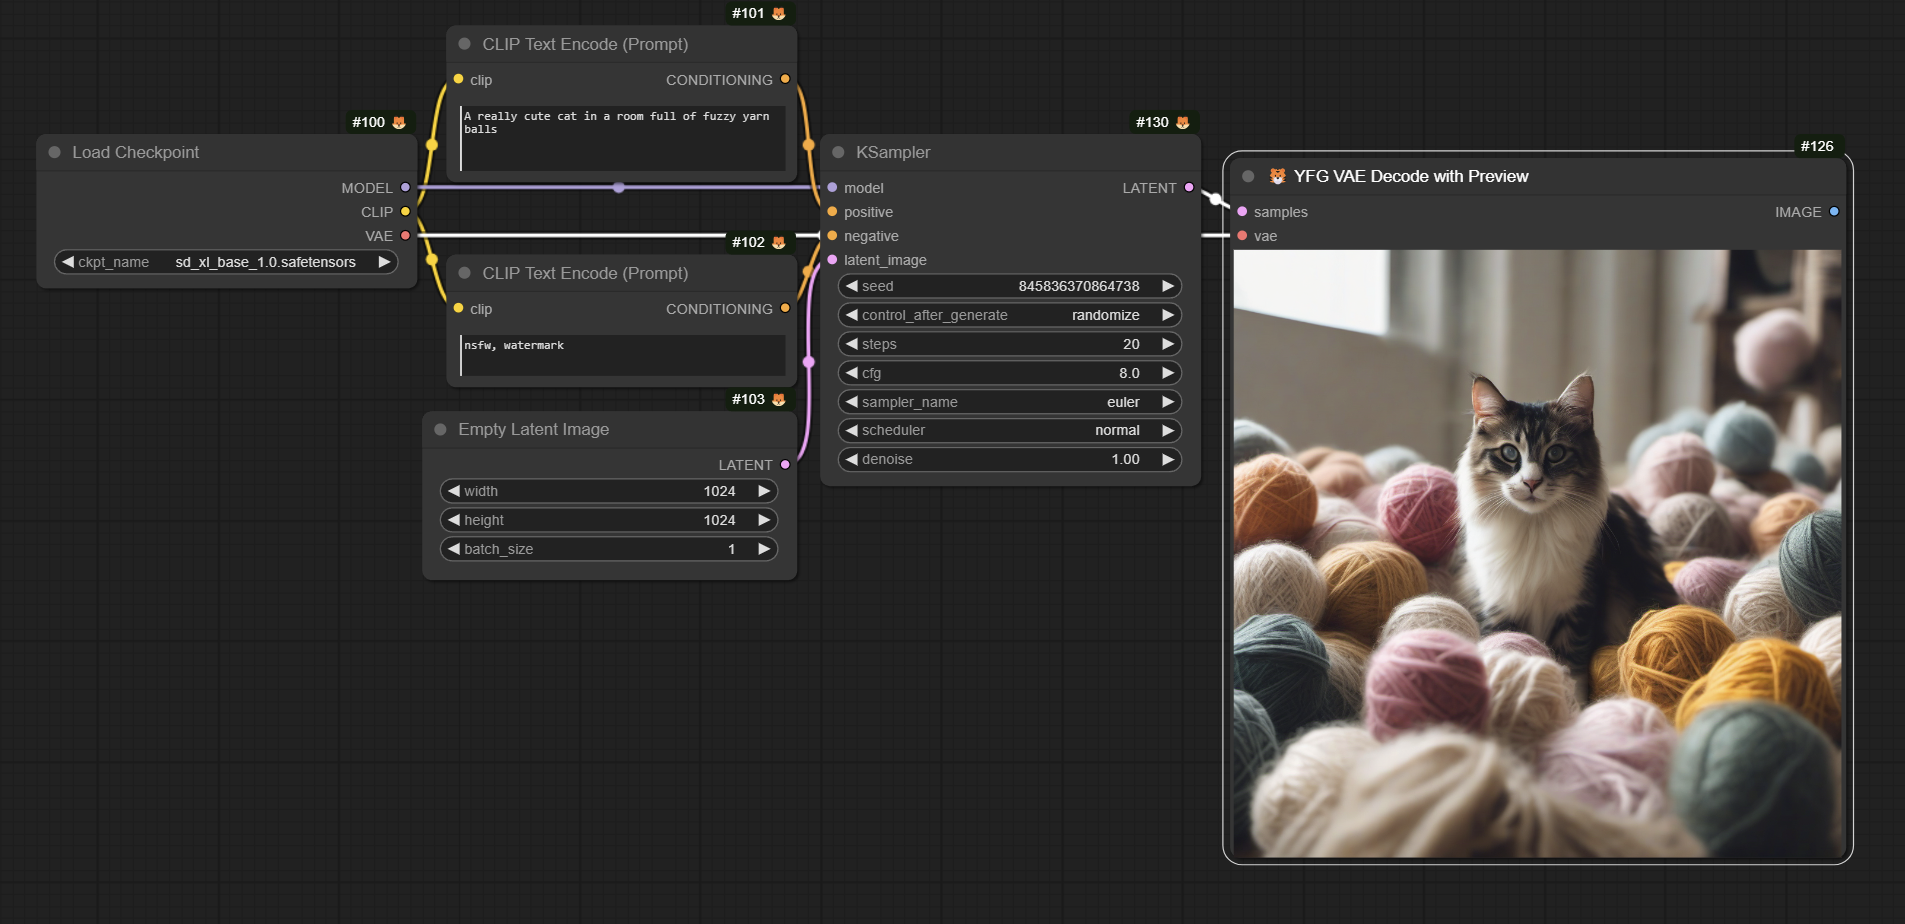
Generates a black and white or greyscale clipped image. Choice of three options with reverse mode for each. Suitable for masking and special effects.
This node is based on original code by XSS https://civitai.com/models/24869?modelVersionId=47776
Image to Contrast Mask
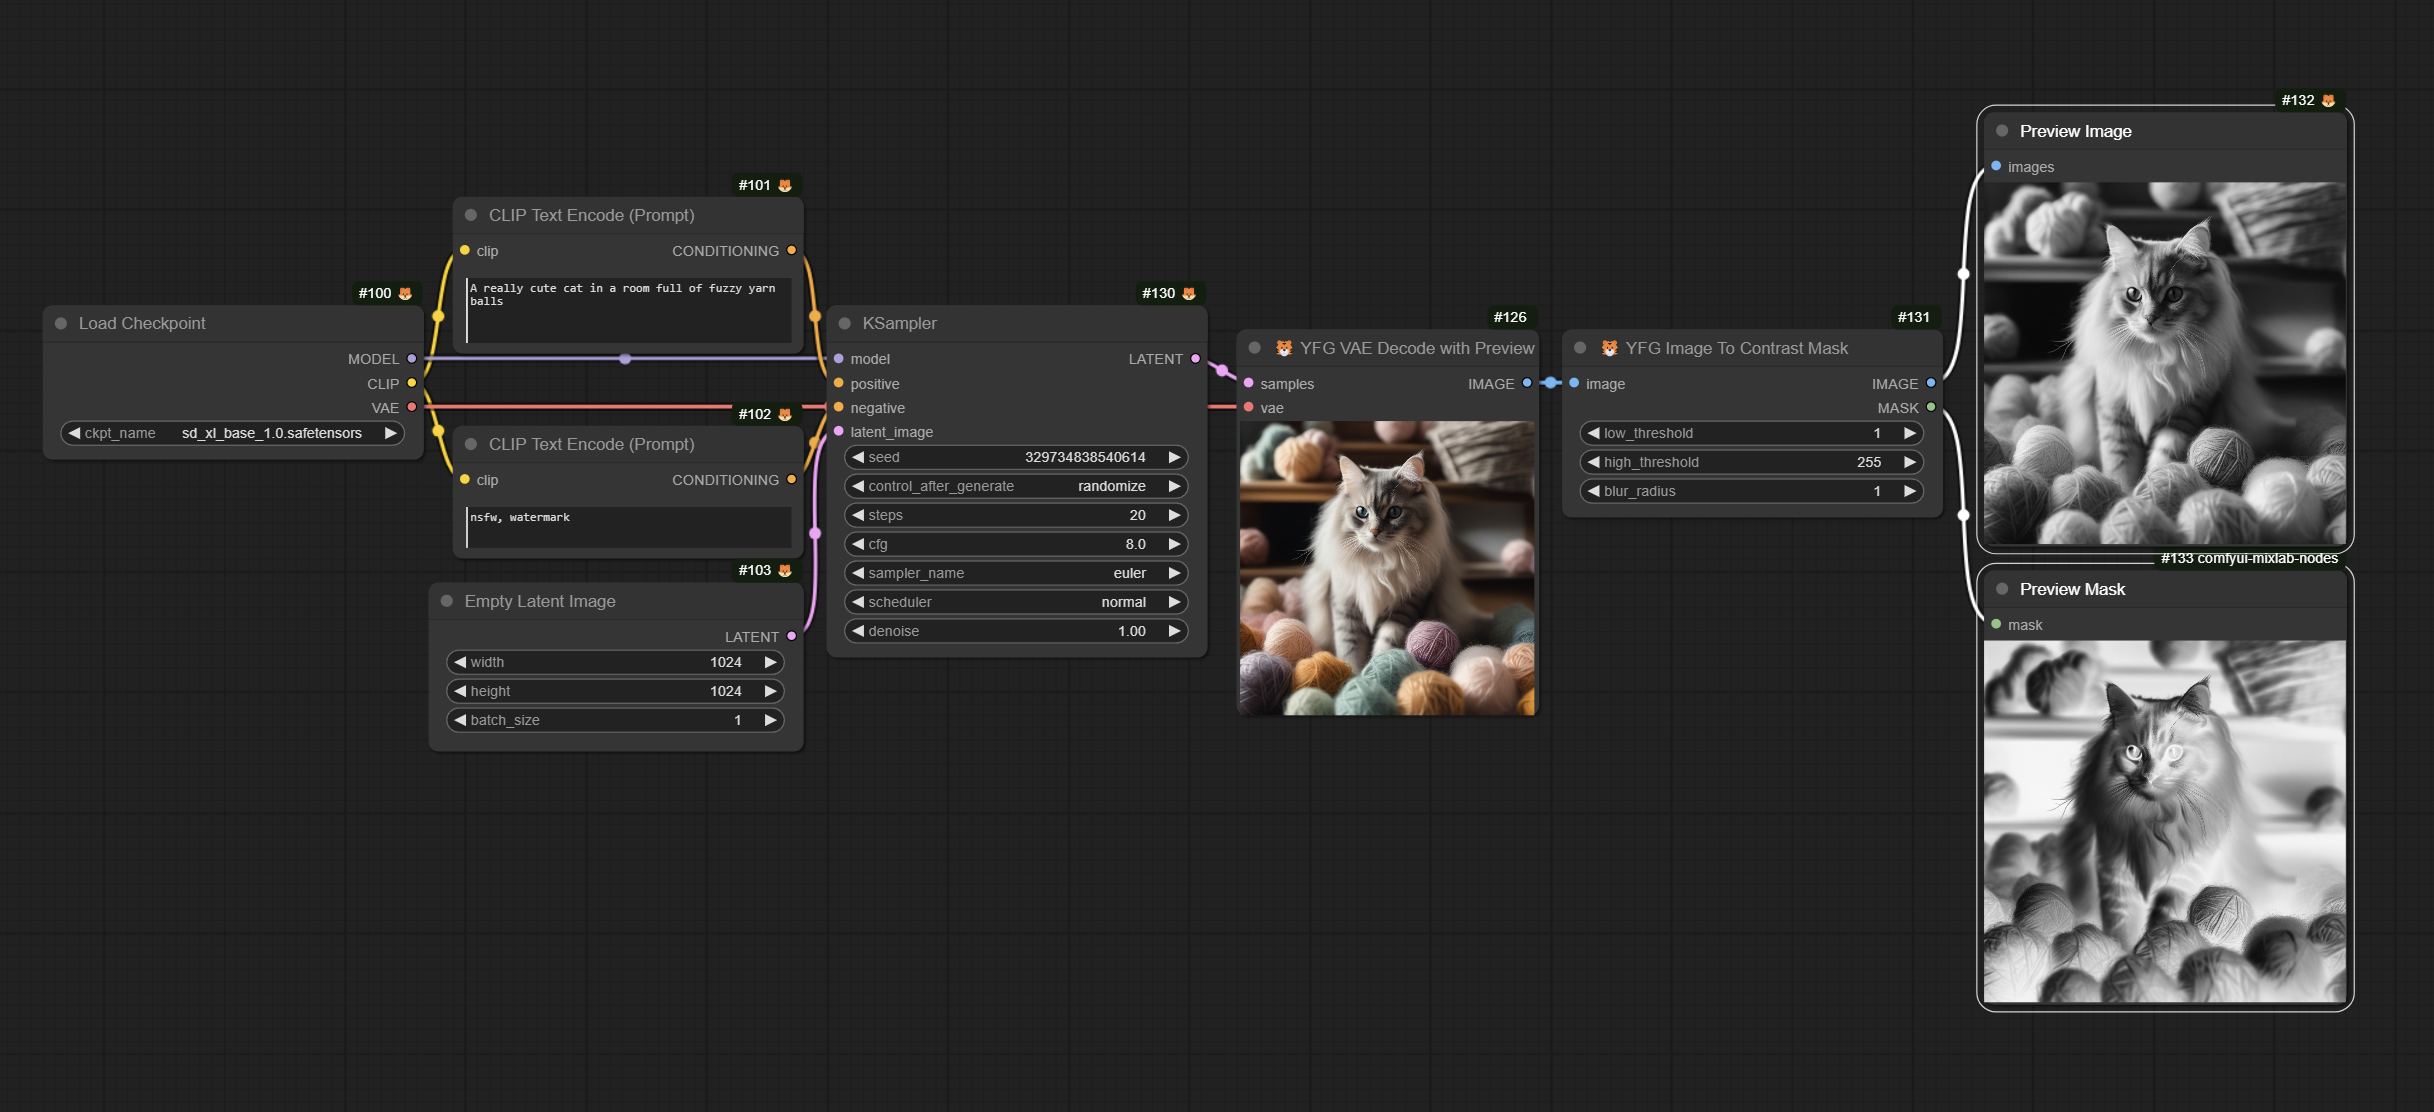
Generates a greyscale contrast mask. Threshold is selectable between 1 and 255 for low and high values. Optionally blur the output.
This node is based on original code by XSS https://civitai.com/models/24869?modelVersionId=32717
PixelArt
![]()
Generates a Pixel Art style image. Optionally select the interpolation mode and number of pixels.
This node is based on original Mosaic code by XSS https://civitai.com/models/24869?modelVersionId=29750
Text Mask Overlay
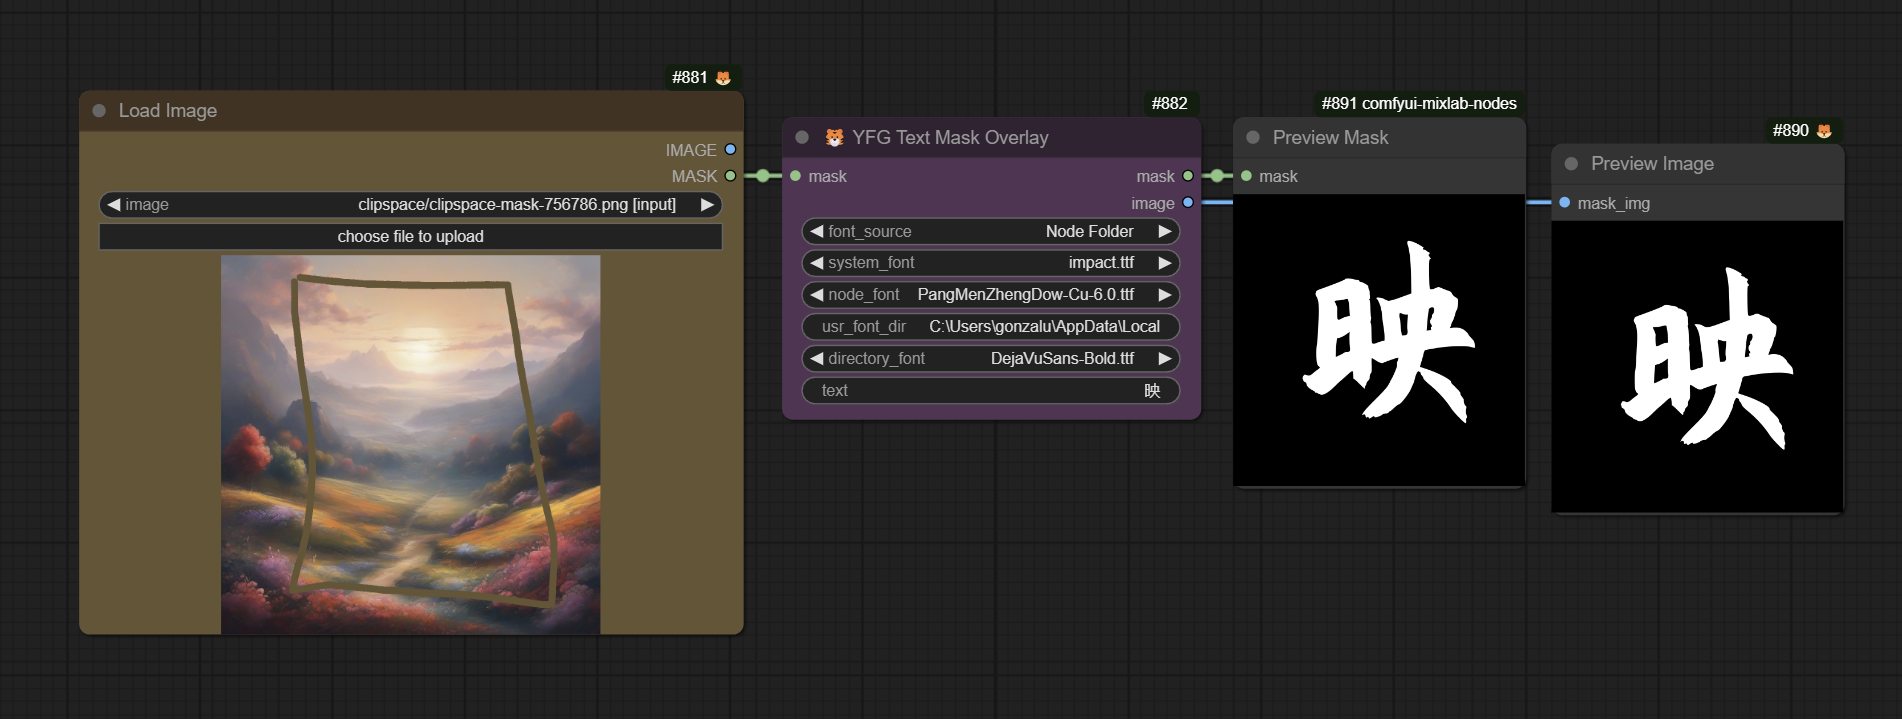
This node takes the original idea by Yuigahama Yui and adds a few enhancements.
- Font Selection: You have the option of selecting from System Fonts, User fonts or local fonts in the node directory (under the folder ./fonts/ in the custom node directory)
- Mask-to-Image is handled in the node so no need for an external converter.
Here is a sample image output using the node.
| <a href="img/textMaskOverlay01original.png"><img src="img/textMaskOverlay01original.png" alt="Text Mask Overlay Example" width="400"/></a> | <a href="img/textMaskOverlay01.png"><img src="img/textMaskOverlay01.png" alt="Text Mask Overlay Example" width="400"/></a> | | :-: | :-: | | Original | Output |
Example workflow workflow in JSON format. The workflow is also embedded to the linked image below.

This node is based on the ComfyUI-Text node by Yuigahama Yui https://github.com/LZpenguin/ComfyUI-Text
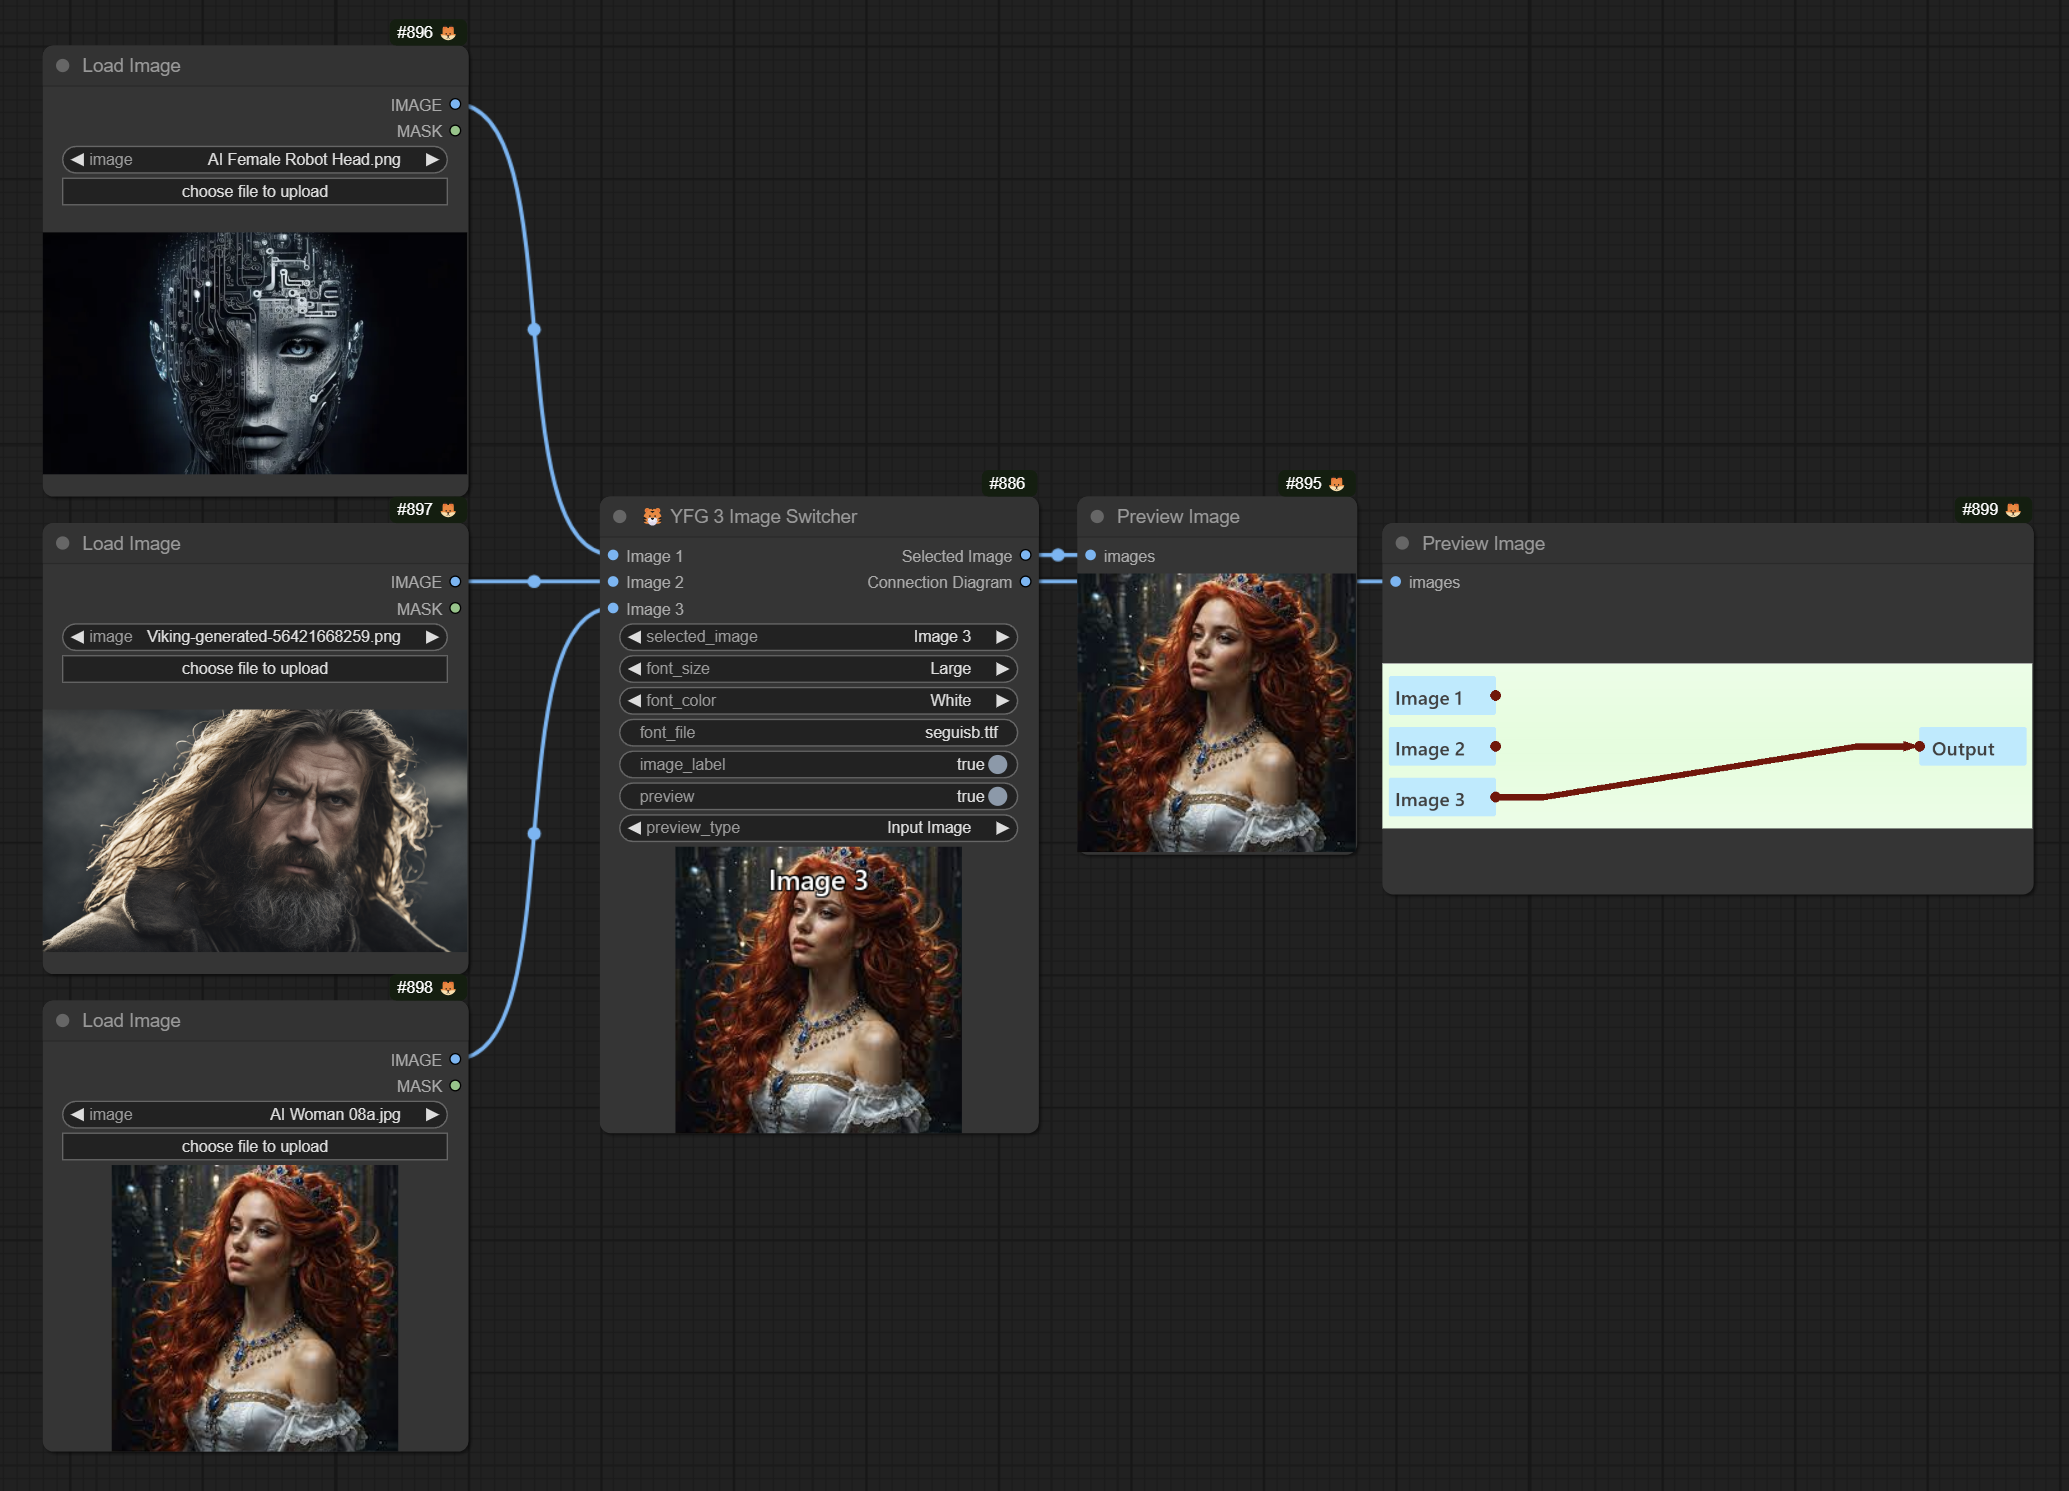
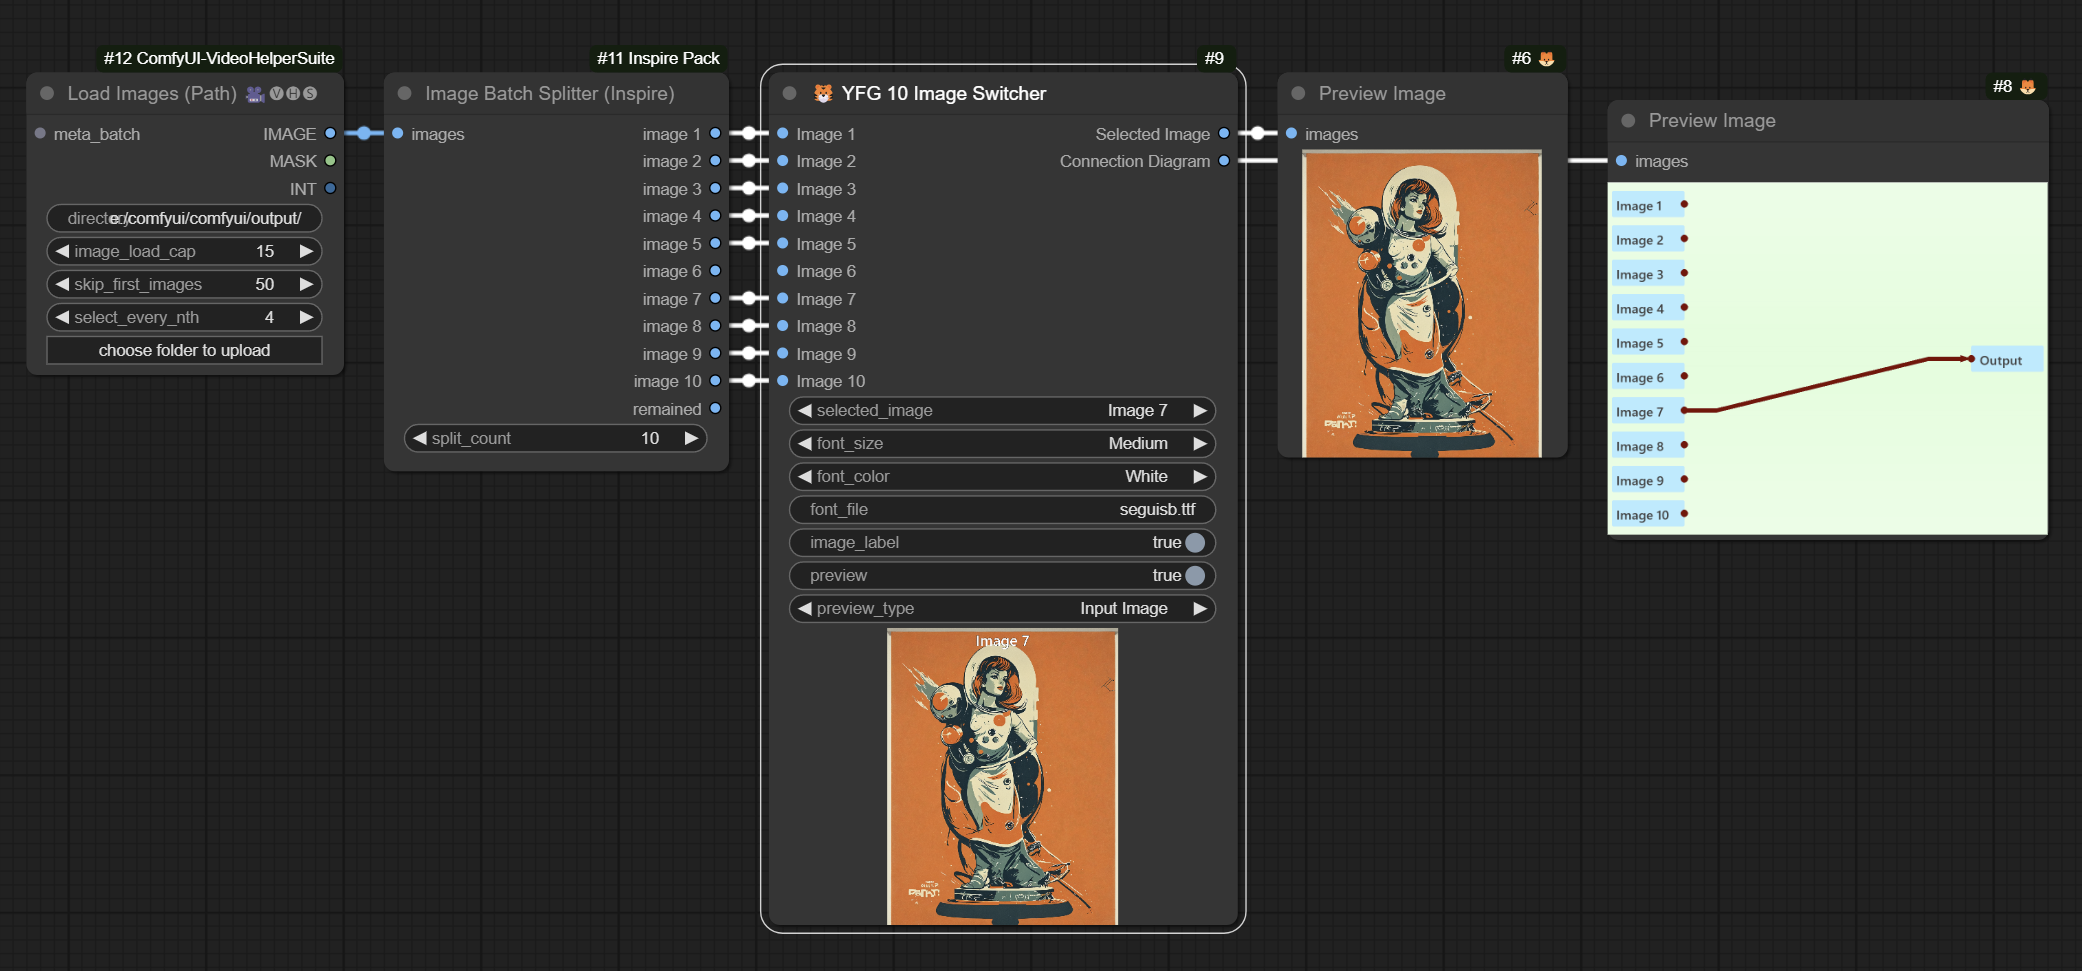
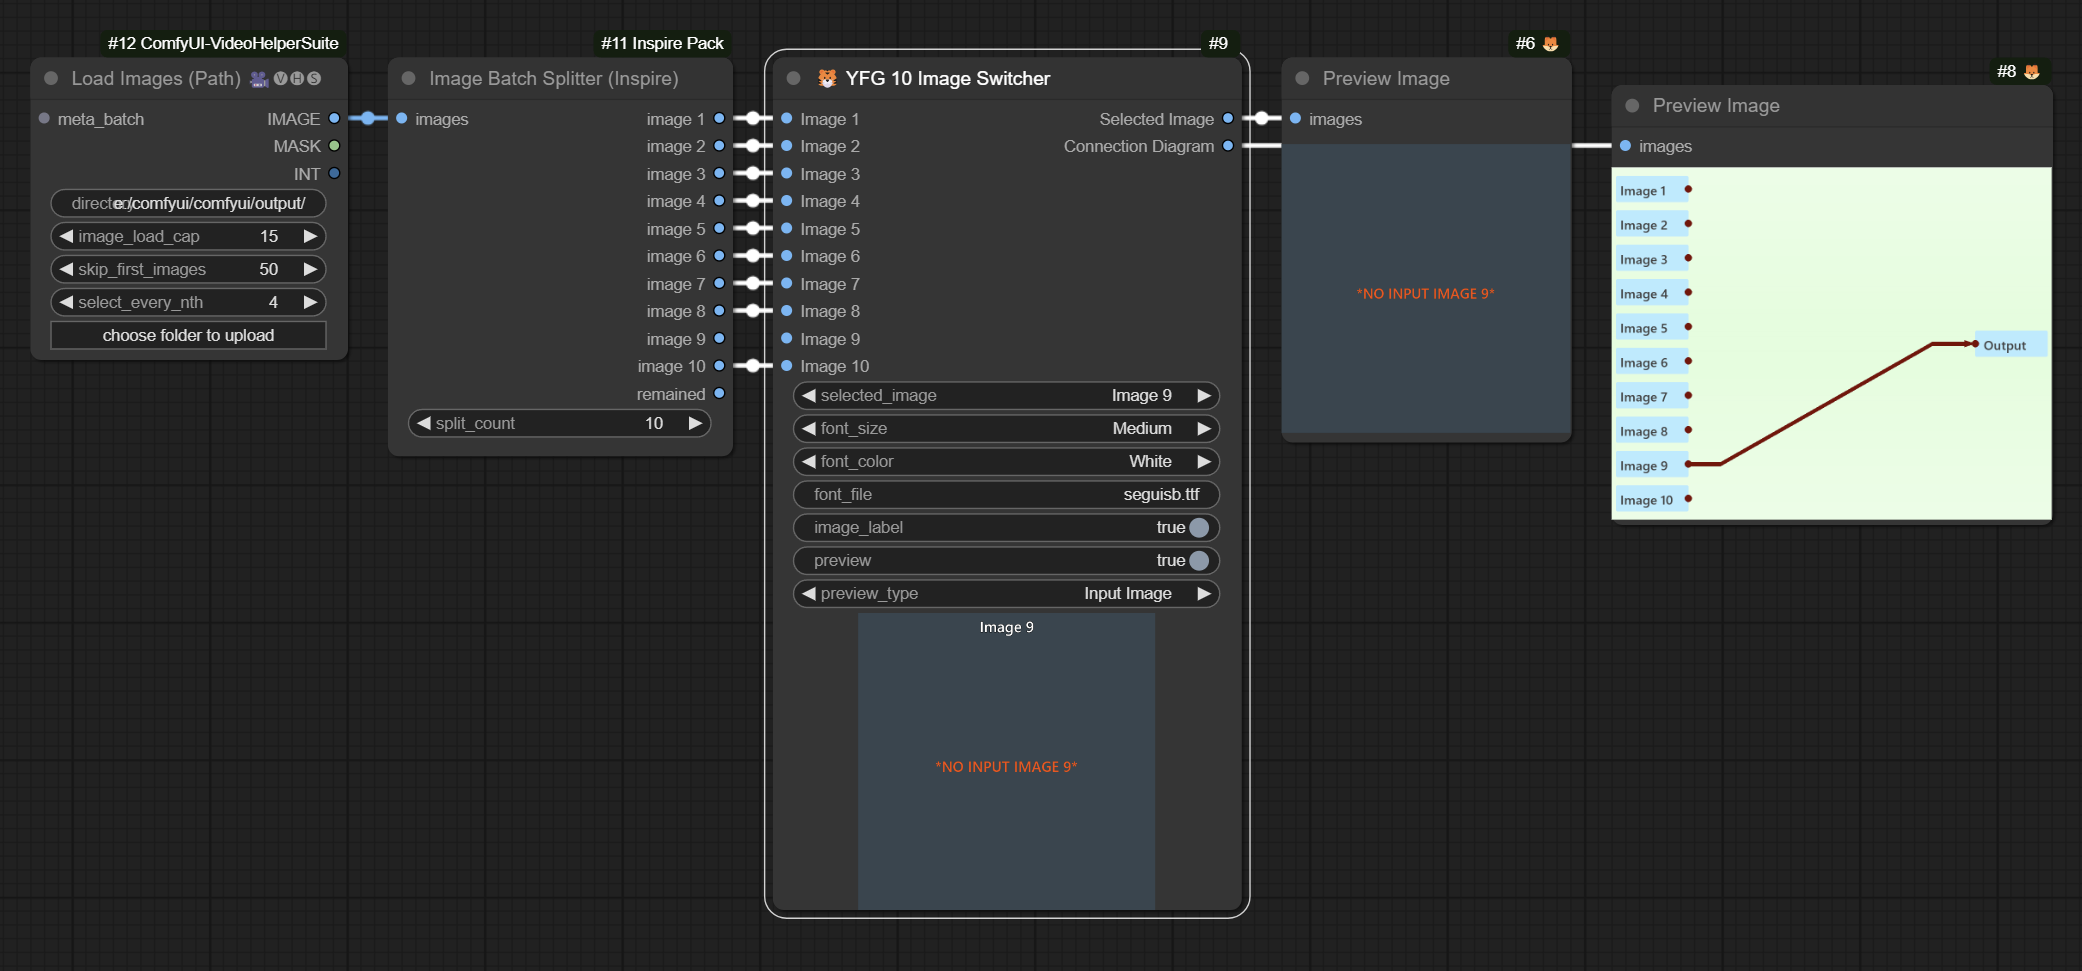
Image Switchers
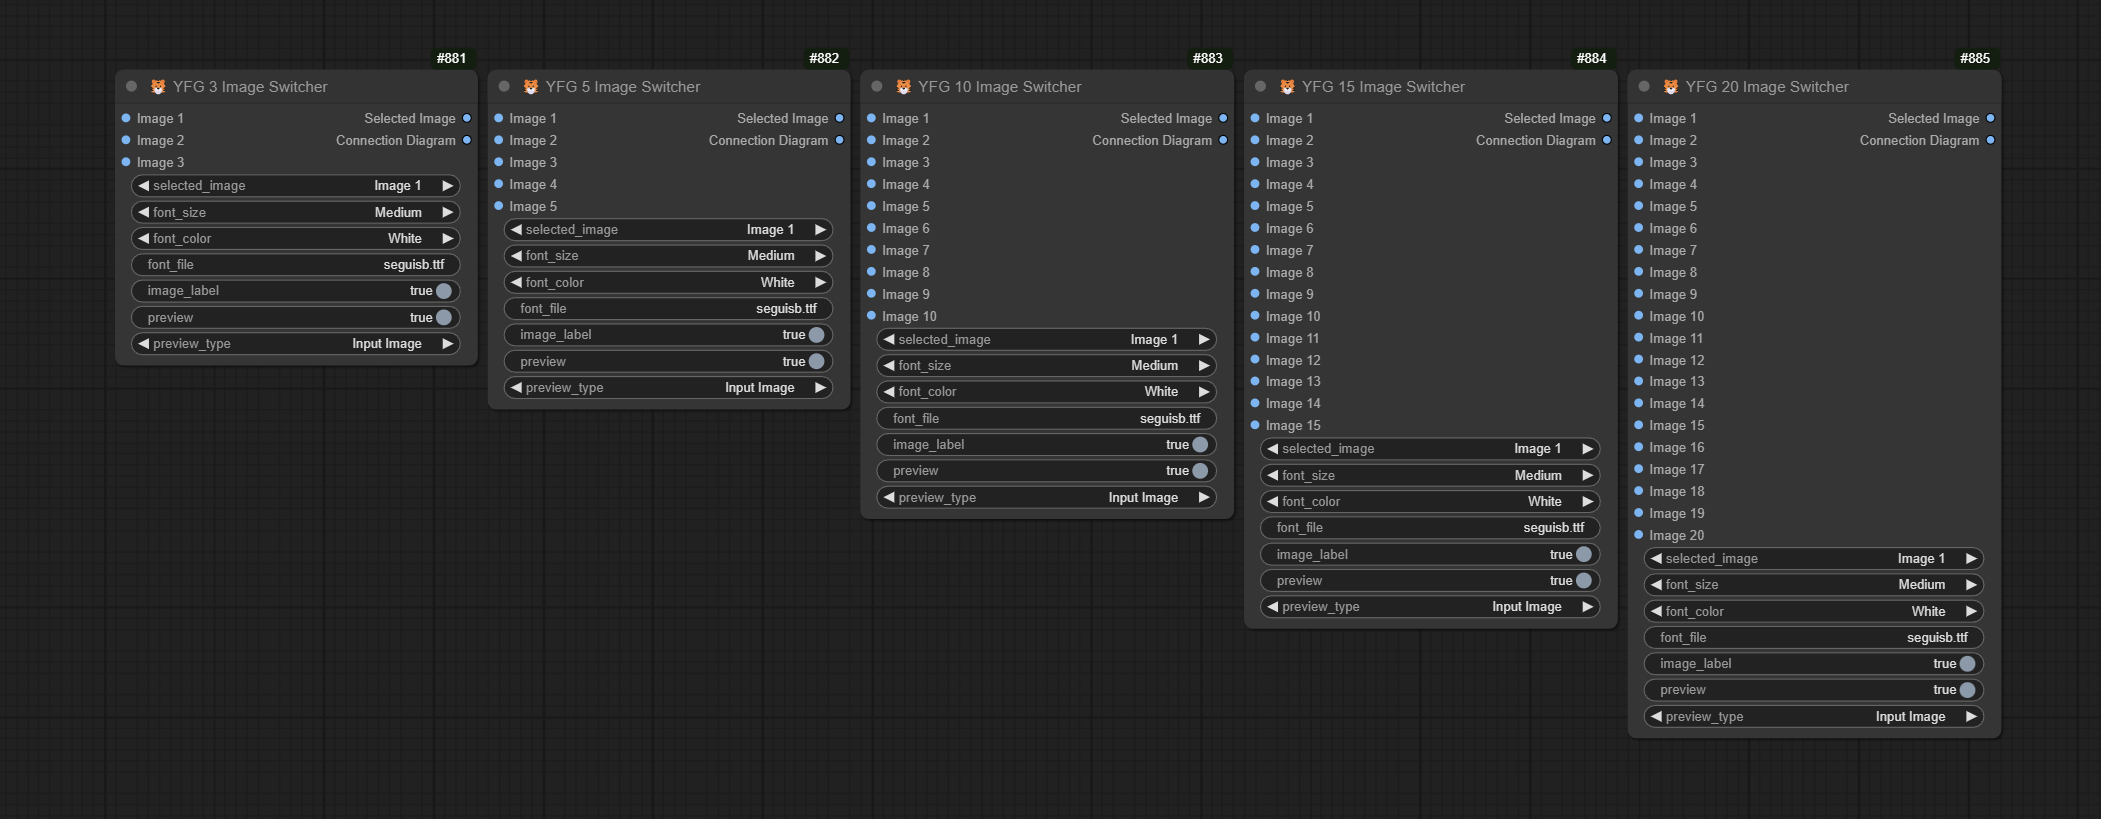
Multi-input image switchers. 3, 5, 10, 15 and 20 input versions. These nodes also have a lot of additional functionality such as a matrix display showing routing and also gives the user to preview the image selected within the node. The nodes also gracefully handle missing inputs and dsiplays a warnign to the user that a particular input is empty.
Why these nodes? I have some workflows where I had to gang together existing image switchers which made it cumbersome to keep track of what batch of inputs was switched to an output.
Examples
Sample Workflow
The workflow should be embedded in the file. If you can't get it to load, feel free to download and open the workflow.json file.
All nodes as of 06-13-2024
Acknowledgements
I have to give credit to at least those who's other custom nodes I use quite often and in some cases make my life in ComfyUI all around better.
And many many others too many to name. Your inspiration and talent is really exemplary. Thank you.