Nodes Browser
ComfyDeploy: How ComfyUI-AutoCropFaces works in ComfyUI?
What is ComfyUI-AutoCropFaces?
Use RetinaFace to detect and automatically crop faces.
How to install it in ComfyDeploy?
Head over to the machine page
- Click on the "Create a new machine" button
- Select the
Editbuild steps - Add a new step -> Custom Node
- Search for
ComfyUI-AutoCropFacesand select it - Close the build step dialig and then click on the "Save" button to rebuild the machine
ComfyUI-AutoCropFaces
Use RetinaFace to detect and automatically crop faces
Forked and modified from biubug6/Pytorch_Retinaface
Custom Nodes
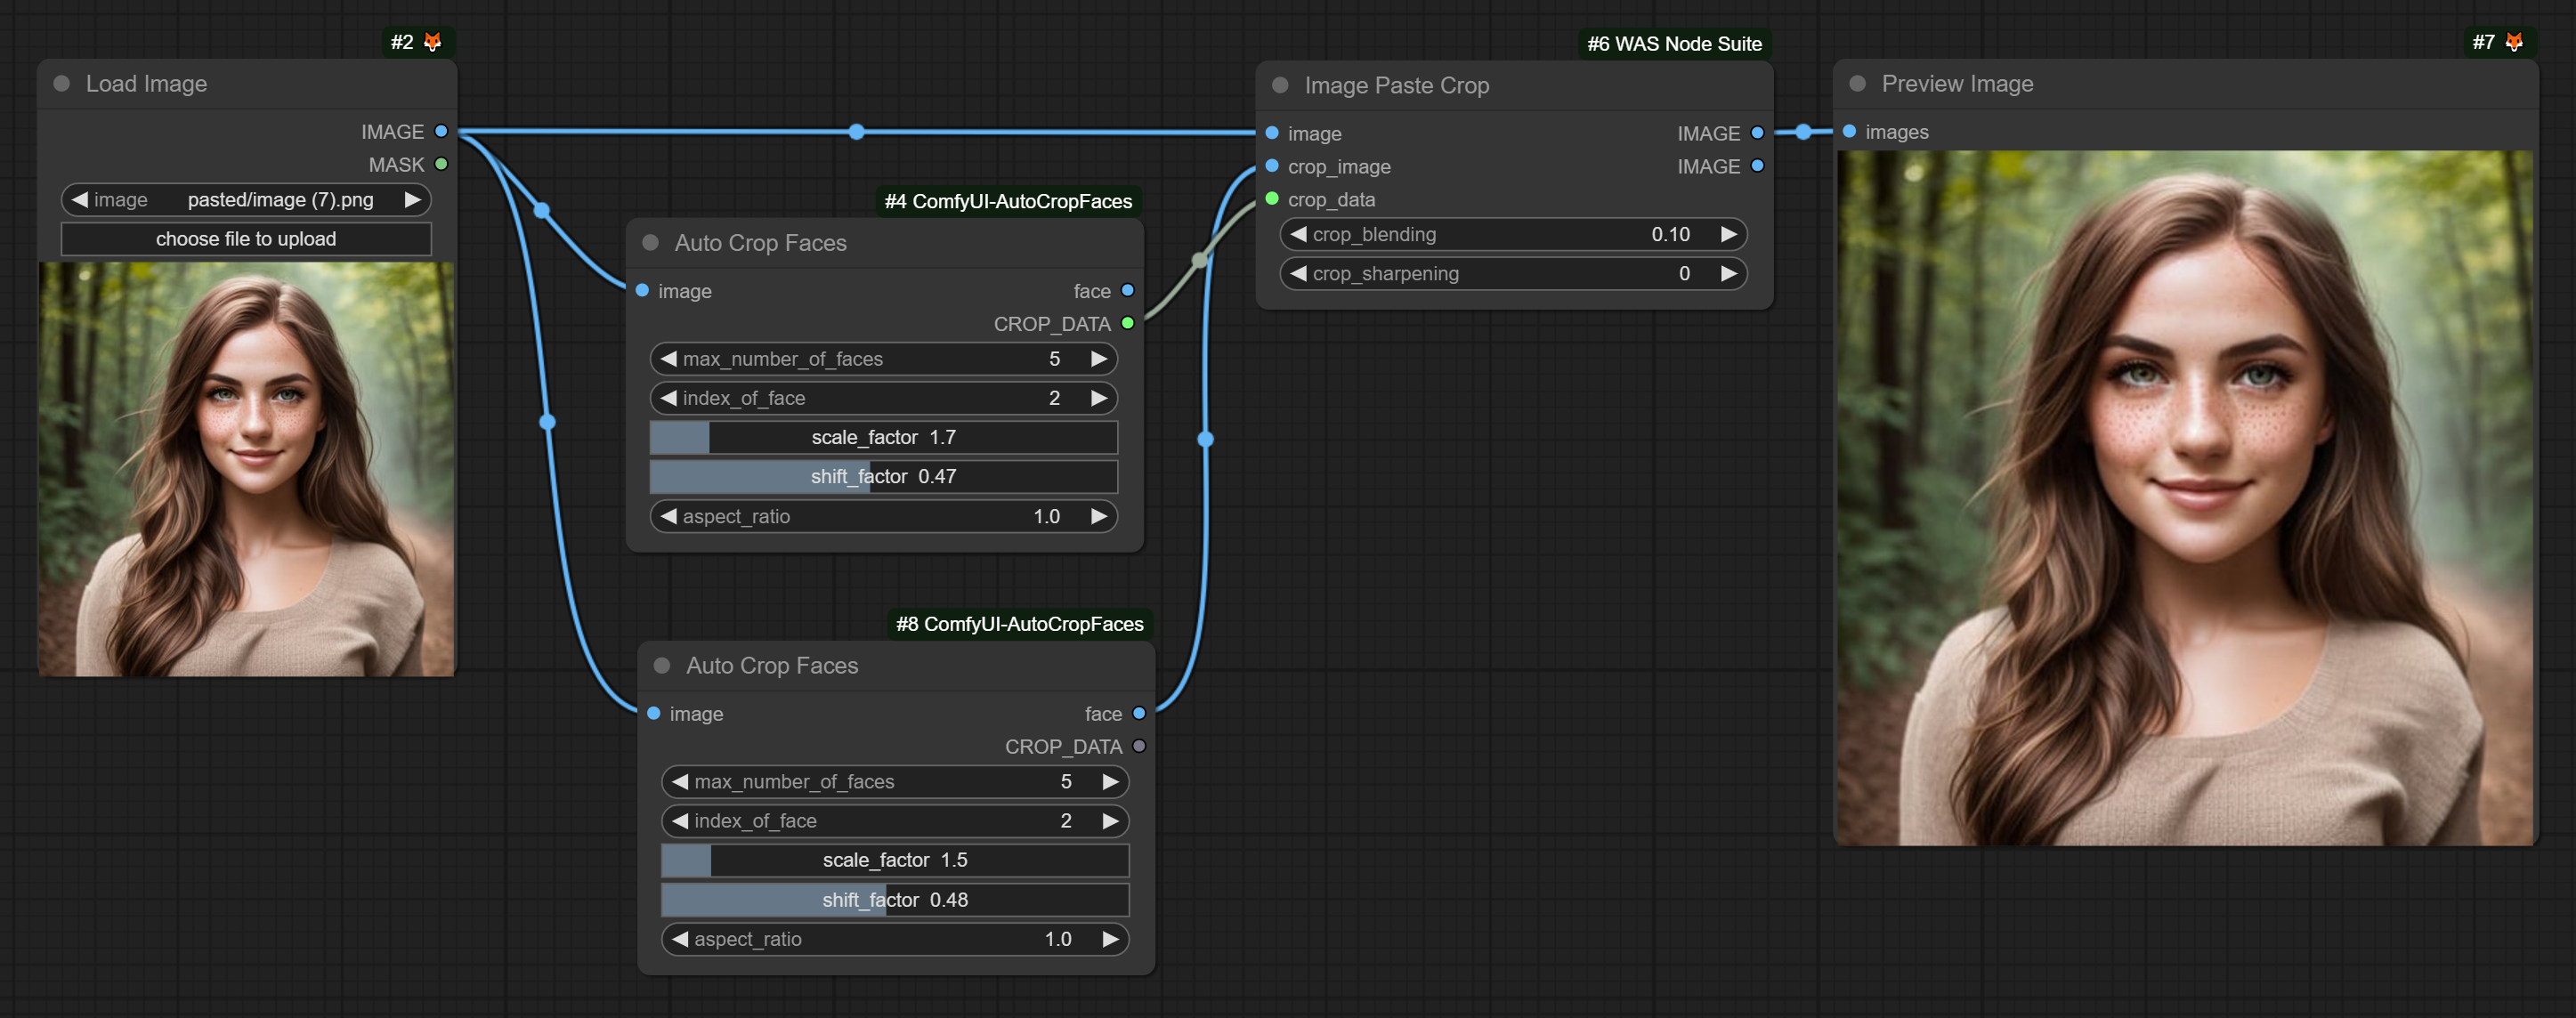
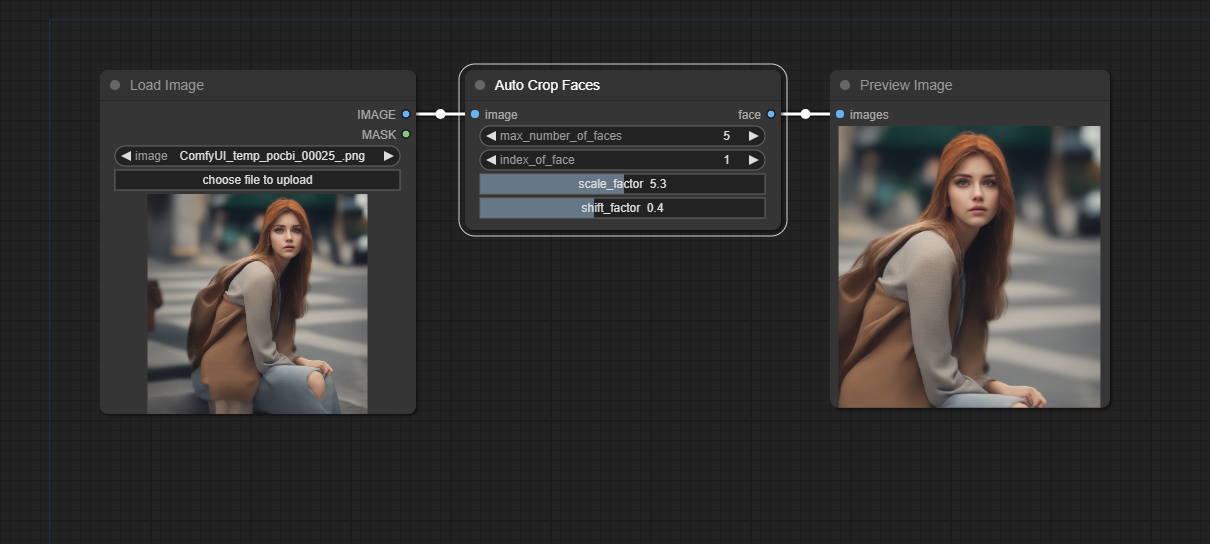
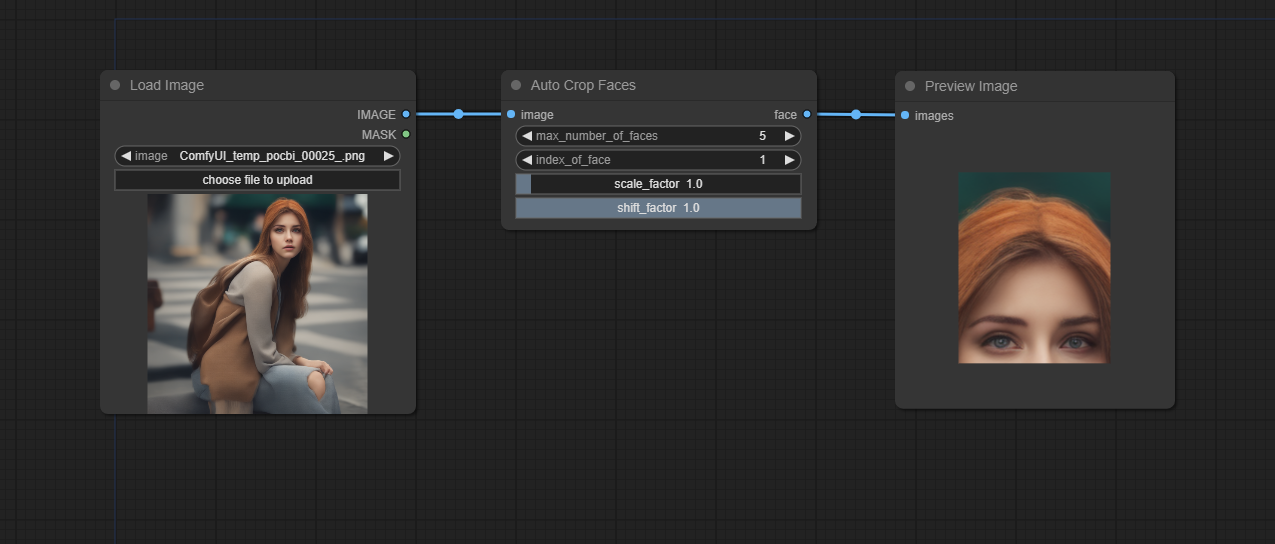
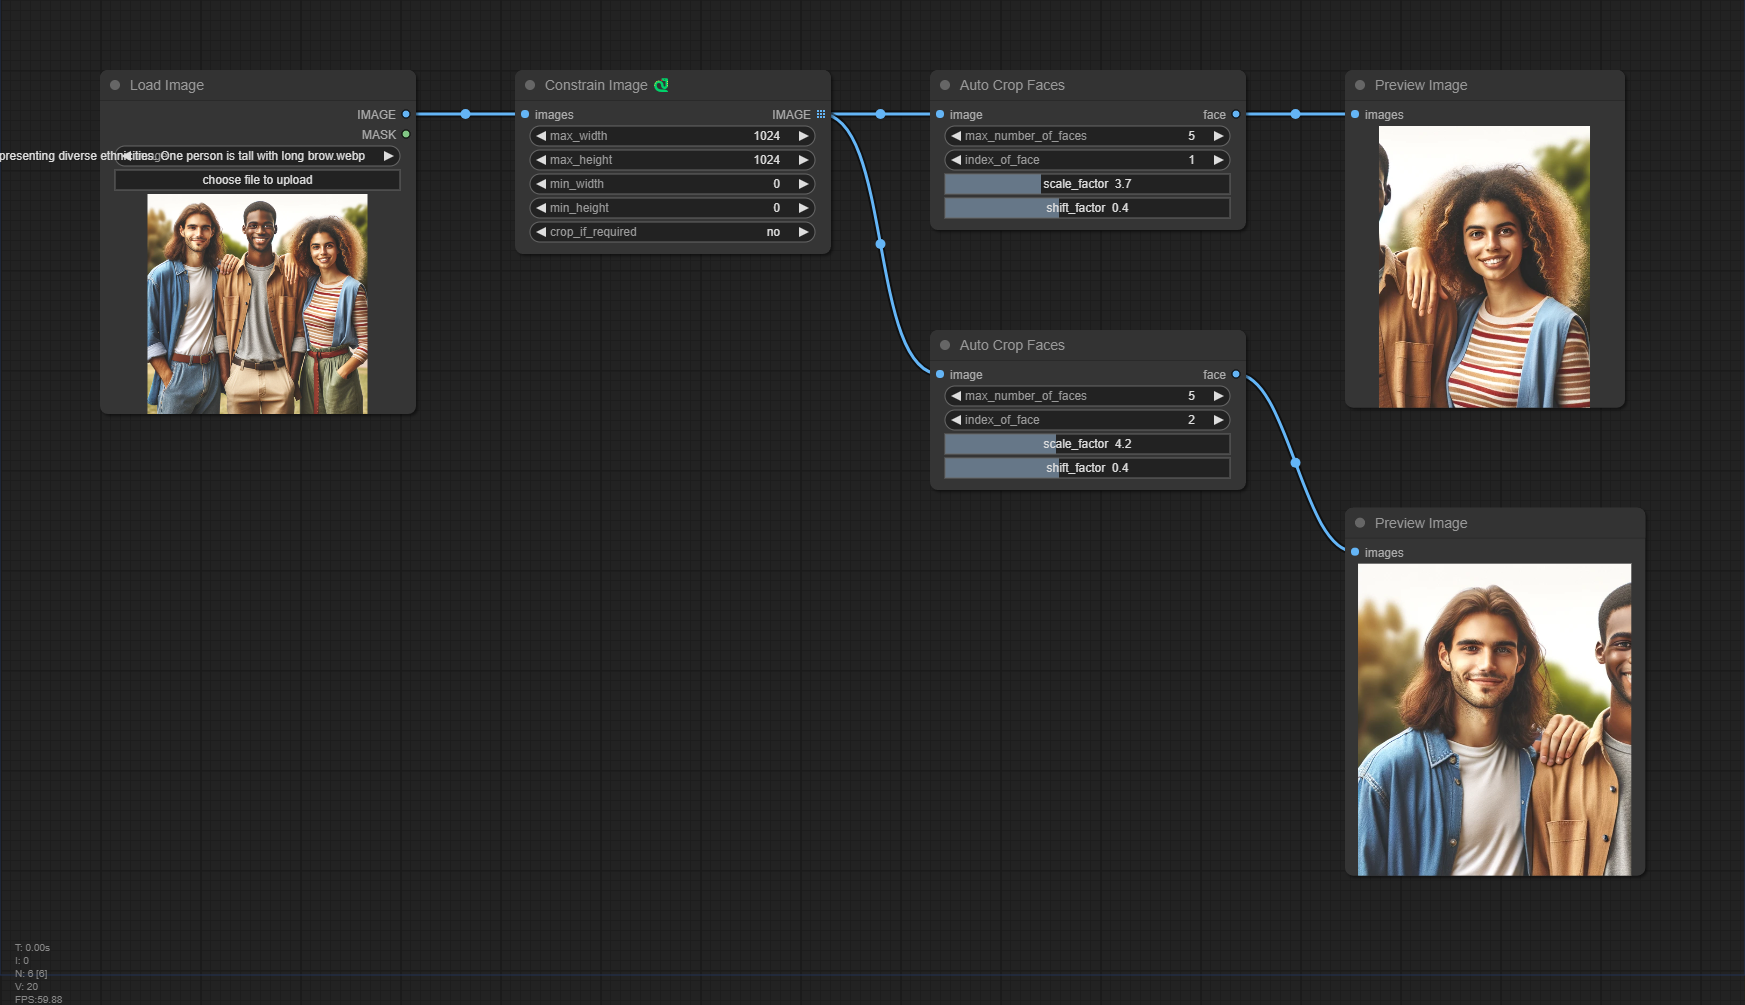
Auto Crop Faces
Detect faces and focus on one of them.
Sure, here is the updated documentation:
Auto Crop Faces
Detect faces and focus on one of them.
-
number_of_faces: How many faces would you like to detect in total? (default: 5, min: 1, max: 100) -
start_index: Which face would you like to start with? (default: 0, step: 1). The starting index of the detected faces list. If the start index is out of bounds, it wraps around in a circular fashion just like a Python list. -
scale_factor: How much padding would you like to add? 1 for no padding. (default: 1.5, min: 0.5, max: 10, step: 0.5) -
shift_factor: Where would you like the face to be placed in the output image? Set to 0 to place the face at the top edge, 0.5 to center it, and 1.0 to place it at the bottom edge. (default: 0.45, min: 0, max: 1, step: 0.01) -
max_faces_per_image: The maximum number of faces to detect for each image. (default: 50, min: 1, max: 1000, step: 1) -
aspect_ratio: The aspect ratio for cropping, specified aswidth:height. (default: 1:1)
Recommandation:
Users might upload extremely large images, so it would be a good idea to first pass through the "Constrain Image" node.
It now supports CROP_DATA, which is compatible with WAS node suite.