Nodes Browser
ComfyDeploy: How ComfyUI Image Watermarking Node works in ComfyUI?
What is ComfyUI Image Watermarking Node?
A custom node for ComfyUI that allows you to add image watermarks with advanced controls for transparency, positioning, and color manipulation.
How to install it in ComfyDeploy?
Head over to the machine page
- Click on the "Create a new machine" button
- Select the
Editbuild steps - Add a new step -> Custom Node
- Search for
ComfyUI Image Watermarking Nodeand select it - Close the build step dialig and then click on the "Save" button to rebuild the machine
ComfyUI MGnodes Collection
A collection of custom nodes for ComfyUI focused on simplicity and usability.
Available Nodes
1. Image Watermark Node
Add image watermarks with advanced controls for transparency, positioning, and color manipulation.
 Features:
- Add image watermarks with adjustable transparency
- Multiple positioning options (Center, Top Left, Top Right, Bottom Left, Bottom Right, Tiled)
- Scale watermark size
- Remove white background from watermark
- Invert watermark colors
- Preserve transparency in both base image and watermark
2. Text Extractor Node
A utility node for processing text output from Language Models (LLMs), specifically handling Chain-of-Thought content.
Features:
- Extracts content between
<think>...</think>tags - Outputs both cleaned text and extracted thoughts
- Useful for processing LLM outputs with reasoning steps
- Supports multiple think blocks in a single input
Installation
Option 1: ComfyUI Manager (Recommended)
The easiest way to install is through the ComfyUI Manager. Simply search for "MGnodes" and click install.
Option 2: Manual Installation
- Navigate to your ComfyUI custom nodes directory:
cd ComfyUI/custom_nodes/
- Clone this repository:
git clone https://github.com/meanin2/comfyui-MGnodes.git
- Restart ComfyUI
Usage
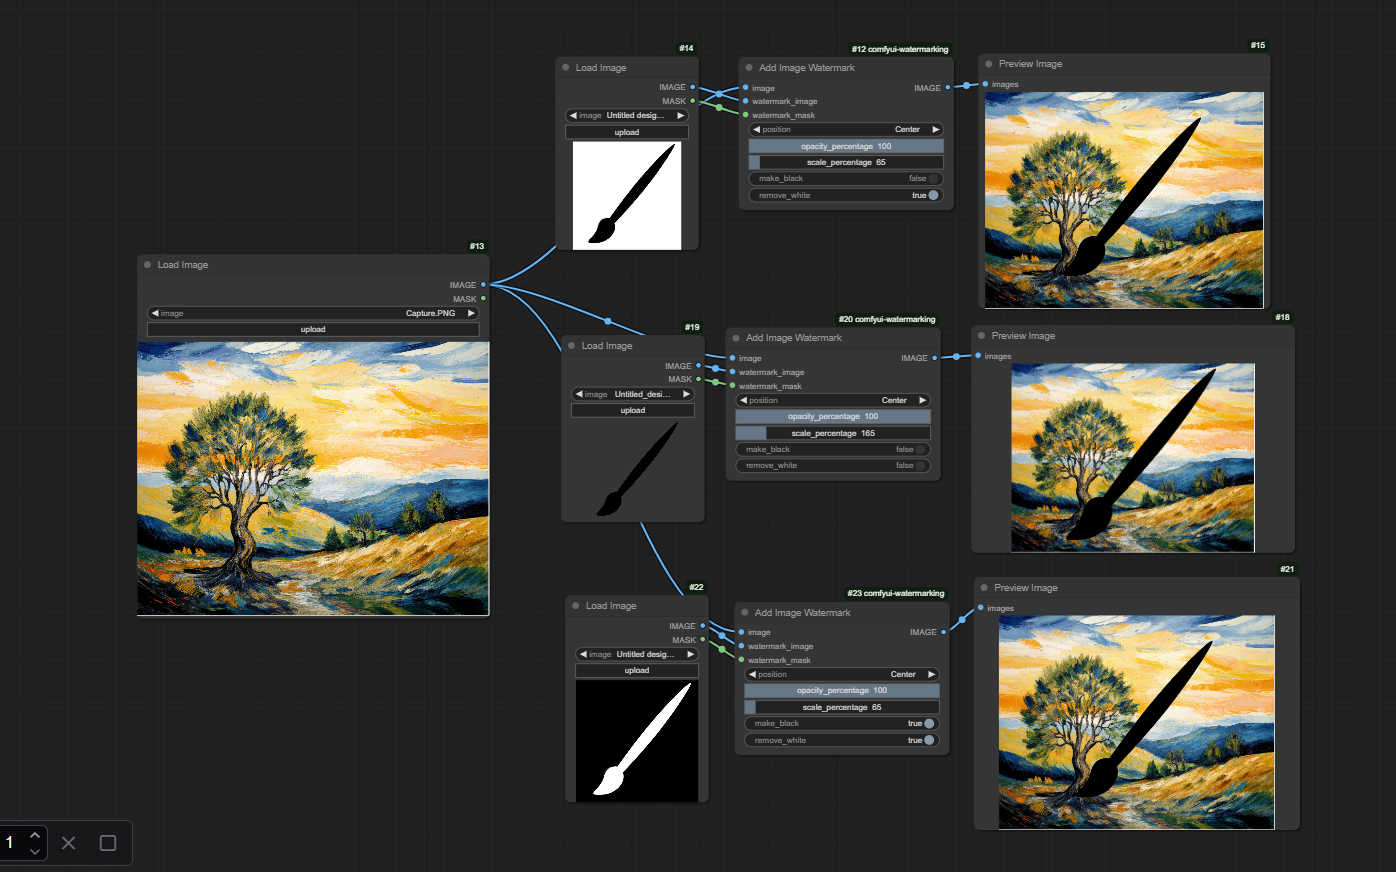
Image Watermark Node
- Load your base image using a "Load Image" node
- Load your watermark image using another "Load Image" node
- Connect both to the "Add Image Watermark" node
- Configure the watermark settings:
- Position: Choose where to place the watermark
- Opacity: Adjust transparency (0-100%)
- Scale: Resize the watermark (10-1000%)
- Make Black: Invert the watermark colors
- Remove White: Make white pixels transparent
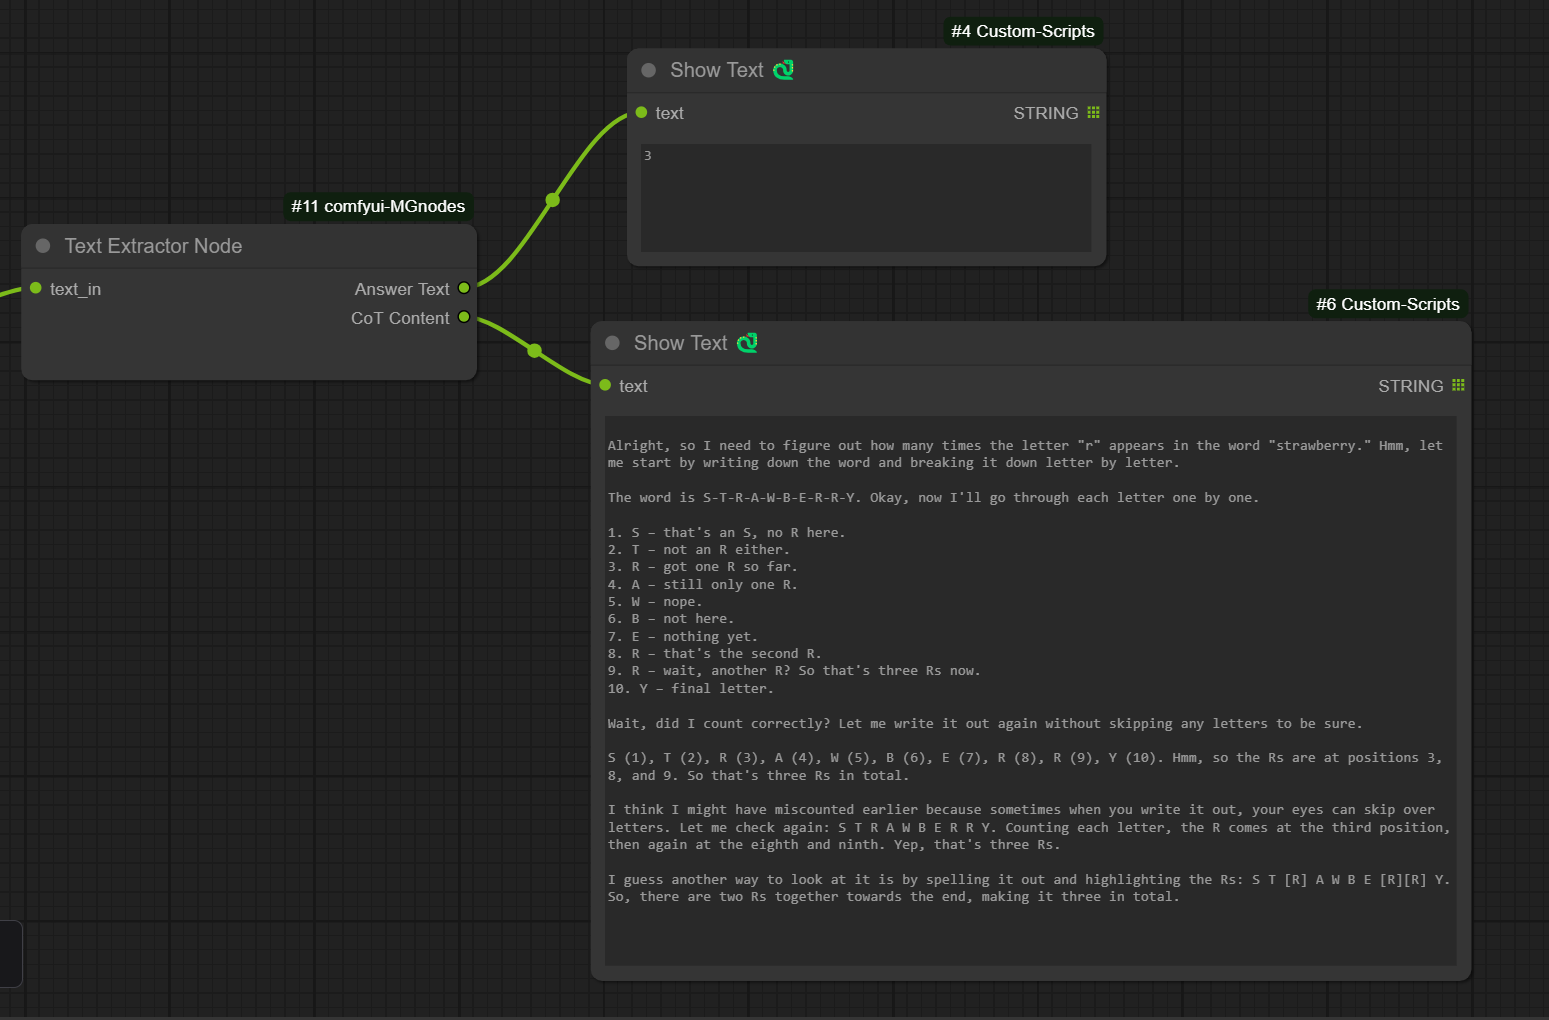
Text Extractor Node
- Connect any text output (typically from an LLM node) to the Text Extractor
- The node will output two strings:
- Answer Text: The input text with all
<think>...</think>sections removed - CoT Content: The extracted content from within the
<think>tags
- Answer Text: The input text with all
Example Workflow
Check out the examples folder for:
- A complete watermark workflow you can import into ComfyUI
- Sample images used in the showcase
- Test watermark images
Tips
- For best watermark results with "Remove White", ensure your watermark has a clean white background
- When using "Make Black", the inversion happens before white removal
- The watermark mask input is optional and can be used for additional transparency control
- Scale values above 100% will enlarge the watermark, below 100% will shrink it
- For text extraction, multiple
<think>blocks will be joined with newlines in the CoT output