Nodes Browser
ComfyDeploy: How ComfyUI-Mosaic-Mask works in ComfyUI?
What is ComfyUI-Mosaic-Mask?
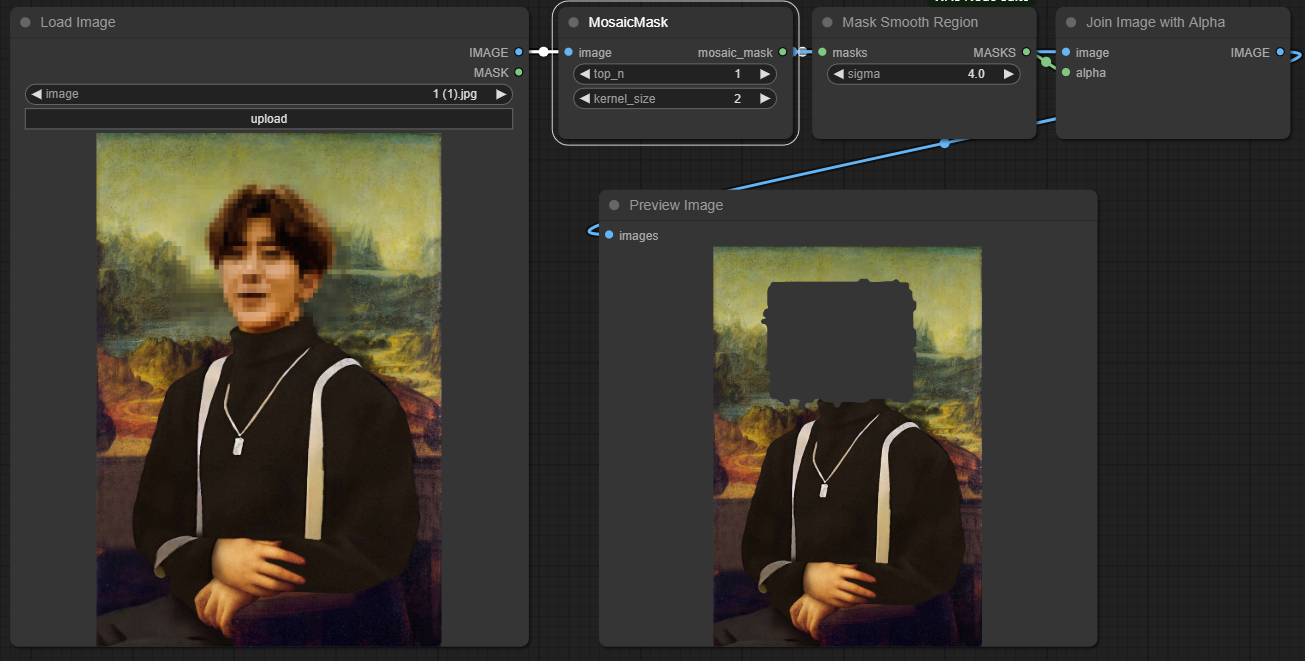
ComfyUI-Mosaic-Mask is an automatic tool designed to detect and mask mosaic areas in input images.
How to install it in ComfyDeploy?
Head over to the machine page
- Click on the "Create a new machine" button
- Select the
Editbuild steps - Add a new step -> Custom Node
- Search for
ComfyUI-Mosaic-Maskand select it - Close the build step dialig and then click on the "Save" button to rebuild the machine
ComfyUI-Mosaic-Mask
ComfyUI-Mosaic-Mask is an automatic tool designed to detect and mask mosaic areas in input images.
Features
- Automatically detect mosaic areas in images.
- Mask the detected mosaic areas with customizable grid patterns.
Installation
To install and use ComfyUI-Mosaic-Mask, follow these steps:
git clone https://github.com/okgo4/ComfyUI-Mosaic-Mask.git
Usage
Please follow the example.json for a basic template.
The top_n parameter controls how many noncontinuous censored areas to be returned (The algorithm will sort the censored parts based on their area).
The kernel_size parameter refers to how many pixels to expand upon the censored areas.
Important
It is worth noting that the Mask Smooth Region node is STRONGLY RECOMMENDED after the MosaicMask node. Otherwise, when sampling an image without smoothed mask, the image may become black.
Thanks
Special thanks to the mosasic_detector project: https://github.com/summer4an/mosaic_detector.