Nodes Browser
ComfyDeploy: How ComfyUI_zfkun works in ComfyUI?
What is ComfyUI_zfkun?
A collection of nodes for common tools, including text preview, text translation (multi-platform, multi-language), image loader, webcamera capture.
How to install it in ComfyDeploy?
Head over to the machine page
- Click on the "Create a new machine" button
- Select the
Editbuild steps - Add a new step -> Custom Node
- Search for
ComfyUI_zfkunand select it - Close the build step dialig and then click on the "Save" button to rebuild the machine
ComfyUI zfkun
Custom nodes pack for ComfyUI
ChangeLog
2024-01-21
- update version to
0.0.8 - add error tips for
Share Screennode - Optimize some logic for
Share Screennode
2024-01-06
- update version to
0.0.7 - add
Clip Areasupport forShare Screennode - add
Refresh Durationsupport forShare Screennode
2023-12-27
- add
Window Capture SimpleServer (WIP)
2023-12-24
- update version to
0.0.6 - add
Share Screennode
2023-12-17
- update version to
0.0.5 - fix translation error for
alibabaplatform - fix translator name typo for
tencentplatform
2023-12-17
- update version to
0.0.4 - update README
- add
Load Image Pathnode - add
Camera Capture Simpleserver
2023-12-16
-
update version to
0.0.3 -
add niutrans platform for text translate node
2023-12-15
-
update version to
0.0.2 -
add auto converting encoding to
utf-8forconfig.yaml -
add auto install requirements
2023-12-08
-
add baidu, alibaba, tencent, volcengine platform for text translate node
-
update README
Installation
Using ComfyUI Manager (recommended)
Install ComfyUI Manager and do steps introduced there to install this repo.
Alternative
cd ComfyUI/custom_nodes/
git clone https://github.com/zfkun/ComfyUI_zfkun

# comfyui use system python
pip install -r requirements.txt

# if comfyui use venv
# path/to/ComfUI/venv/bin/python -s -m pip install -r requirements.txt

# restart ComfyUI
Server
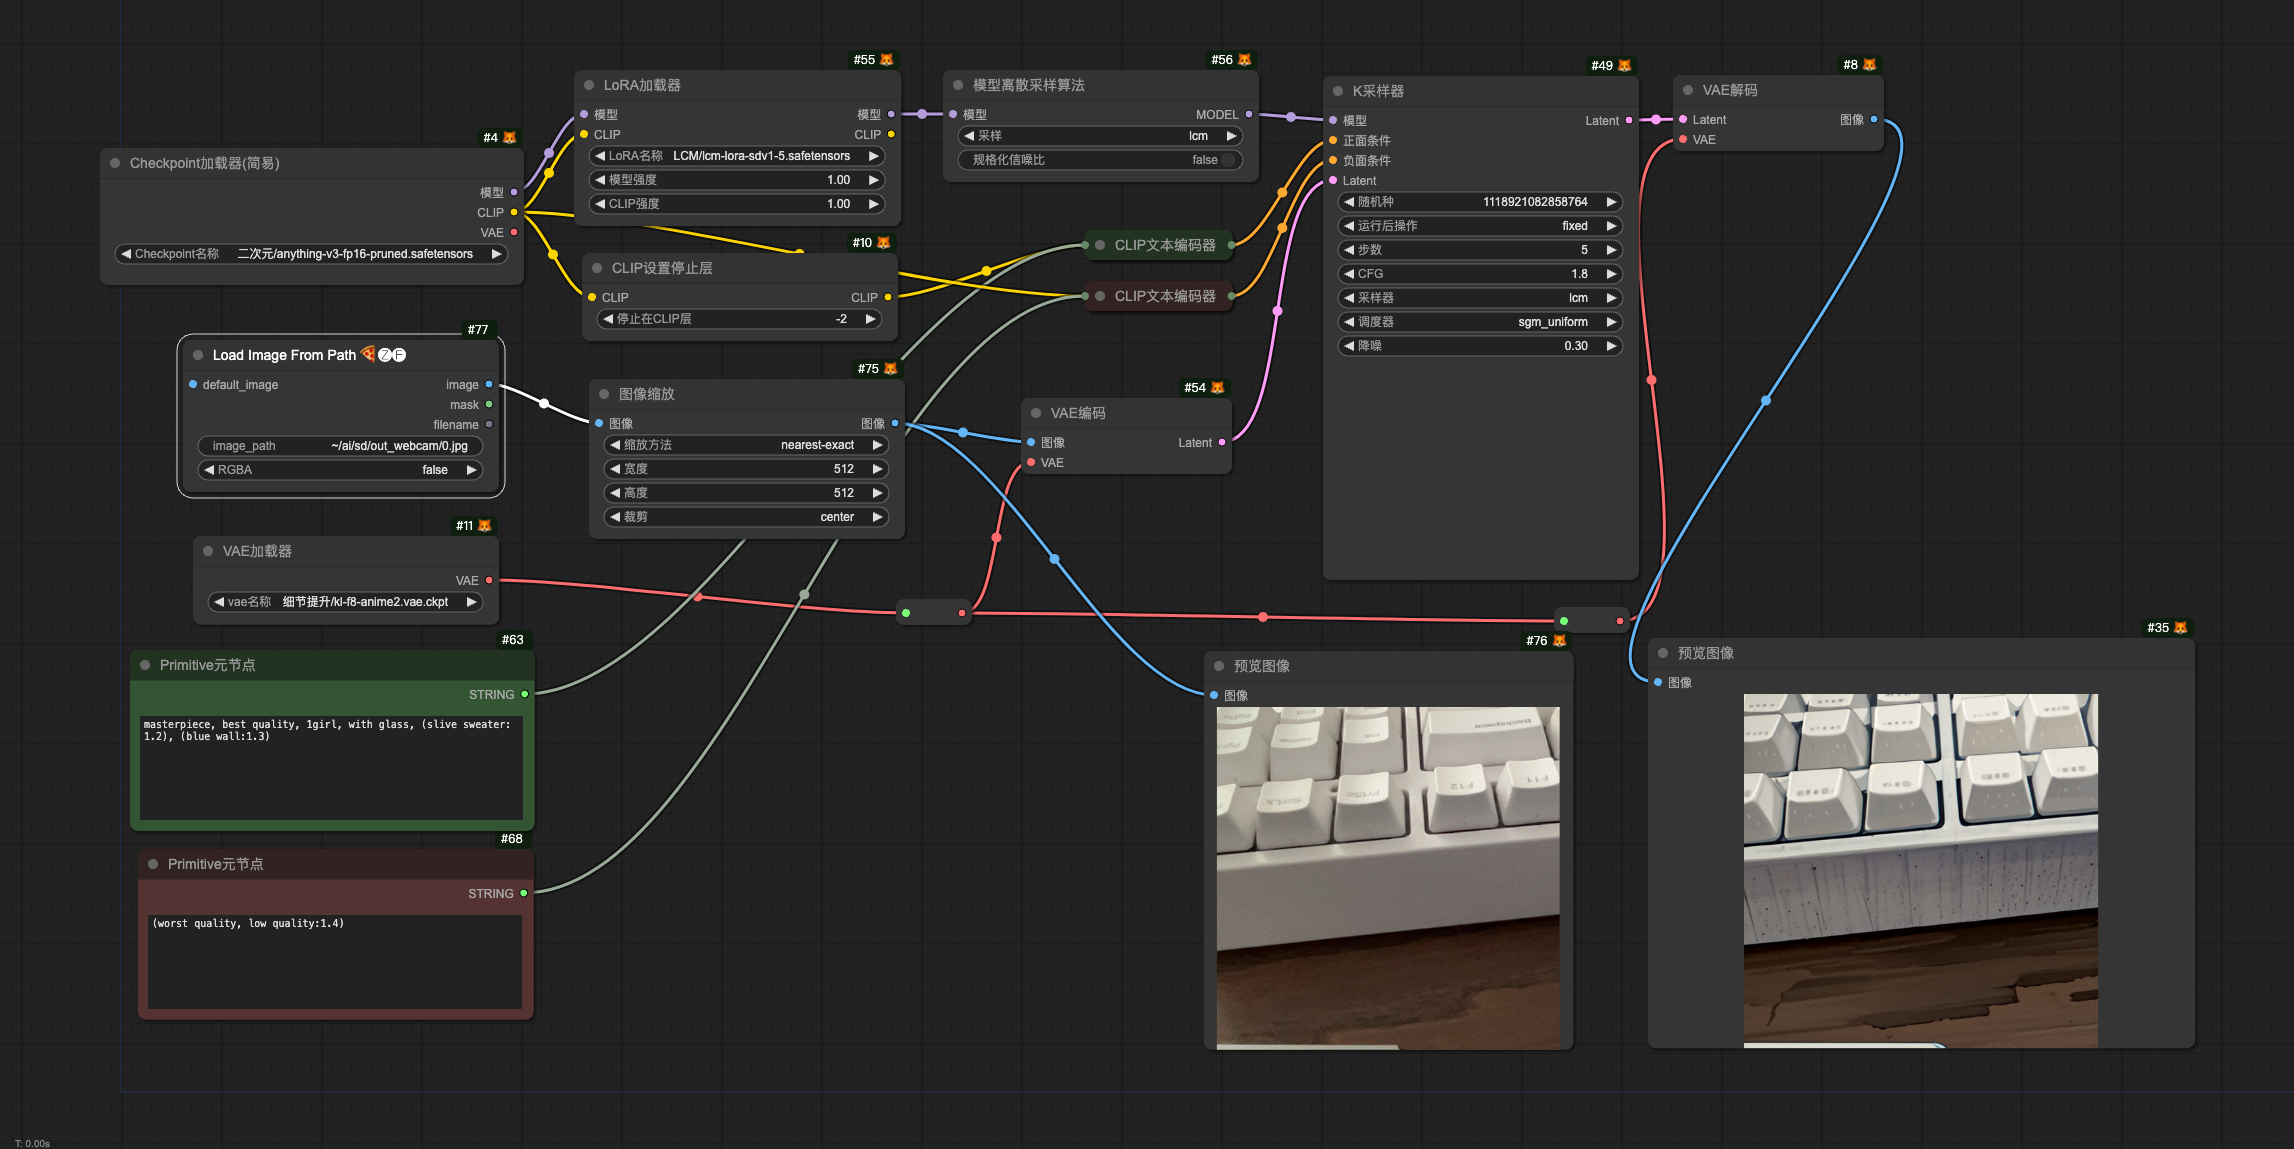
Camera Capture Simple
a simple camera capture server.
mainly used with Load Image Path and LCM for real-time virtual live workflow
feature
- custom capture source (0, 1, 2 ...)
- custom output directory
- custom output filename (
*will be replaced by%Y%m%d_%H%M%S)
useage
the paths to
ComfyUIandpythonneed to be modified to suit for you.
in my case,
ComfyUIin./ComfyUIandpythonin./ComfyUI/venvwith venv
basic
# enter ComfyUI's home
cd ./ComfyUI

# active virtual environment for python
source ./venv/bin/activate

# enter server's home
cd ./custom_nodes/ComfyUI_zfkun/server

# start server with custom output directory
python camera_capture_simple.py -o ~/ai/sd/output_webcam
advanced
python camera_capture_simple.py -h
Nodes
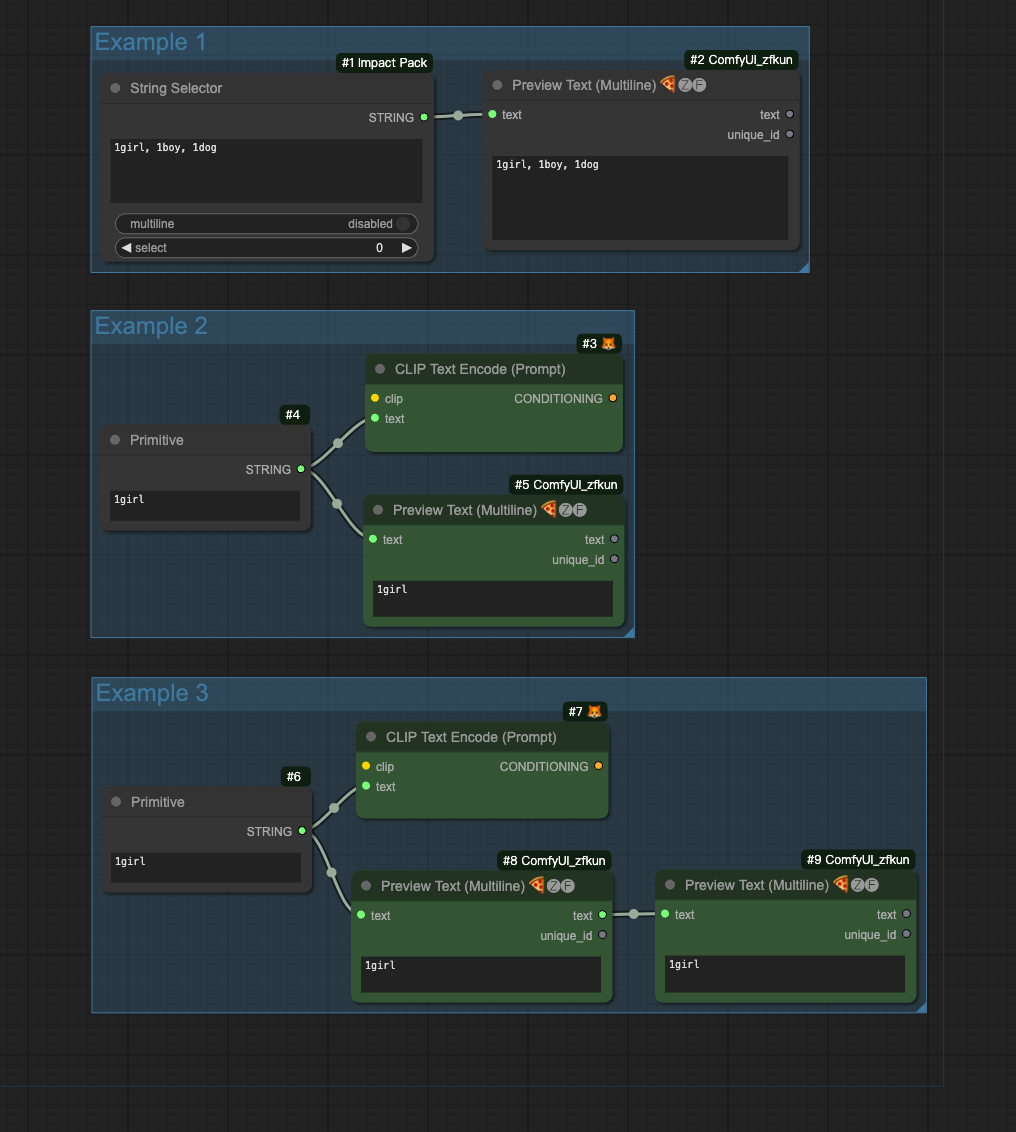
Preview Text
support text、primitive (text) for input
Preview Text (Multiline)
support text、primitive (clip text) for input
Text Translation
support platforms:
- create
config.yaml(copy fromconfig.yaml.example, make sure file encoding isutf-8)- update
translatorfield, save- restart
ComfyUI
Load Image Path
- support
path(relative、absolute、~、~user)) - support
url(http、https) - support
RGBAfor output image - support
default imagefor input
Share Screen
- support window、tab、screen share
- support multiple share node at the same time
- support custom clip area
- support custom refresh duration
- support default image (
RGBAsupport) - support weight and prompt
Examples
Preview Text

Preview Text (Multiline)
Text Translation
![]()
Load Image Path

Share Screen

Camera Capture Simple Server
Window Capture Simple Server (WIP)
